10 Chicken Coop Decor Ideas That Survive an Actual Winter
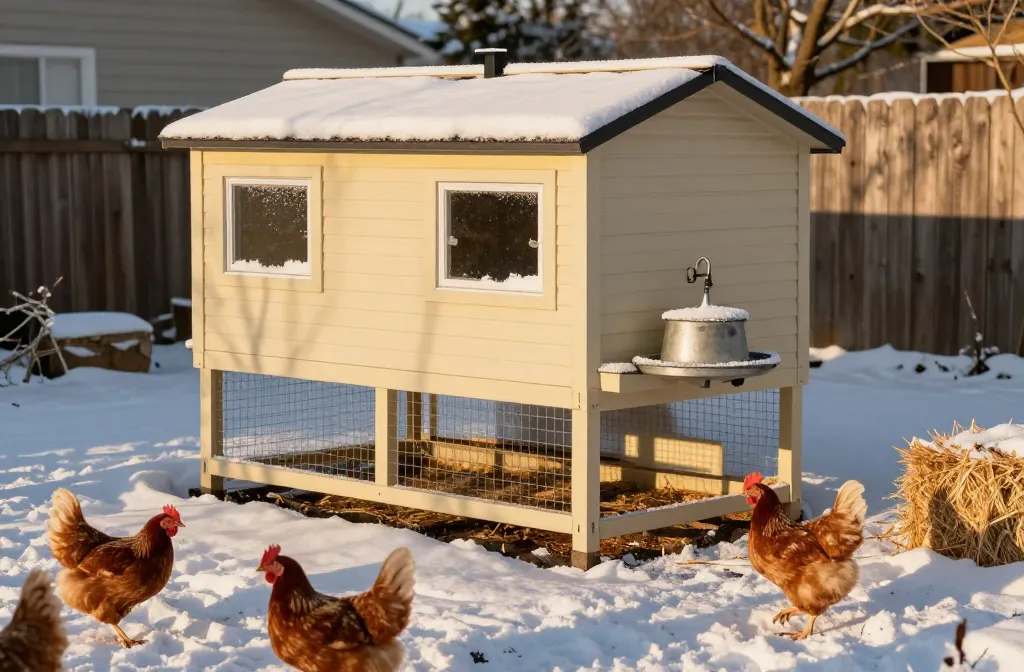
Chicken coop decor ideas are everywhere, but the ones that survive an actual winter are a shorter list. I learned that the December I found my cute burlap bunting frozen to the pop door like a damp tortilla while my waterer skated across the floor. By the end of this you’ll have 10 ways to make a coop look good in January and still function in February, with real prices and what failed when I tried the Pinterest way first. My first-person tally: three winters of mud, wind, and ice, and I’ve paid for the same “deal” decor twice.
1. Exterior Paint That Doesn’t Peel: Spend on the Can, Not the Stencil

I tried “weathered” craft paint on scrap siding because it was on sale and I wanted a farmhouse vibe for $12. By March, it was flaking off in thumb-sized chips and trapping moisture against the wood. I sanded, primed with an exterior primer, and used a basic exterior house paint in a satin finish — $18–$30 per quart, or $40–$65 per gallon depending on region and season. One gallon covered my 6×8 coop with 2 coats and has held up through 2 winters without chalking or peeling. Satin wipes clean; flat looked great for two weeks and then grabbed every mud fleck like Velcro.
The time tax was real: scraping and repainting took a Saturday and a half because I’d tried to save $20 the first go. Moisture and rot are welfare issues more than decor — don’t trap water under bad paint to “get a look.”
Make it yours: paint the trim a darker color to hide mud splash (I used a deep green); light body color keeps the coop cooler during spring warm-ups.
2. Metal House Numbers on the Coop: Cute, Visible in a Blizzard

I wanted something that read “ours” without ribbons that would wick water. The first winter, I stenciled numbers in craft paint for $6 and they vanished under frost and dust. I swapped to powder-coated metal house numbers from the hardware aisle — $7–$12 each — and mounted them with exterior screws. They’ve survived driving sleet, and I can spot the coop from the gate at dusk. Bonus: if a neighbor is feeding while you’re out, “3” is easier to describe than “the tan shed behind the lilac.”
The catch was drilling pilot holes through old pine siding; I snapped one screw and had to back it out with pliers. Five minutes slowed to twenty while my fingers went numb. Worth it, and they still look new after 2 winters.
Make it yours: choose a high-contrast color for visibility in snow; black on light paint or white on dark trim reads from 50 feet.
3. Coop Window Film for Light Without Drafts

The first time I tried “decorative” cloth curtains, they froze into a crunchy arch and wicked condensation. I peeled them off in January and stuck on frosted privacy window film meant for bathrooms — $12–$20 per 17×78-inch roll. It lets in daylight, blocks wind-blown view distractions, and wipes clean. I squeegeed it onto acrylic window panes and it stayed put through temperature swings from 5°F to 45°F without bubbling.
You still need real ventilation up high — the film is for the lower light panels only. Skipping ventilation because it’s cold is how I learned what frostbite looks like on a comb. Film is decor; airflow is non-negotiable.
Make it yours: pick a simple frost pattern; busy prints hide cracks you should be checking for after storms.
4. The 2×4 Perch Rail: Painted End Caps That Look Good and Save Toes

I used to wrap roosts in twine because it looked “natural.” It got soggy, froze into ridges, and chewed up feet. I switched to a plain 2×4 turned wide-side up so they can cover toes in cold — $4–$6 for an 8-foot stud — and sealed the ends with exterior paint in a cheery color for the “decor.” The painted end caps make me smile, but what actually mattered was the flat surface through a 9°F snap; no more red, raw toes.
The only fussy part was sanding the top edge so there’s a soft corner — 10 minutes, 80-grit. Paint adds nothing to warmth, but it does keep me from overcomplicating the look with wraps that mold. If your birds sleep warm, they live better; this is one of the few “decor” touches that is function wearing fun clothes.
Make it yours: if you hate bright colors, paint the ends to match trim and add a tiny dot in a second color to track which rail you swap out for cleaning.
5. Hanging Enamel Signs on Screw Hooks: Cute, Washable, Won’t Wick Water

My first sign was plywood with hand lettering and twine. It bowed, soaked up meltwater, and the twine froze. I replaced it with a thin metal or enamel sign hung on zinc-plated screw hooks — $8–$16 for the sign, $2–$4 for hooks. In freezing rain, the hooks don’t seize like small carabiners did, and the sign wipes clean with a glove. I’ve had mine up for 2 winters — no rust streaks on the siding.
Small but real warning: don’t mount it where birds can peck flaking paint. Keep signage outside or high in a people-only zone. I tested a thrift-store sign for loose coating by scraping a coin across a corner; if it sheds, don’t use it.
Make it yours: pick a single word (Henhouse, Feed) with tall letters — script fonts ice over and become illegible fast.
6. Rubber Stall Mats as a “Rug”: The Only Floor Decor I’d Repeat

I tried a jute rug under the feeder for “texture.” By week two it was a frozen manure lasagna. I cut a rubber stall mat into sections — $45–$60 for a 4×6-foot mat — and set one under the feeder and one at the door. They hose off, don’t curl in the cold, and give boots and claws grip on icy mornings. Mine have survived 3 winters and look exactly like they did the day I cut them, minus the feed dust I didn’t sweep yesterday.
Stall mats are heavy. Moving a full 4×6 solo in January was me vs. 90 lb of vulcanized regret, so I cut them into 2x3s with a sharp utility knife and a straightedge. Smaller pieces mean I can yank one to the porch for a wash without plotting a forklift.
Make it yours: bevel the cut edges with two extra passes of the knife to remove sharp corners; your shins will thank you.
7. Winter-Proof Nest Box Curtains: Shower Curtain Strips on a Rod

My first “adorable” cotton nest curtains soaked up condensation and froze into a U-shape. I tossed them after 6 weeks. I cut a PEVA shower curtain liner into 8-inch strips — $6–$12 per liner — punched holes, and hung them on a tension rod ($8–$15) like fringe. They flex, they don’t wick moisture, and they wipe off with a rag. The hens use the boxes the same, and I’m not peeling fabric icicles off screws.
If your coop gets truly drafty, skip curtains until you’ve fixed the drafts; they’re not a solution to wind. PEVA can get stiff under 10°F, but it doesn’t shatter like brittle plastic. I’ve been running these for a full winter and a half — zero mildew, zero laundry.
Make it yours: trim the strips to 6 inches for bantams; leave 8–10 inches for larger breeds that like it darker.
8. Painted Feed Can Bands and Magnetic Labels: Fast ID With Gloves On

I used to write “Layer” in marker on galvanized cans. In January, the ink fades under dust, and I guessed wrong more than once at 6 a.m. I rolled on 2-inch bands of exterior paint around each can — one, two, or three stripes — and added magnetic labels cut from a $5–$8 magnetic sheet. Total paint used was maybe 3 ounces (free from the trim job), magnets were the cost. Through 2 winters, I can grab the right lid without removing a glove, and if I switch feed, I slide a new magnet on.
Adhesive labels peeled in a week. Magnets stick through dust, but wipe the surface once or they’ll skate. This is decor because it looks tidy, but it’s really a speed fix that keeps doors closed longer in the cold — less heat loss, less damp blown snow inside.
Make it yours: use color-coding you can see at dawn: red for grit, blue for layer, green for grower; avoid pastels that go gray under dust.
9. Evergreen Swag Outside the Run: Seasonal Without Tempting Beaks

I zip-tied a garland along the inside of the run once. They ate it, and I spent $14 to decorate their poop. Now I tie fresh evergreen swags to the outside of the run panels with UV zip ties — free clippings if you ask a neighbor or $10–$20 for a bundle. From 2 feet away, it reads festive; from the chickens’ side, it’s out of reach. It also breaks a bit of wind and drifting at ground level without blocking ventilation.
Check what plants you’re clipping — avoid anything treated or toxic. I stick to spruce and pine; skip yew. My first winter with outside-only greens was calm; with inside greens was a digestive mess and a $23 bag of grit refilled early because they chewed more than they needed.
Make it yours: wire on a weatherproof bell or two for you; put them high so the birds can’t peck the clapper loose.
10. Coop Lighting That Isn’t a Fire Risk: String the Solar Outside
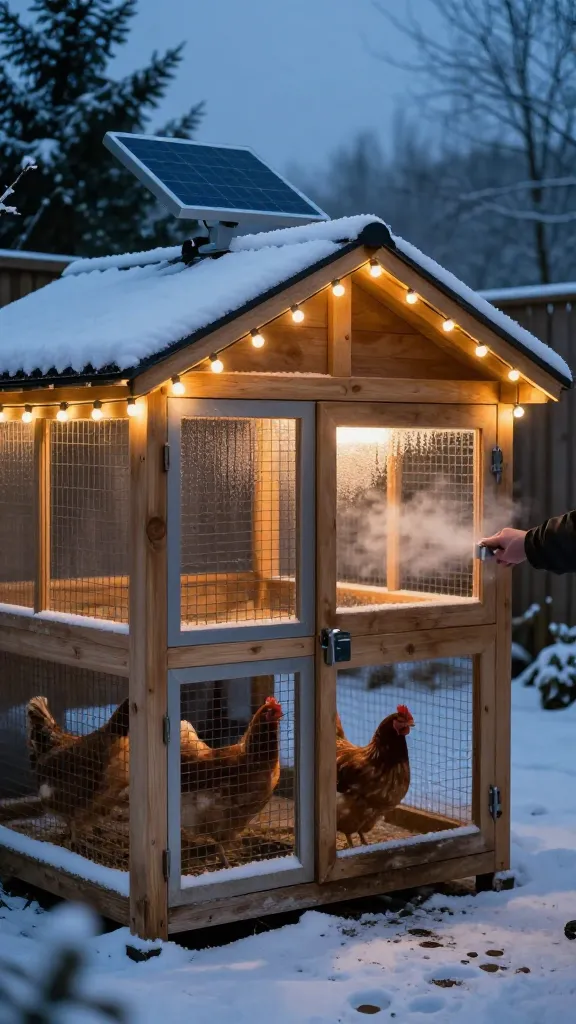
I strung indoor fairy lights inside for “ambience.” The cord got pecked in a week, the plug got dusty, and I stared at it every night wondering if I’d burn the coop down. I swapped to outdoor-rated solar string lights run along the outside fascia with exterior cable clips — $18–$30 for the lights, $6–$10 for clips. The panel sits on the roof edge facing south; the glow helps me see locks at 5 p.m. without introducing heat or extension cords through bedding. Two winters in, still working; I’ve replaced two clips total.
This is decor for you, not the chickens. I do not supplement light inside for egg production in peak winter; I prefer their natural rest cycle. If you choose to add interior light, use a hardwired setup on a timer with proper fixtures — not strings and not in peck range.
Make it yours: choose warm white; cool blue makes snow glare unpleasant and makes it harder to read comb color in a quick visual check.
Frequently Asked Questions
What chicken coop decor actually survives freezing temps?
Anything that doesn’t wick moisture, can be wiped, and is mounted with exterior hardware stands a chance: exterior paint, metal or enamel signs, rubber stall mats, and window film. Fabric inside the coop failed for me within 6–8 weeks; PEVA, metal, and rubber are still fine after 2–3 winters. Budget $60–$120 and you can do paint, signs, and a mat, which covers most of the visual impact.
How do I make a coop cute without inviting mold?
Keep porous materials out of the splash zone. Use satin exterior house paint on walls, rubber under high-traffic spots, and hang decor on screw hooks so you can remove and wash it. Anything that absorbs water — burlap, twine, cotton — turned gross or froze for me in under 2 months.
Are winter nest box curtains worth it for a coop?
If you use PEVA or another non-wicking material cut into strips, yes — they reduce line-of-sight without holding damp. My PEVA curtains cost $6–$12 and have lasted over 1 winter so far with no mildew. Cotton ones failed in about 6 weeks and went straight to the trash.
Should I put lights inside for winter?
If you add light, use a safe, fixed installation with a timer and avoid strings or cords birds can reach. I don’t add interior light for production; I run outdoor-rated solar strings on the exterior for people visibility only, which cost $18–$30 and avoid cords through bedding. Fire risk beats “ambience” every time.
What’s the cheapest winter-safe decor upgrade I can do this weekend?
Paint trim and add visible house numbers. One quart of exterior paint is $18–$30 and numbers run $7–$12 each. You’ll get a fresh look, better visibility at dusk, and you can knock it out in under 2 hours between chores if temps are above 40°F for drying.
Start With What Won’t Wick
If you change one thing this weekend, strip the fabric and twine, then spend your budget on exterior paint and one rubber mat. That’s a 2-hour, under-$100 swing from “soggy cute” to “works in slush and looks tidy.” I learned decor that survives winter is just functional gear with nicer edges.
— ask me how I know.