7 Black Chicken Coop Ideas — Including the Heat Question
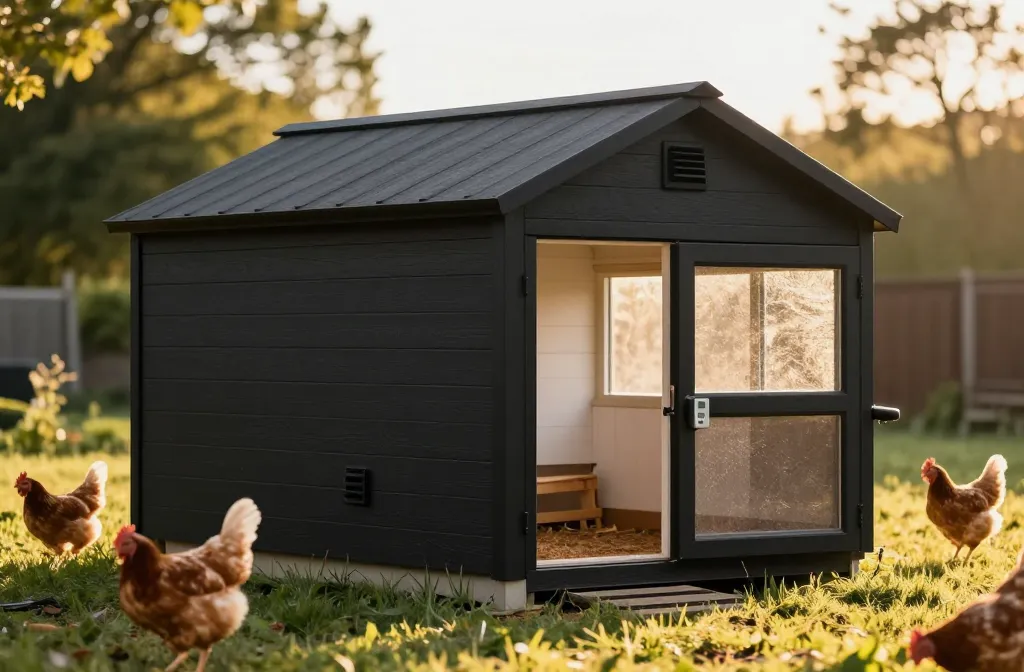
Black chicken coop ideas looked sleek on my Pinterest board; on my actual lawn, I worried they’d turn the flock into rotisserie. I stood in the paint aisle with a quart of flat black in one hand and a thermometer in the other, doing math I didn’t trust. Here’s exactly what I built, what I paid (down to the $9 hinges and the $34 roofing panels), and how the heat actually behaved in summer and winter. By the end, you’ll have seven real options that keep the look, protect the birds, and won’t make you redo August.
1. Black Exterior, White Interior: The Paint Combo That Didn’t Cook the Birds
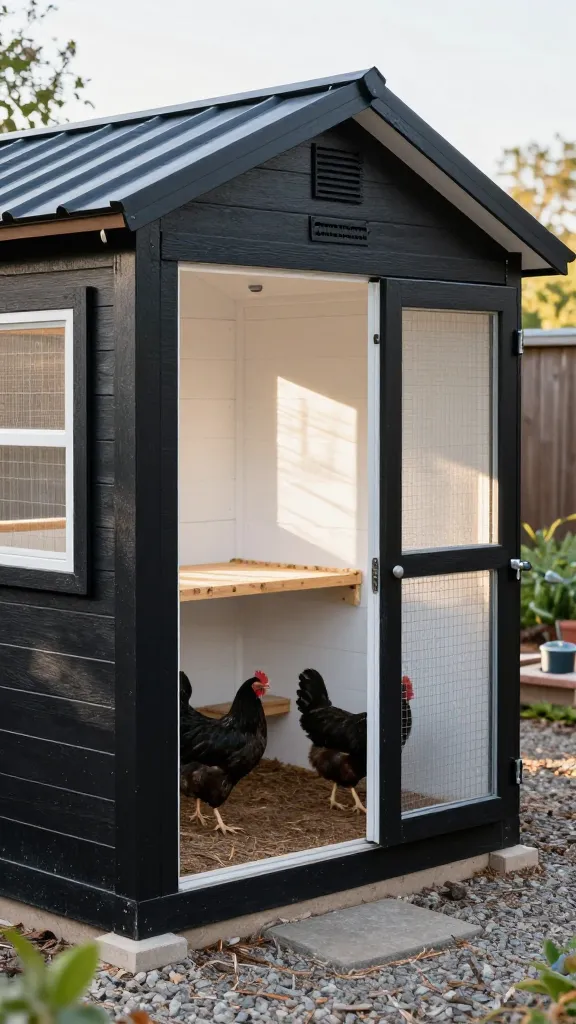
I wanted the clean, modern black shell you’ve seen everywhere, but I also wanted to sleep in July. The first time I tried it, I did two coats of exterior flat black on plywood and left the inside raw because I was out of time and out of money. The inside stained dark with humidity and felt like a sauna by late afternoon.
On the rebuild, I kept the black exterior but painted the interior walls and ceiling bright white using interior/exterior porch paint for light bounce and scrubbability. The paint tally was $28–$40 per quart for the black (needed 2 quarts) and $26–$32 per quart for the white (used 1.5 quarts), plus $12 for a cheap brush/roller kit. I added $9 worth of adhesive foam tape to stop little air leaks around the pop door. With three 4-inch vents open, my thermometer read 94°F inside when it was 92°F outside at 5 p.m. in August — not cooler, but not hotter either, which is the whole point. The white interior also let me spot a mite issue early because everything showed up against it.
The catch was time: two color coats each, and I let them cure 48 hours between to protect the birds from fumes. That pushed me into the weekend after I’d planned to move the flock. Worth it — the raw-wood interior had trapped stink; the painted-white one sprayed clean in 4 minutes.
Make it yours: if you only budget for one quart of white, at least do the ceiling. That one bright surface dropped my afternoon reading by 2–3°F compared to the all-dark trial.
2. Black Metal Roof, Radiant Barrier Underlay: Heat Out, Look Intact
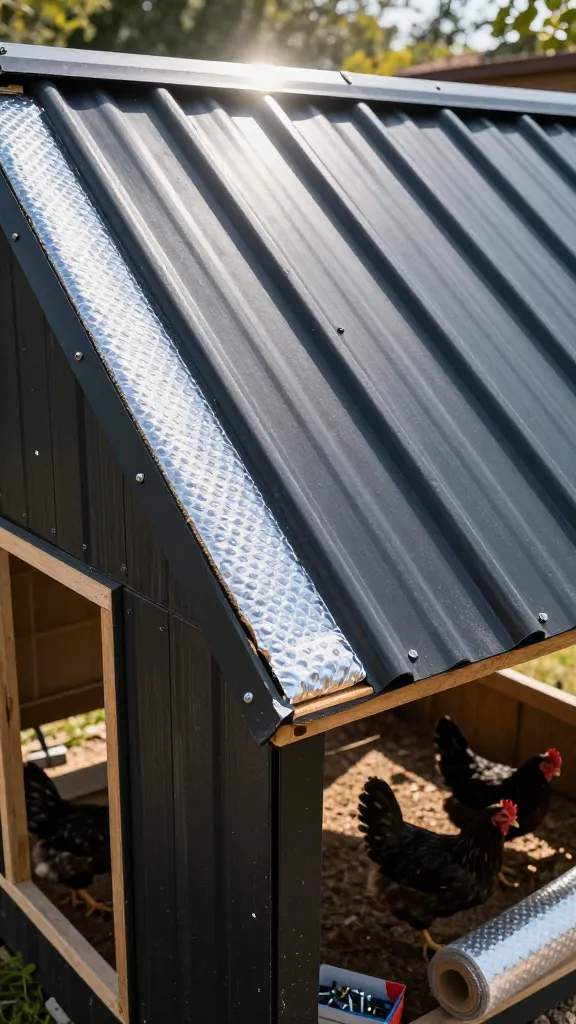
I tried a matte-black corrugated metal roof because that line in photos is unbeatable. Day 1 of a hot spell, the coop felt like a toaster by noon, and I could hear the tin ping as it expanded. I pulled one sheet up to see what I’d messed up and found…nothing under it but plywood.
I reinstalled with a polyethylene radiant barrier (the bubble-foil kind) stapled shiny side down over the rafters, leaving a 1-inch air gap under the metal. The roofing was $34–$52 per 8-foot panel (I needed 3), fasteners $7, and the radiant barrier roll was $18–$28. I added a 1.5-inch ridge vent using a simple cap detail for another $12. After that, my peak temperature inside ran 3–6°F below the outside high at 4 p.m. because the venting actually worked instead of baking. The roof has been through two hailstorms with only cosmetic dings.
The honest part: cutting and fitting the barrier neatly around rafters took an hour longer than I gave it; my first fit trapped sawdust and looked like a wrinkled baked potato. Don’t compress it tight to the decking — you need that gap for convection or you’re just adding cost for nothing.
Make it yours: if you’re in a wind tunnel, swap the ridge vent for two gable vents with louvered covers ($10–$16 each) so you can aim airflow without driving rain inside.
3. The Black Coop That Isn’t: Stain Dark, Seal Smart, Vent High
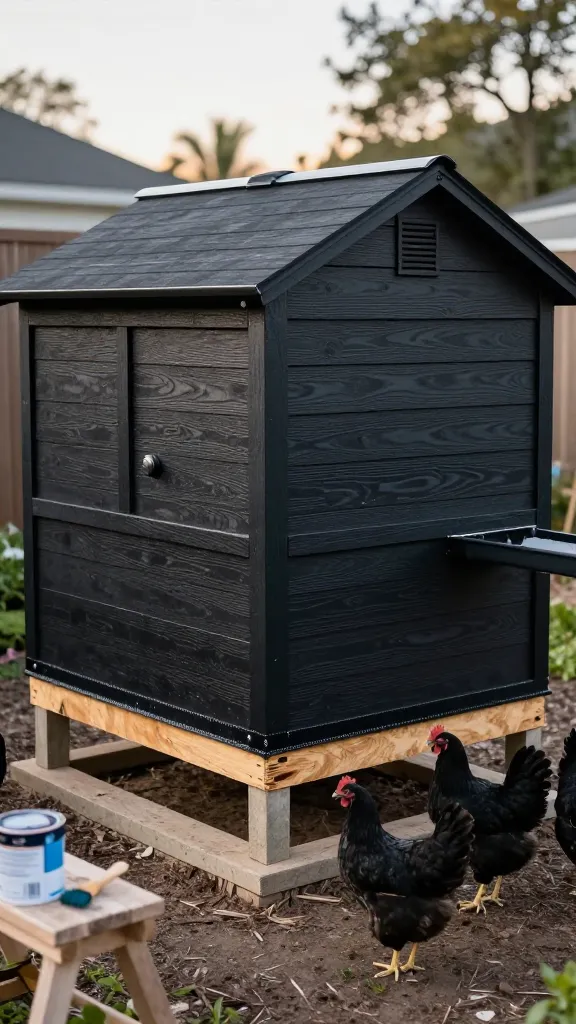
I learned the hard way that jet-black paint hides sins but also hides rot starting in the seams. My first “statement” paint job cost me $56 in paint and a layer of denial; the lower back corner wicked water and turned to oatmeal by month 11. I rebuilt that wall with plywood again but went dark with a semi-transparent exterior stain and sealed the bottom edge.
The semi-transparent stain ran $34–$44 per gallon and covered the whole 4×6 footprint with one coat, two on the south wall. I sealed raw end grain and every bottom edge with exterior polyurethane ($18–$26 for a quart) and set the wall panels on a 1-inch paver shim line ($8 worth of cheap pavers) to keep splashback off. I added two 4-inch round soffit vents up under the eaves ($5–$9 each) and covered the openings inside with half-inch hardware cloth cutoffs and screws ($0 new spend if you have scraps; call it $6 if you don’t). The dark-stained look reads as black from 10 feet, but surface temps run a hair cooler than my painted black test wall — my IR thermometer showed 118°F on the stained south wall vs. 126°F on the painted panel on the same day.
The drawback is maintenance: stain asks for a refresh every 2–3 years in full sun. I’m okay with that — it took me 40 minutes and half a cup of stain last time.
Make it yours: if your wall panels sit near grade, add a 6-inch flashing skirt of thin metal or cement board over the bottom edge for $12–$20; it’s cheap insurance against splash rot you won’t see until it’s mush.
4. Black Hardware, Silver Wire: The Predator-Proof Line You Can Afford
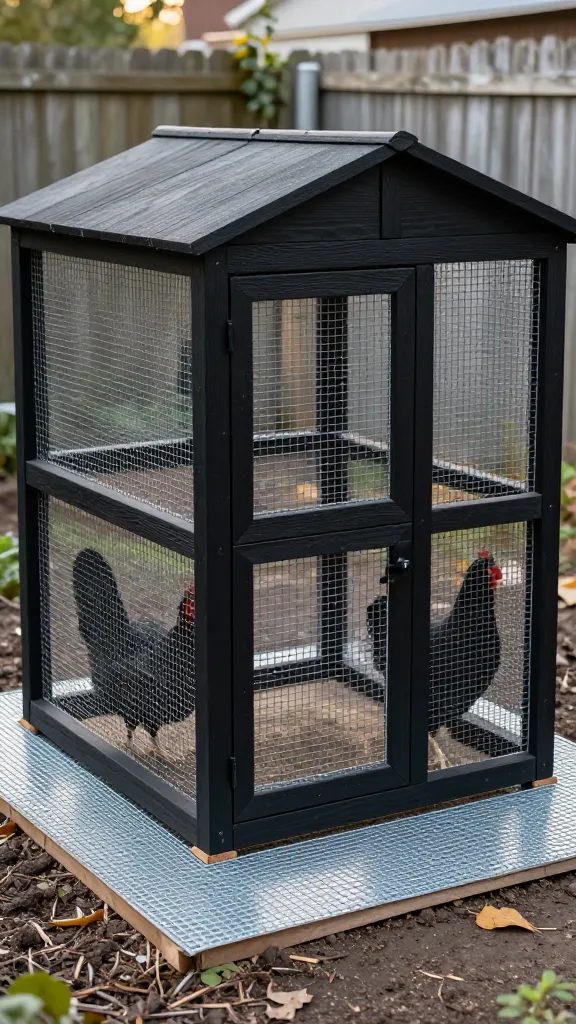
I once bought spray paint to black out my wire so the whole coop read sleek. It looked great for about a week, then the paint flaked like fish food and I had a gray-speckled mess plus less visibility into the run. Lesson: pick your black moments and leave the wire honest.
The protection that matters is half-inch hardware cloth in galvanized steel. A 25-foot roll in 36-inch width runs $34–$48 where I live; 48-inch width is $46–$62. I skirted the run with an 18-inch apron laid flat on the ground and pinned with landscape staples ($7 per 50) so diggers hit metal and quit. For the look, I used black-coated T-hinges and a black hasp with a carabiner for raccoon-proofing — $9–$15 total for the latch hardware. Two years in, zero breaches, and the hardware still reads intentional against the silver mesh.
Be careful about black chain-link fabric or black plastic mesh as a stand-in. The 2-inch chain-link doesn’t stop raccoon hands; the plastic mesh gets chewed open in a night. That’s not an aesthetic compromise; that’s a welfare one. If your budget is tight, shrink something else, not the wire.
Make it yours: if you’re dead set on darker wire, spring for black PVC-coated hardware cloth. It’s typically 30–50% more than galvanized, but the coating lasts. I priced it at $58 for the same 25-foot roll and decided my eyes could accept silver.
5. Shade That Saves Summer: Sail + Vents + A Fan You Can Unplug
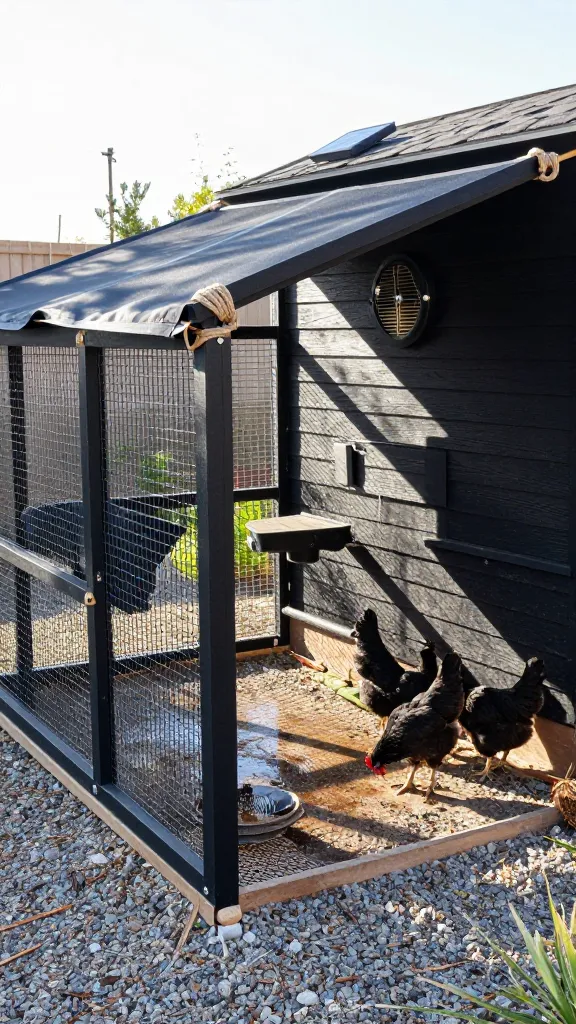
The first heat wave with my “minimalist” black setup put me in triage mode. I was dragging a hose, spraying the run, and inventing swear words. The next morning I put a shade plan in place instead of playing hero every afternoon.
I installed a 6×9 shade sail in dark gray (reads black) over the run on the west side for the brutal late sun — $22–$36 plus $9 for screw eyes and rope. I added one more 4-inch vent up high on the west wall ($5–$9) and mounted a small battery or solar fan rated for sheds ($24–$48) to pull air out, not push it in. With those layers, interior temps dropped 5–8°F compared to my fan-only test. Water froze in winter? I unclipped the sail in 2 minutes and let the sun hit the coop again.
Caveat: sails can become kites. My first attachment failed in a gust and whipped a hook into the siding. Tight triangle geometry and three solid anchor points fixed it. Also, never rely on a fan alone; power fails exactly when you need it most.
Make it yours: if you rent and can’t anchor to structures, two 8-foot T-posts ($7–$11 each) and zip ties ($5) will hold a small sail just fine; face the open side north to keep airflow without catching wind like a parachute.
6. Black Coop, Cold Weather: When Heat Helps Instead of Hurts
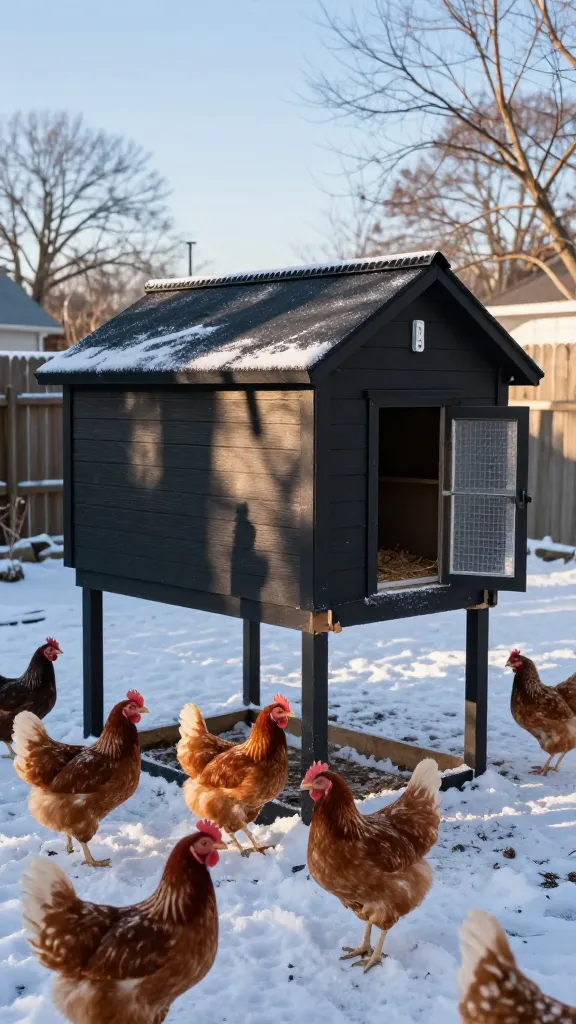
By January, my black roof I’d cursed in July was quietly doing me a favor. On a sunny 30°F day, the coop ran 3–5°F warmer than ambient without me plugging anything in. I had worried the dark color would cause condensation issues in winter, but it was the opposite: with too-little ventilation, warm air met cold roof and rained. I had to relearn the vent math.
I opened a continuous 1-inch soffit gap on both long sides, backed by hardware cloth and a simple baffle that blocks wind but not air. Materials were $14–$22 for lumber scraps and $6 in screws. I kept the ridge vent from summer and used clear plastic wind screens on the run’s north and west sides ($12–$18 of clear vinyl or greenhouse plastic) to kill drafts but still let light in. The black shell made winter chores nicer; the birds stayed dry-combed and frostbite-free because the moisture could leave up high.
Don’t close the vents “to keep heat in.” That’s where frostbite starts. If you’re below 0°F often, consider a heated water base ($28–$45) so you aren’t opening and refilling twice a day; heat the water, not the air.
Where Can You Research Coop Ventilation and Frostbite?
| Source | What It Says |
|---|---|
| University of Minnesota Extension | Explains how trapped moisture, not cold air, is the main driver of frostbite in coops, and why ventilation stays necessary in winter. |
| Coop Vent Calc | Technical breakdown of vent sizing and placement to flush ammonia and moisture without creating a direct draft on roosting birds. |
| Chicken Coop Company | Practical guidance on preventing winter humidity buildup and the link between damp litter, ammonia, and frostbitten combs. |
Make it yours: in heavy-snow regions, choose a steeper roof pitch (6/12 or more) so dark metal sheds load; the difference between shoveling twice a week and never is about $0 in cost and a lot in your back.
7. The Budget Black Look: Pallet Frame, Smart Skins, Real Math
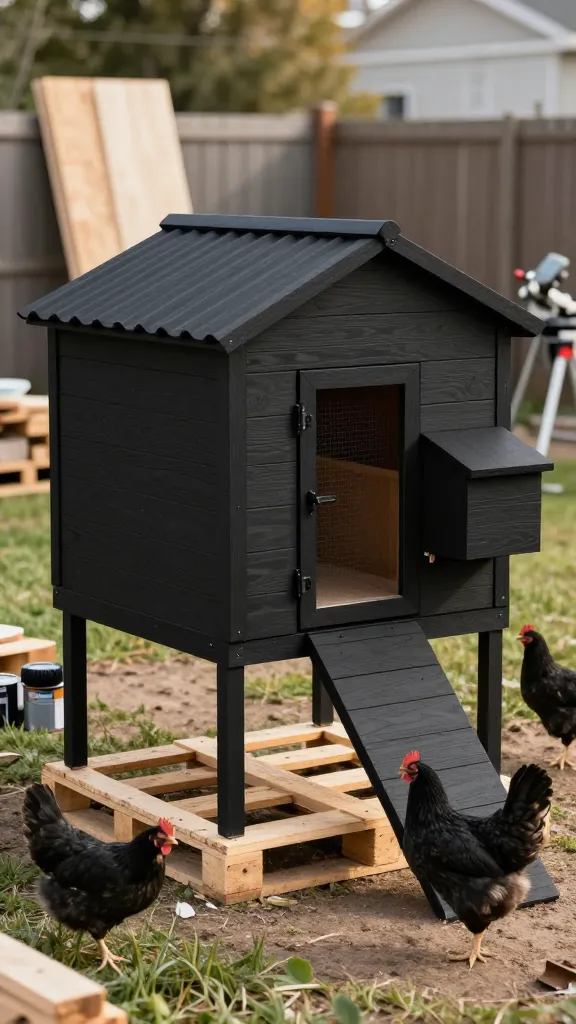
I built a black “cabin” look on a two-pallet frame because my wallet said no to a lumber cart. The first try — tar paper and black paint — peeled and flapped in under a month. I priced it out twice before I believed my own math: you can get the look without the flimsy if you choose the right skins.
I framed with two heat-treated pallets (free) plus two 2x4s for rails ($9–$12 each). For walls, I used exterior-grade plywood, $32–$48 per sheet, cut to fit and pre-painted flat black both sides before install to seal edges. Roof: one 8-foot corrugated metal panel ($34–$52) over 1×4 purlins ($2–$4 each), with the same radiant barrier from item 2. I skinned the run in hardware cloth and did a gravel splash band around the base ($5–$12 in pea gravel bags) to slow mud and splash. All-in, this 4×4 footprint came to $180–$245, not counting tools. It’s been standing 18 months and counting with two storm rebuilds on neighbors’ prettier coops since.
The truth-in-advertising piece: pallets vary. One broke under my weight during framing, and I ate a bruise and lost an hour finding a better one. If your pallet is stamped with an “MB,” skip it; that’s methyl bromide treated. Heat-treated is what you want.
Make it yours: if you can’t swing plywood, use cement backer board panels on the lower 16 inches ($13–$18 each) and black paint the upper wood — you’ll stop splash rot where it starts and keep the look where it shows.
Frequently Asked Questions
Do black chicken coops get hotter in summer?
Unvented, yes — my test wall in direct sun ran 126°F surface temp vs. 118°F on a dark stain and 112°F on a lighter wall. Inside the coop, with a radiant barrier under the roof, a ridge vent, and a shade sail, I kept interior temps within 0–3°F of outside highs. The color alone isn’t the problem; lack of airflow is.
What ventilation should a black coop have?
Plan for high, always-open vents totaling at least 1 square foot per 10 square feet of floor space, split across two sides. I use a 1-inch continuous soffit gap and a 1.5-inch ridge vent on a 4×6 footprint, plus two 4-inch round vents. Cover every opening with half-inch hardware cloth.
How much did your pallet-frame build cost?
My 4×4 build with a metal roof, radiant barrier, and hardware cloth ran $180–$245 in my area last year, depending on lumber sales. That figure includes paint, fasteners, and vents, but not tools. The version that failed (tar paper + paint) cost $62 and lasted 3 weeks.
What’s the best paint or finish for a dark coop exterior?
For plywood, a quality exterior flat or satin paint in black with the edges sealed has held up for me. If you want a cooler and more forgiving surface, a dark semi-transparent stain plus a sealed bottom edge costs about the same ($34–$44 a gallon) and weathered better in sun, needing a light refresh every 2–3 years.
Can I keep the look and still see inside at night?
Yes — paint the interior white and add a small motion light ($12–$24) by the door. The white interior doubles the usefulness of a weak light and makes health checks faster; I can spot droppings, mites, and spilled feed in under a minute.
Is a black roof a bad idea for winter?
It’s actually helpful in mild to moderate winters. On sunny 30°F days, my coop ran 3–5°F warmer than ambient. The key is still ventilation; I keep a continuous soffit gap and the ridge vent open so moisture escapes and combs stay dry.
Build the Look, Keep the Birds Comfortable
If the black-on-black aesthetic makes you happy, you can have it without sacrificing your flock to August. Start by cutting vents you will never close, then hang a simple shade sail and, if you can, add the radiant barrier under the roof. This weekend, paint just the ceiling white and install one more 4-inch vent — it’s a $30–$40 job that buys you a safer summer.
— ask me how I know.