6 Chicken Coop Curb Appeal Makeovers — Before and After
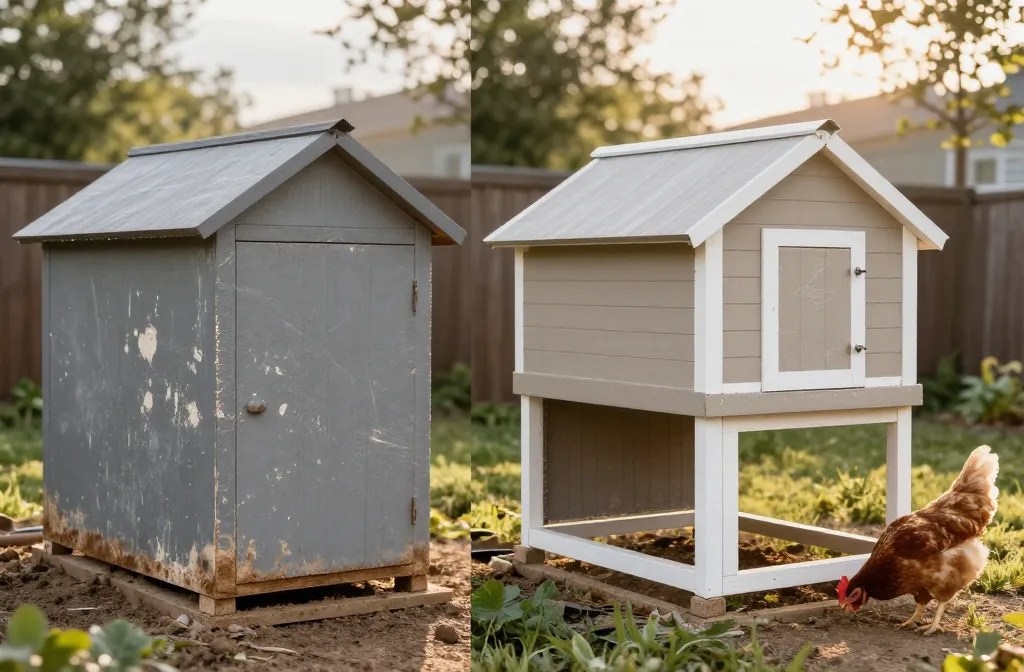
Chicken coop curb appeal makeovers sound like a Pinterest problem until your neighbor texts, “Is that a shed or a spaceship?” Mine did, right after I primed the coop a shade I can only describe as “wet drywall.” I started this list after standing in the paint aisle with a photo of my mud-spattered box and $120 in the checking account. By the end, you’ll have six projects I actually did, what each cost me, and the small fixes that made a plain coop look kept without making the birds’ lives worse.
1. Paint + Trim: Turned My Coop Into a Building
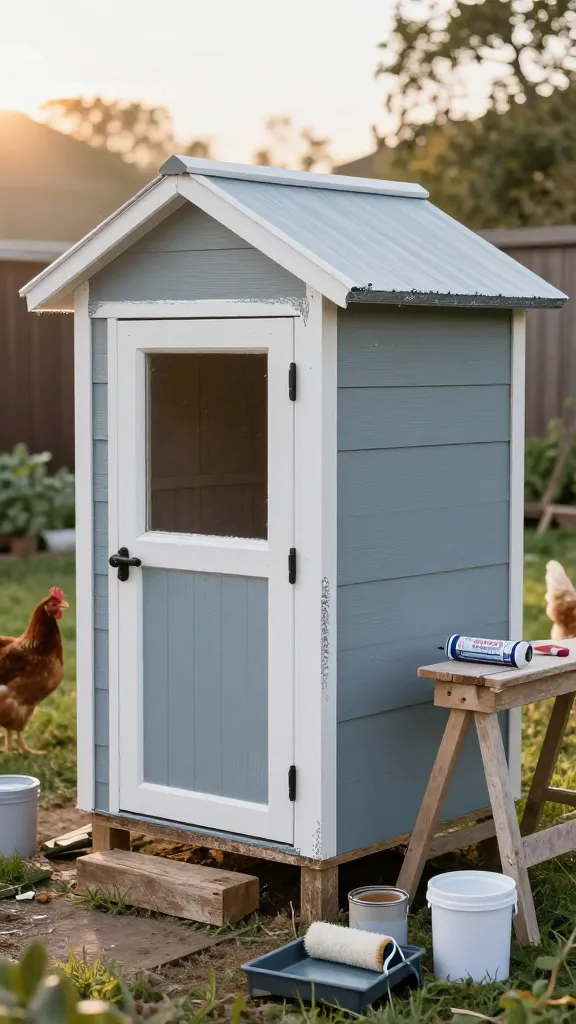
I put off paint for a year and called the gray-brown weathering “rustic.” It read like abandonment. One Friday night I set a $100 cap, bought a gallon of exterior paint and a quart of contrasting trim, and finished before the weekend chores stacked up again.
I used a gallon of exterior satin in a mid-tone color, a quart of white for trim, a 2-inch angled brush, a roller, and a cheap caulk tube. My local prices came to $45–$55 for the gallon, $12–$18 for the quart, $6 for brushes/roller, and $5–$8 for caulk — call it $68–$87. I filled screw holes, laid a simple 1.5-inch “frame” line around the door and windows, and suddenly it looked intentional. Two years later, the satin finish still hoses clean.
The catch: I rushed the first pass, skipped primer on raw edges, and the bottom trim flashed tannins after the first rain. I spent another $9 on a stain-blocking primer and repainted the bottom 8 inches the next week. Worth it. Use exterior-rated paint and let each coat dry the full time on the can.
Make it yours: If your climate bakes paint, pick a lighter body color and a medium trim so it doesn’t chalk as fast. For rentals, paint only removable panels and trim boards you can unscrew and take with you.
2. Hardware Cloth Skirt + Gravel Edge: Looks Finished, Stops Diggers
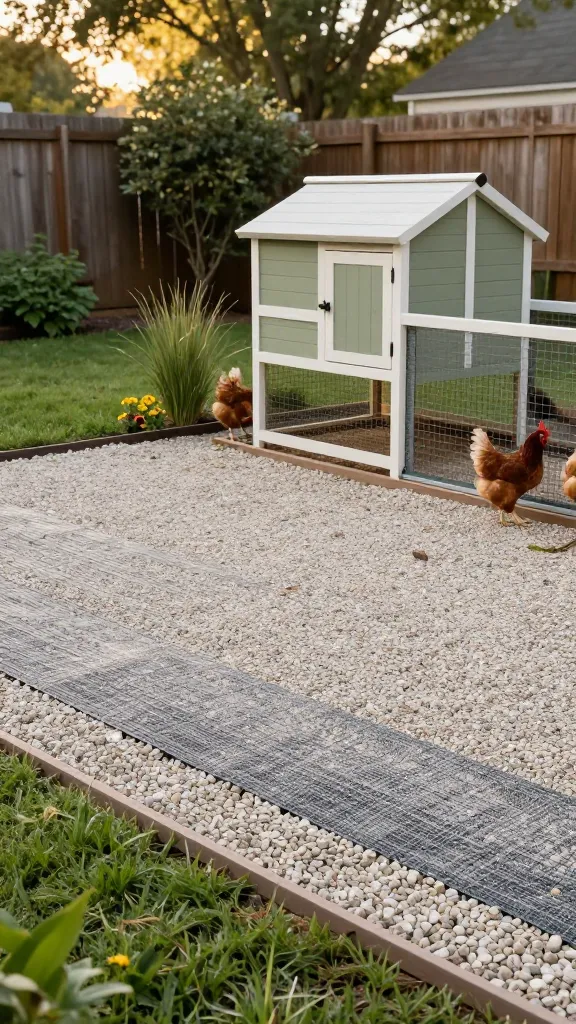
The first time a fox nosed around, it left claw marks under the pop door and my stomach in my shoes. My “before” was bare dirt with a little trenching where the hens dust-bathed. It looked scruffy and felt risky.
I laid a 24-inch-wide apron of half-inch hardware cloth out from the base on all sides and pinned it with landscape staples every 12 inches, then topped it with a 6-inch band of crushed gravel. A 50-foot roll of 24-inch hardware cloth ran $38–$60 here, staples $6, and five 0.5-cubic-foot bags of gravel were $20–$30 total. My out-the-door was $64–$96. The apron has stopped every dig attempt for 18 months, and the gravel border reads “finished” instead of farm mess.
What didn’t work at first: I tried a weed barrier under the gravel. The hens targeted it like a toy and shredded the exposed edge in a day. Skip fabric unless you can fully bury it; just rake the gravel back into place after they dust-bathe. Predators will test your edges the week you get complacent — secure those apron seams with actual overlap and galvanized ties.
Make it yours: If gravel isn’t your look, cover the apron with a 6–8-inch strip of pavers. Fourteen basic pavers cost me $28 on a second coop and made the sweep-up easy.
3. The Front Porch: A Little Roof that Fixed the Mud
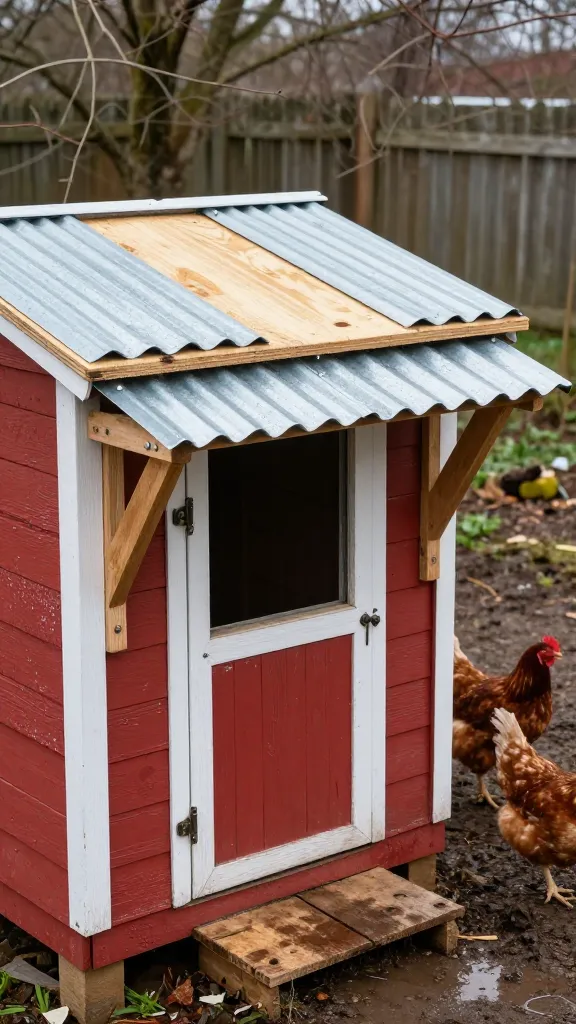
My pop door used to open onto a seasonal bog, and the hens wore a mud fringe all March. I wanted that postcard “porch” look but not the price tag. The “before” photo is a mud crater and a warped scrap of plywood pretending to be a stoop.
I built a mini awning: two 2×2 braces lagged into studs, a 24×36-inch scrap of exterior plywood, and two small corrugated panels. Lumber was $14, lag screws and brackets $8, and the roofing panels plus gasketed screws were $16–$22. Add a scrap of drip edge for $4. Under it, I set a 24×36-inch deck of 2x3s with a slatted top — $20–$28 in materials. Total: $38–$68 depending on scraps. The entry looks like a real front and the run doesn’t turn into a slip-and-slide at the door.
Lesson learned: Pitch the roof at least 3 inches over 24 inches and run the drip edge past the wall. My first try dribbled straight down the siding; I recaulked and added the edge. Also, don’t put a welcome mat; it mildewed in a week and the hens tried to eat it.
Make it yours: Snow load? Swap the 2×2 braces for 2x4s and shorten the projection to 18–24 inches so you’re not knocking icicles near birds.
4. Framed Windows with Hardware Cloth: Safe Venting that Looks Custom
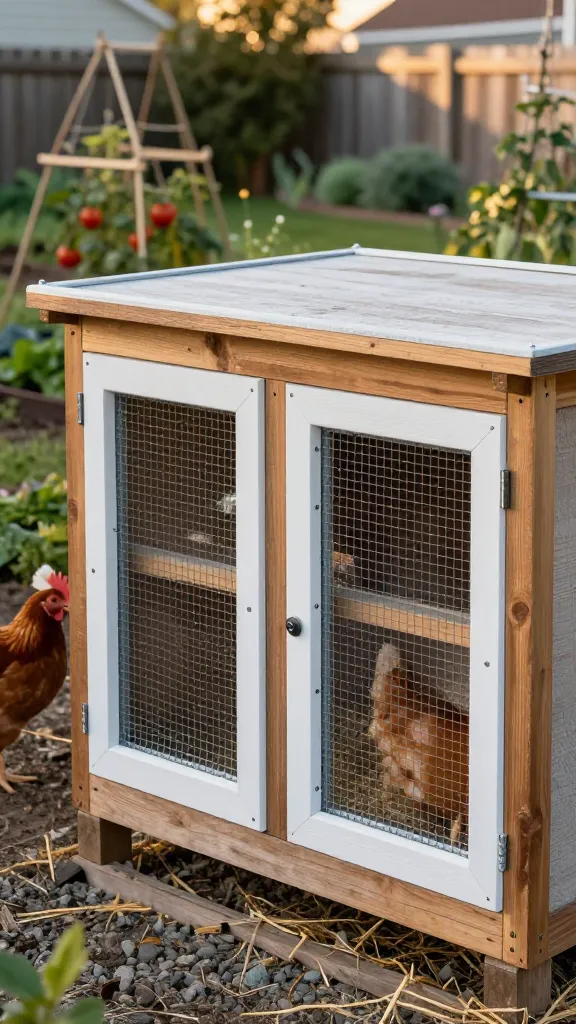
I cut two haphazard holes for ventilation my first summer and backed them with whatever mesh was on sale. It worked until a raccoon pulled a corner loose and I found myself on a ladder at 11 p.m. with a headlamp and zip ties. The “after” reads like real windows, and the coop smells like wood, not ammonia.
I framed two 10×18-inch openings between studs and lined them inside with half-inch hardware cloth using washers and exterior screws every 3 inches. Outside, I added simple 1×3 picture-frame trim and a hinged shutter made from fence pickets. Costs: hardware cloth off the same roll ($0–$12 worth depending on use), screws/washers $8, 1×3 trim and pickets $18–$30, two small hinges and a hasp $6–$10. Call it $32–$60 per pair. Two summers in, the shutters flip down for storms, up for breeze, and the whole face looks finished.
The honest catch: Cutting into a wall invites leaks. I backed the top trim with a bead of exterior caulk and overlapped a piece of leftover drip edge above the frame. Also, never use window screen for predator protection — it tears like paper. Ventilation is non-negotiable for health; build the pretty around the safe, not the other way around.
Make it yours: No saw? Use a jigsaw and drill pilot holes in the corners; slow and steady beats splinters. For rentals, build vent boxes that screw into existing openings and come back off with four screws.
5. Path + Planters at the Coop: and 40 Minutes Changed the View
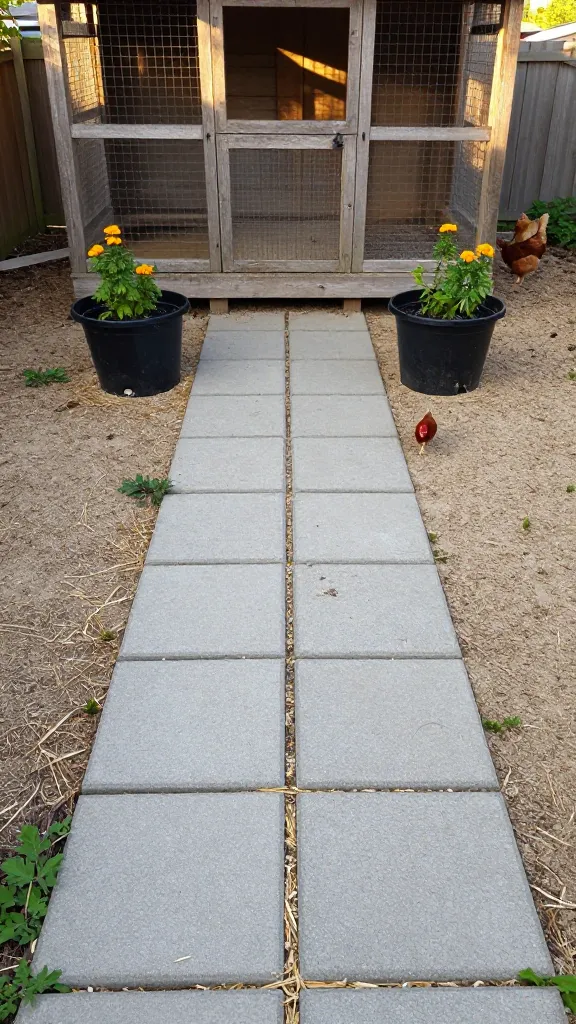
I resisted “landscaping” because I thought it was frivolous next to feed bills. Then I timed my morning chores and realized I was adding 2 minutes a day to scrape boots. I laid a small path and set planters that read tidy even when I haven’t weeded.
I put down 12 basic concrete pavers in a 2×6 pattern from the gate to the pop-door porch, on a tamped layer of sand. Pavers were $24–$30, one bag of leveling sand $5–$7. For planters, I used two plastic tubs with drilled drain holes ($6–$10 each) and 2 bags of compost ($9–$12). I planted hardy, non-toxic perennials and herbs the birds ignore — chives and thyme. Total: $44–$59. It takes me 30 seconds to sweep the path, and the tubs hide the hose sprawl.
What I’d skip: bark mulch near the run. My hens launched it into orbit and I was raking chips out of the hardware cloth for a week. Also, check toxicity; many ornamentals are fine as borders if the birds can’t reach them, but young plants are temptation in pecking range.
Make it yours: If your yard shifts with frost heave, set the pavers on gravel instead of sand and accept a spring reset — it took me 10 minutes to relevel 3 last year.
6. Solar Motion Light + House Numbers: Safe at Night, Looks Like It Belongs
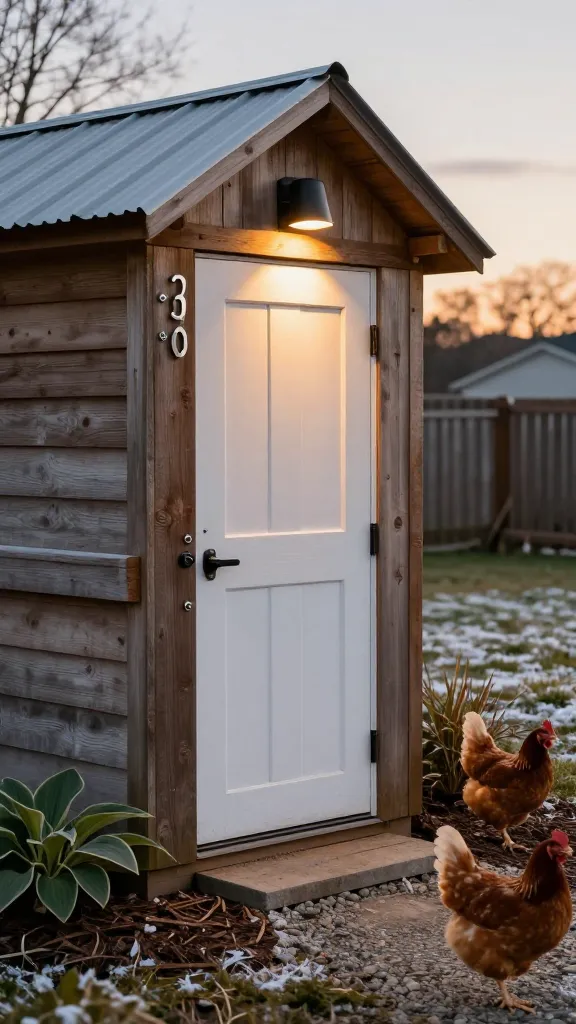
I used my phone flashlight for months, balancing a scoop of feed and pretending I wouldn’t trip. The coop also looked like an orphan shed in the dark. I added one small solar motion light over the people door and screwed on metal house numbers. It suddenly read like part of the property, not a project I abandoned at dusk.
A basic outdoor-rated solar motion fixture ran me $18–$28, and it’s held charge through two winters. Self-adhesive numbers were $6–$12, but I drilled and used short screws so they’d stick to textured paint. If you wire a permanent light, add a weatherproof switch box; a DIY plug-in kit with an exterior cord and box cost me $22 on a second coop. The light kicks on when I’m 10 feet out, which has absolutely sent a raccoon sprinting the other way at least once.
Heads-up: Face the panel south or west and wipe dust off monthly. My first install shaded the panel with the porch roof I was bragging about in Item 3; I remounted it 8 inches higher and it’s been fine. Also, motion lights don’t replace a secure latch and a real lock at night — they just help you see to close it.
Make it yours: If glare bothers you, pick a fixture with a pivoting head and aim it down the path, not into the run. For deep cold, choose one with a removable battery you can swap every 2–3 years.
Frequently Asked Questions
What are the cheapest chicken coop curb appeal makeovers I can do in one afternoon?
Paint and trim is the biggest visual swing for the cost — expect $68–$87 for a gallon, a quart, and basic tools. Adding house numbers and a solar motion light is another $24–$40 and takes under an hour. A 12-stone paver path ran me $29–$37 and saved daily boot scraping.
How do I improve ventilation without making it look rough?
Frame actual openings between studs and back them with half-inch hardware cloth fastened every 3 inches with screws and washers. Add 1×3 trim and hinged shutters so it reads like windows; mine cost $32–$60 for a pair and has handled two summers and a winter storm. Never use window screen — it’s not predator proof.
Will a hardware cloth skirt really help and does it look tidy?
Yes. A 24-inch apron staked flat and topped with a 6–8-inch gravel band stops diggers and looks like a clean border. Expect $64–$96 for a 50-foot roll, staples, and 4–5 gravel bags for a small coop. I haven’t had a successful dig-under in 18 months.
Any chicken coop makeover ideas for rentals where I can’t pour concrete or plant shrubs?
Use removable pieces: a painted trim kit screwed into existing holes, a freestanding paver path ($29–$37), planters in plastic tubs ($21–$34 for two with soil), and a solar motion light ($18–$28) mounted with screws you can fill later. A hardware cloth apron can be laid and pinned without trenches and lifted when you move.
How much should I budget to make my coop look finished without touching the structure?
If you skip cutting new openings, you can do paint, gravel edge, paver path, planters, and a solar light for roughly $180–$250 depending on region and what you already own. I did mine in two weekends to spread the cost, starting with paint because it changes the most for the least time.
Start With What You See From the Gate
If it looks kept, you’ll keep it better — that turned out true for me. Pick one entry project you can finish in a Saturday, even if it’s just a 12-stone path and a scrubbed door with new numbers. Then, price your hardware cloth line and build the pretty around the safe parts first.
— ask me how I know.