8 Modern Farmhouse Chicken Coop Ideas — Black Trim and Clean Lines
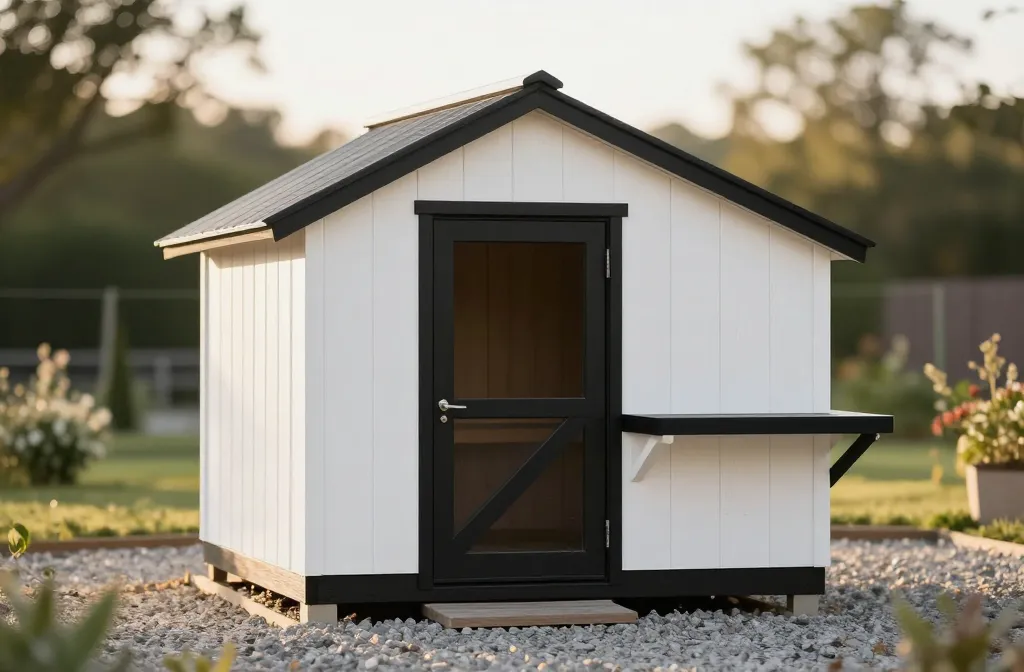
Modern farmhouse chicken coop ideas got real for me the night I was standing in the paint aisle holding a $21 quart of exterior black and a $39 gallon of white, trying to decide which mistake I could afford. I wanted black trim and clean lines, not a Pinterest wish list that warped by August. By the end of this, you’ll have 8 builds and buys I actually did, what they cost me, and where the look holds up outside. First time I tried to fake the look with interior paint and fence boards, it peeled in 5 weeks and I got to sand my pride off the door.
1. Crisp Black Coop Trim That Doesn’t Peel: The Paint Line That Lasted
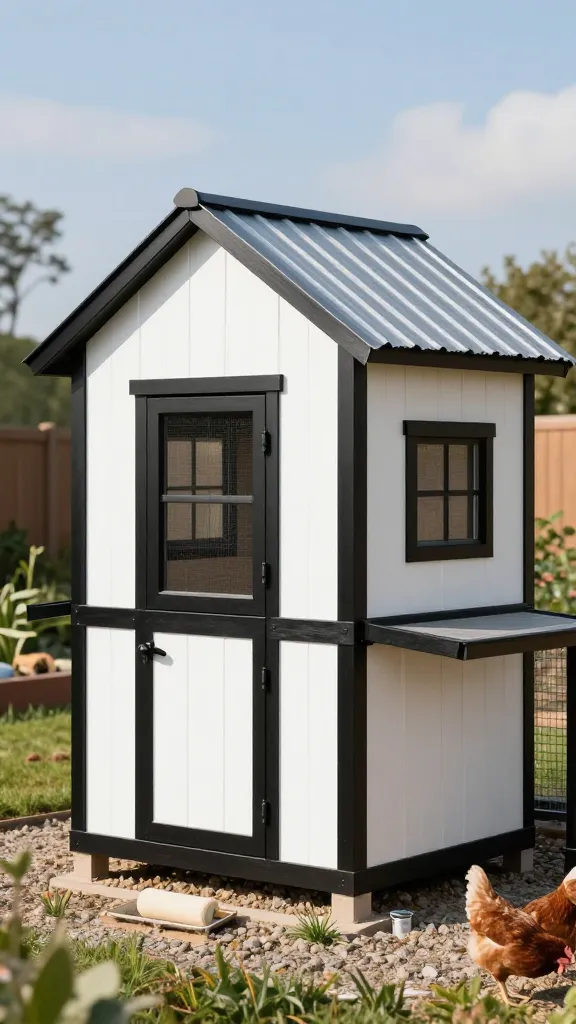
I started with interior satin because it was on sale — the first rain left drip marks that looked like mascara on a hot day. I sanded, primed, and repainted with exterior black in satin on trim and exterior white in eggshell on walls. My receipts: $21 for a quart of black, $39 for a gallon of white, $12 for exterior primer sample, plus a $6 foam roller pack. Two coats, 24 hours apart, and it’s held 18 months through sun, hose spray, and one freeze-thaw week.
The catch was time — I lost a weekend to sanding my first mistake and waiting for the dew to burn off before coat two. If you’re in a humid area, plan on 48 hours. Use exterior caulk at joints ($5) before paint or you’ll chase hairline cracks all season.
Make it yours: If you want more contrast, go flat white walls with satin black trim — flat hides siding imperfections but pick satin or semi-gloss for the trim so you can wipe mud off with a rag.
2. The Clean-Line Roof: 8-Foot Metal Panels and a 1×2 Shadow Edge
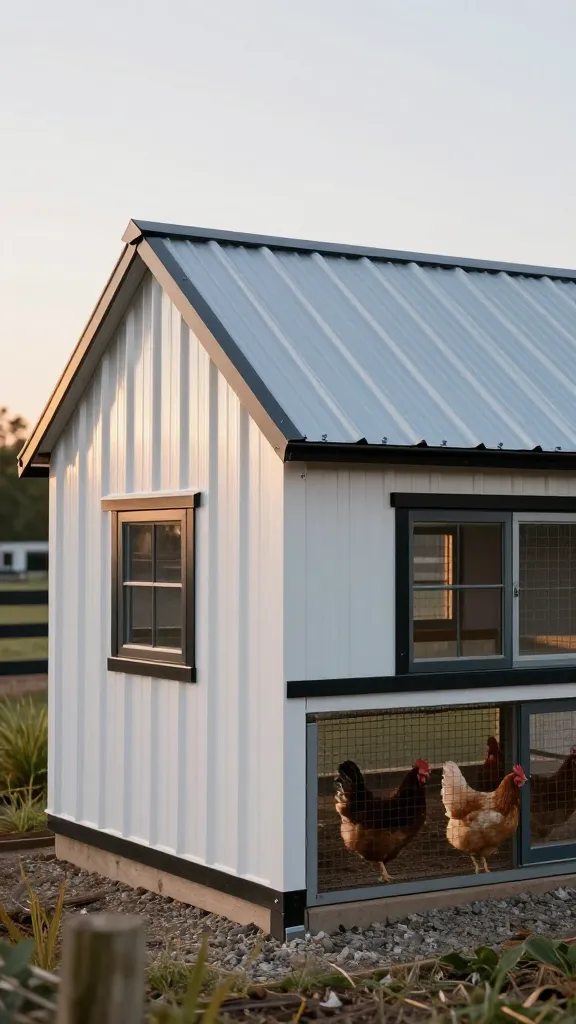
I wanted that razor-edge silhouette without turning my coop into a solar oven. The first summer I tried dark shingles on a shed roof and hit 98°F under there at noon — not fair to the birds. I switched to galvanized corrugated panels in 8-foot lengths, $22–$28 each in my area, with a minimal 6-inch overhang and a 1×2 painted black as a perimeter shadow trim.
Materials ran $70–$110 depending on panel price, plus $9 for neoprene washer screws. It sheds water, reads modern from the street, and dropped mid-day coop temps by 6–8°F compared to my shingle roof. The gotcha: cut panels with a metal blade and gloves; the edge bites. Also, anchor rafters properly — metal sings in wind if not screwed every rib near the edge.
Make it yours: In snow country, bump your pitch to at least 4/12 and add a black drip edge ($8–$12 for 10 feet) to keep melt from weeping behind your fascia.
3. Vertical Board-and-Batten Coop Siding: Construction-Ply That Reads Fancy
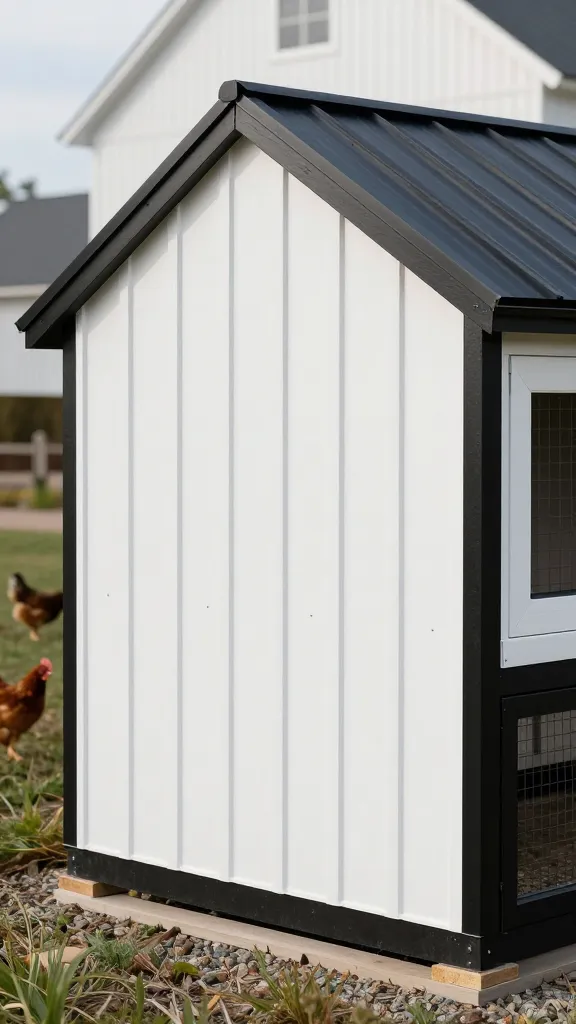
My first siding was fence pickets because they were $2 each; they cupped like potato chips in 2 months. The version that worked: 3/8-inch exterior plywood ripped for the field, then 1×2 battens every 12 inches. Costs were $28–$38 per 4×8 sheet (2–3 sheets on a small coop), $1.80–$2.60 per linear foot of 1×2 depending on species, and a $9 box of exterior screws.
Prime edges before install and leave a 1/8-inch gap between sheets for expansion; the battens cover it and the lines stay laser-straight. Mine has seen 2 winters with no delam. Don’t skip the bottom flashing or a drip gap — my first panel wicked splashback and swelled at month 10.
Make it yours: On a rental or tight budget, use panel siding with vertical grooves and fake the battens with paint — tape 1.5-inch stripes in black; it cost me $4 in tape and fooled two neighbors.
4. The Minimal Black Door: 2×2 Frame, Hardware Cloth Lite, Solid Where It Counts
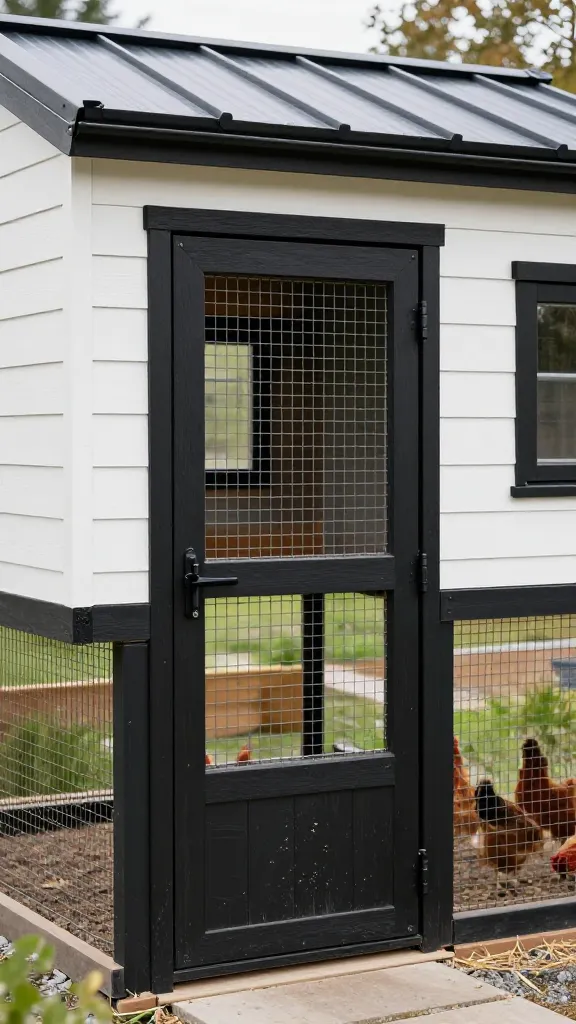
I wanted a skinny-frame look without handing raccoons a salad bar. The first try was a picture-frame door with screen — that lasted one night. The keeper: a 2×2 pine frame with half-inch hardware cloth center and a solid bottom kick panel in plywood for strength, all painted black. Lumber was $12–$18, hardware cloth from a 25-foot roll at $45 (plenty left for vents), plus $14 for two exterior hinges and $8 for a hasp.
It reads modern but withstands a paw test. Use fender washers every 4 inches on the cloth so it can’t peel back. The only thing I’d change sooner: a spring-loaded carabiner on the latch for $4. Raccoons are smarter than my first coffee of the day.
Make it yours: For wind-prone yards, add a black diagonal brace on the inside — a single 1×2 offcut kept my door square through a 40 mph gust for zero extra dollars.
5. Hidden Venting That Still Reads Clean: Soffit Slots and a Shadow Gap
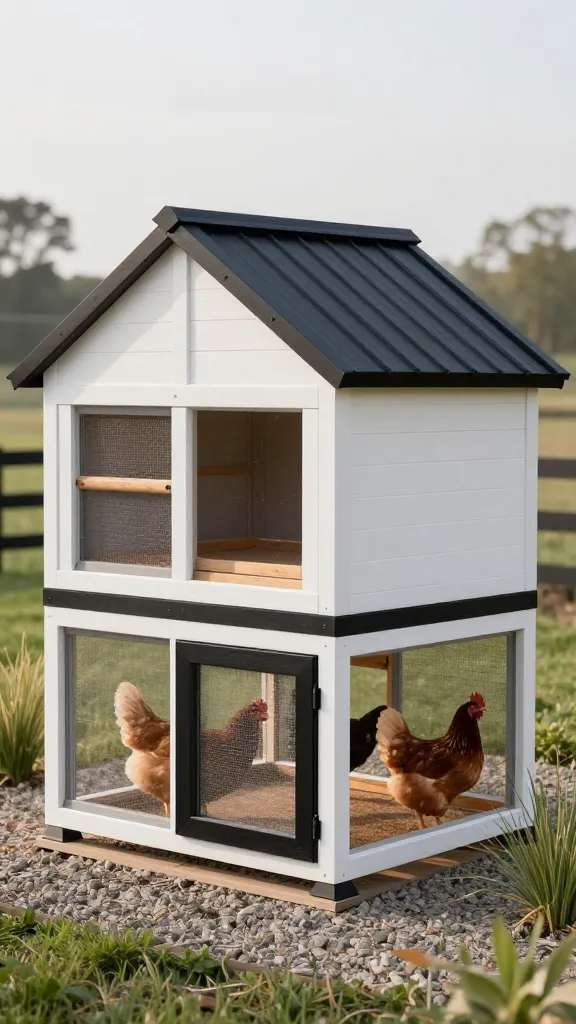
My first “modern” take was too sealed and the coop smelled like a damp hay barn by week 2. I cut in continuous soffit vents (2 runs at 4 feet each, $12–$16 per strip) and a 1-inch shadow gap under the roofline at the high wall, backed with hardware cloth from that same $45 roll. From the ground, you only see a crisp line; inside, the ammonia disappears and condensation stopped.
Hot climates need it even more. I keep the vents at least 12 inches above the roost so no direct drafts hit the birds in winter. If you paint the visible cloth black, it disappears. The only mistake was waiting until July to cut them; do it before the siding goes on and save yourself an hour on a ladder.
Make it yours: In freeze zones, add a removable interior baffle (thin plywood, $8) you can clip on for deep-cold snaps while keeping soffit flow open.
6. Black-Framed Run That Doesn’t Sag: 2×4 Posts, Hardware Cloth, Sand Floor
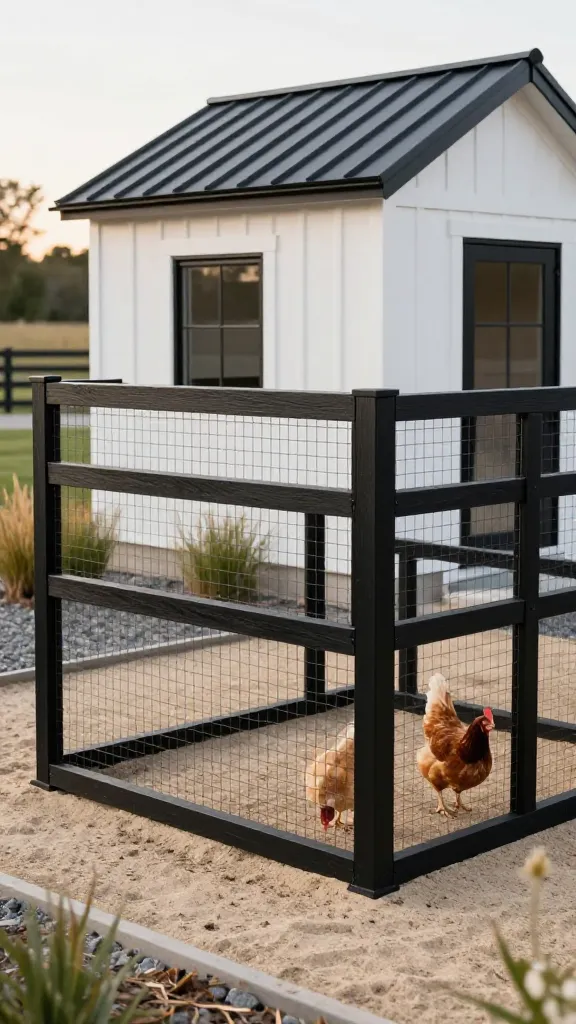
I built my first run out of PVC because the internet said it was “lightweight.” It was — the hawk perched on it and bowed it like a cello. The version that’s held 2 years: pressure-treated 2×4 posts at 6 feet, 2×3 cross rails, and half-inch hardware cloth stapled, then sandwiched with 1×2 battens painted black. Costs: $9–$12 per 2×4 (8–10 pieces), $45 hardware cloth roll per 25 feet (plan on 2–3 rolls for a mid-size run), and $12 for a pound of 1.5-inch staples.
I filled the floor with 2 inches of coarse sand, $45–$65 per yard delivered, which rakes clean and keeps the line tidy. The only pain is stretching the cloth tight — I pre-drilled and used fender washers along edges for a drumhead finish and fewer ripples in the black frame.
Make it yours: If you rent, build 4×8 panels and bolt them together — I moved mine once with a friend and a ratchet set in under 90 minutes.
7. Lighting That Fits the Look: Black Sconce Shell, Safe 12V Inside
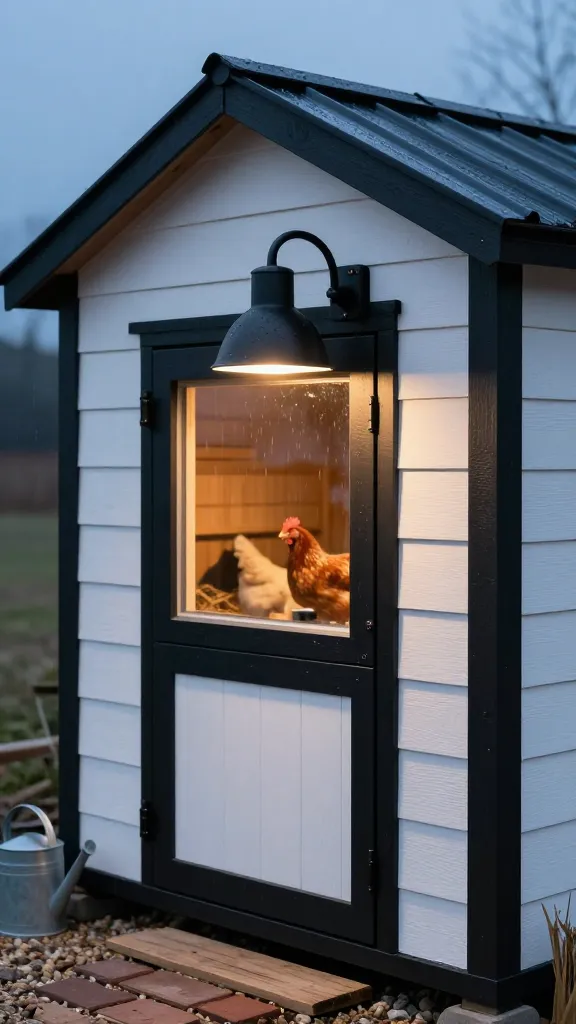
I lusted after a farmhouse yard light until I saw the price tag north of $70. I used a $18 black metal sconce shell (no wiring) as the outside face and ran a 12V LED puck on a timer inside the coop for winter laying, $15 for a two-pack. The shell gives the look; the light the birds need is soft and inside where it belongs.
It’s been through rain without rust because I hit it with leftover exterior clear ($7) and siliconed the mounting holes. Keep the LED at or below 1–2 watts on a 14-hour day cycle December–January, and route the cable in conduit ($6) so nobody pecks it. I tried a plug-in shop light once — harsh and flickery. Not again.
Make it yours: If you’re off-grid back there, a small solar stake on a timer aimed at a white-painted ceiling bounces enough light for a dusk check without blinding roosting birds.
8. The Black-and-White Coop Hardware Rule: Spend Here, Save There
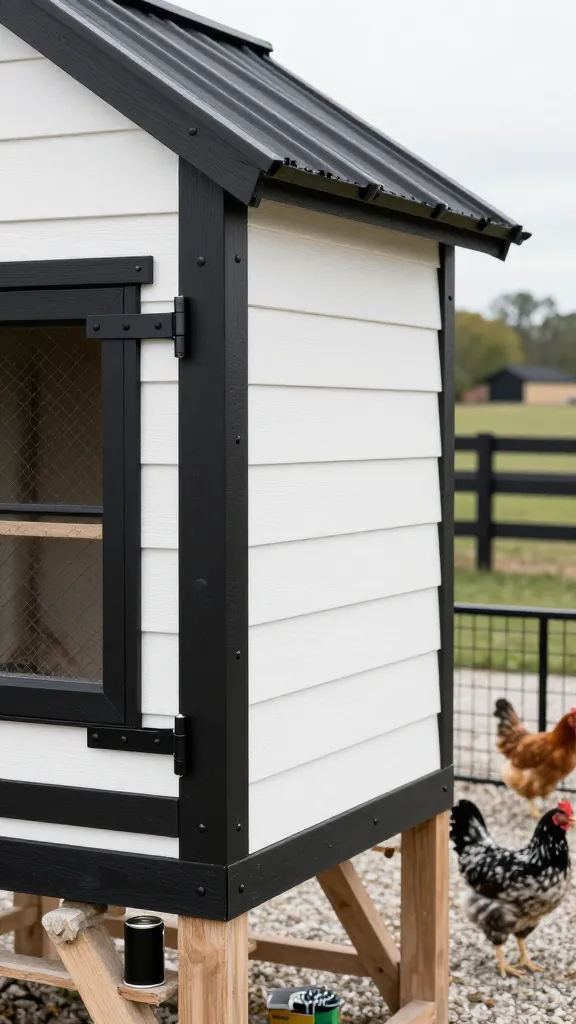
I learned fast that the modern look falls apart when the latch rusts orange. My first black spray-painted gate latch cost $7 and looked great for 3 months, then it seized. I now buy zinc or stainless hardware first ($14–$22 for latch/hinge set), then hit visible pieces with exterior-rated black spray ($6) once mounted.
Hidden screws can be standard exterior, $9 per 1 lb box; visible ones go black-head or get a touch-up after install. It’s a small line item, but it’s what keeps the “clean lines” vibe six months later. If you live coastal, skip spray entirely and buy black-coated stainless — pricier up front but cheaper than replacing three times.
Make it yours: For a quick facelift on an existing build, swap in a black pull handle ($8) and a magnetic catch ($6) on the nest box lid — 20 minutes, big visual payoff.
Frequently Asked Questions
How do I get the modern farmhouse chicken coop look on a small budget?
Pick two high-impact lines: $39 gallon of white for walls and a $21 quart of black for trim, then keep the silhouette simple with a shed roof and a $22–$28 metal panel. Use plywood with battens instead of pricey siding and spend your real money on $45 hardware cloth. That’s the formula that kept my build under $400–$700 depending on run size.
Is black trim on a coop too hot in summer?
Trim is minimal surface area, so heat gain is small; the roof and ventilation matter more. My black-trim, galvanized-roof coop stayed 6–8°F cooler at noon than the shingled version. Prioritize soffit vents and shade and you’ll be fine.
What size should the build be for a clean, modern footprint?
A simple 4×6 floor fits 6–8 standard hens at 4 square feet per bird, plus a run. Keep overhangs tight (6 inches) and battens even to hold the line. If you’re adding a human-height door, bump to 6 feet tall at the high wall so you’re not ducking every chore.
Do I need to paint hardware cloth black to match the look?
You don’t have to. Unpainted disappears in bright light; painted black can vanish in shadow. If you do paint it, use a light coat after install and expect to spend $6–$10 in spray and 30 minutes masking adjacent wood.
How do I keep the coop clean with white walls?
Use exterior eggshell or satin so mud wipes off; flat scuffs fast. I hose mine once a month and hit corners with a scrub brush. Plan on one touch-up afternoon a year — I used about 1/4 gallon for nicks and edges after the first season.
Start With the Silhouette, Spend on Safety
If you want that black-trim, clean-line look, sketch the rectangle first and price the hardware cloth second, then let everything else follow. You can knock out a door trim repaint or swap a latch this weekend for under $30 and see the whole setup sharpen up.
— ask me how I know.