9 Chicken Coop Landscaping Ideas That Handle Mud and Runoff
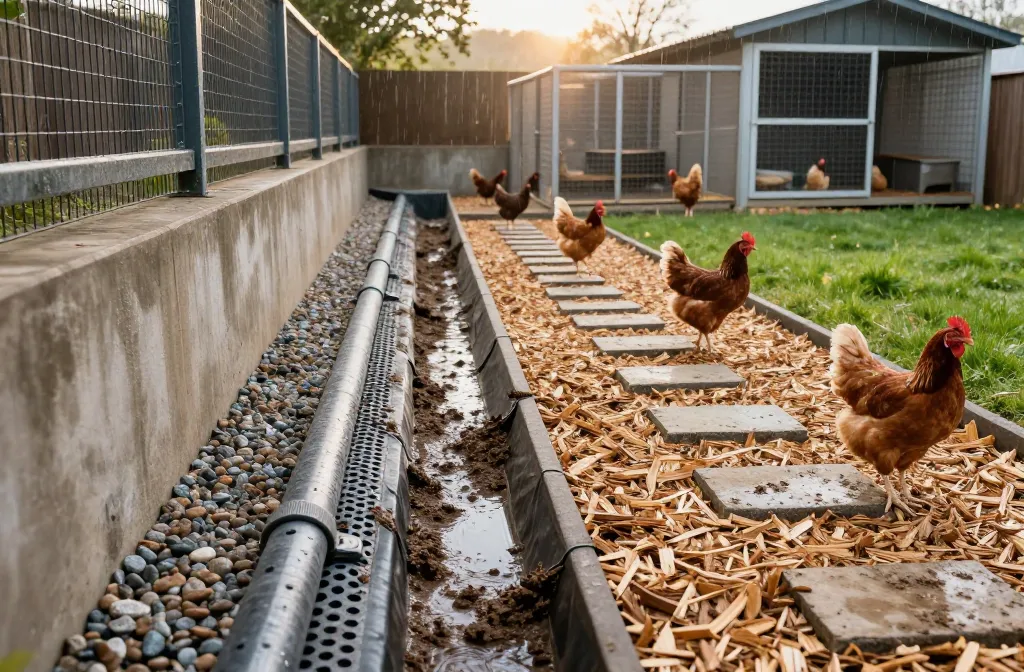
Chicken coop landscaping ideas saved my sanity the spring I learned my run sits in a low spot and turns to soup after a hard rain. I was ankle-deep in a clay-and-poop slurry, pulling a feeder out with a rake because my boots were stuck. Here’s what I’ve actually built and bought since then, what each one cost me, and how they held up. By the end, you’ll have a plan that drains, sheds water where you want it, and keeps the birds off a wet floor — without hiring a skid steer.
1. French Drain Lite Along the Low Side: One Saturday, Real Results
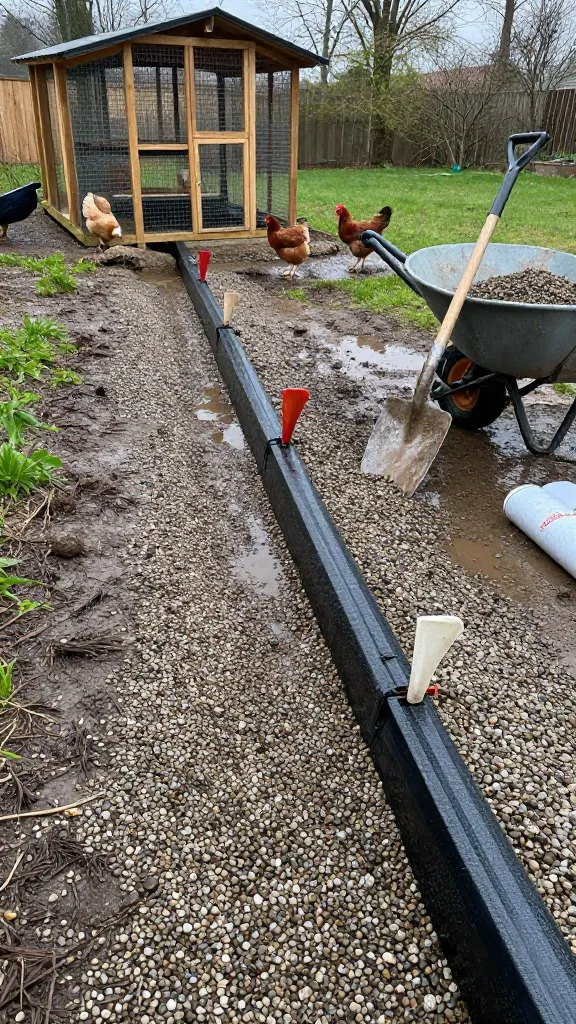
The first spring storm taught me exactly where the water liked to sit — right along the downhill coop wall. I marked the line with cheap flags after a rain, then spent a Saturday with a trenching shovel and a wheelbarrow doing the unglamorous work. No fabric-wrapped perfection, just a practical channel to move water 12 feet away from the run.
I dug a trench about 8 inches deep and 6 inches wide, laid down drainage fabric from a 50-foot roll for $25, dropped in 1.5-inch clean gravel (half-yard from a landscape yard, $28 in my area), and set a perforated drain pipe (10-foot stick, $12) with a slight slope. Covered it with more gravel and folded the fabric over the top. It’s not pretty, but in two winters it’s moved the ponding to the side yard where I can mow it into the turf.
The catch: hand digging through roots took me about 4 hours and two Advil. Also, if you skip the fabric, the pipe silts up. I tried without fabric on a short offshoot to “save” $6 worth — it clogged in 3 weeks.
Make it yours: if you rent or can’t trench, set a shallow surface swale with a flat shovel and line just the bottom with 1–2 bags of pea gravel ($6–$8/bag) to steer water around the run gate.
2. The 4-Inch Perch Pad: Dry Feet Without Redoing the Whole Run
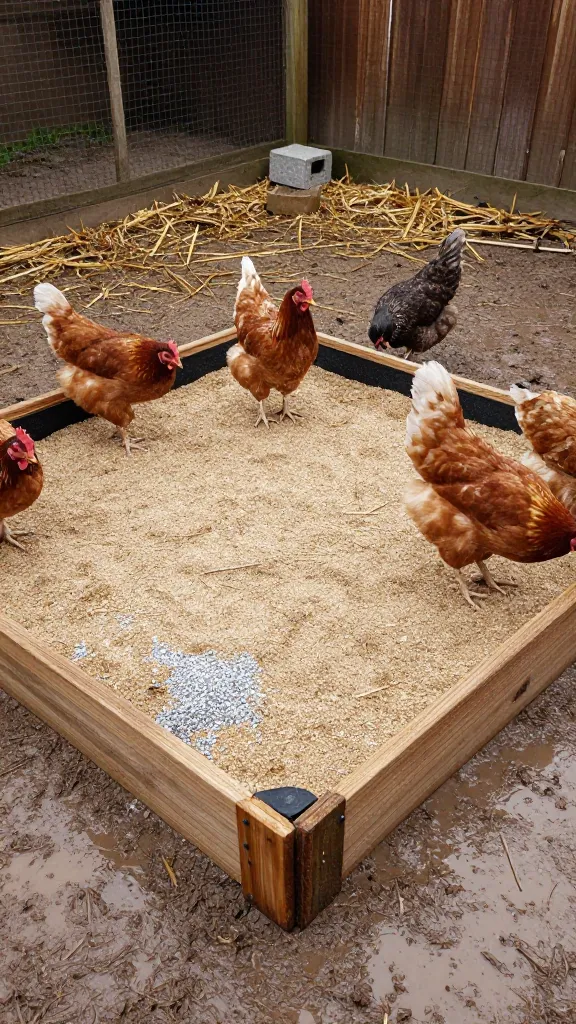
I kept watching my hens huddle on the one dry cinder block like it was a lifeboat. I finally built them a proper dry pad. Not a deck, just a raised zone for loafing so toes and bellies could dry out between foraging laps.
I framed a 6×6-foot rectangle with 2x4s I already had (new would be about $12), staked the corners with rebar offcuts ($6), laid down landscape fabric ($10), and filled it with coarse sand: 0.5 yard delivered with a neighbor’s order came to $19 for my share. Topped the back corner with a small round of 3/4-inch gravel from item 1’s leftovers. Total out-of-pocket was $45 and it’s held shape for 14 months.
The limitation: sand blows if your run is a wind tunnel, and it compacts where feeders hang. I rake it weekly with a kid’s metal rake — 4 minutes tops.
Make it yours: in heavy-clay yards, skip sand and use crushed limestone (called “screenings”) — my second pad used 0.75 yard for $36 and drains better than sand in winter thaws.
3. Coop Gutter + Splash Line: Move Roof Water, Lose the Bog
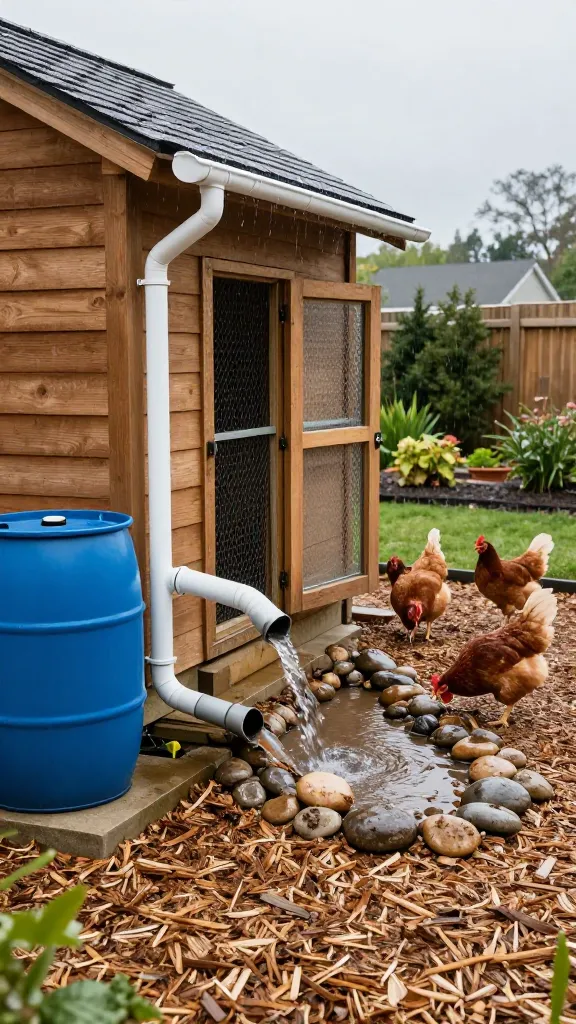
I learned the hard way that the roof is a firehose. The first time I watched 20 minutes of rain carve a trench under the pop door, I stood there holding a baking sheet like a fool, trying to redirect it. Next day I put a gutter up and a splash zone down.
I hung a 10-foot vinyl gutter with two downspouts for $34 total and ran one downspout into a 25-gallon barrel I already had (a used food-grade one locally is usually $20–$30). At the other downspout, I set a 3-foot strip of river rock I grabbed by the bag ($14 for two bags) to stop soil splash and mud where it hits. That alone ended the moat by the pop door.
One gotcha: gutters clog if you have trees. I added a simple plastic screen over the inlet for $5 after the first leaf bomb overflowed and undid my nice gravel line in a single Saturday storm.
Make it yours: no barrel? Clip a flexible downspout extension ($9–$12) and run it 6–10 feet away to daylight the flow downhill.
4. Wood Chips by the Yard, Not the Bag: The Only Bedding That Doesn’t Dissolve

I tried bagged mulch my first year — three bags, $15, gone in one week and smelled swampy. Then I called the tree crew working two blocks over and paid for a partial load. That was the day the run stopped being pudding.
A half-load of mixed fresh arborist chips ran me $60 (price varies; I’ve paid $0–$80 depending on distance). I laid it 4–6 inches deep over fabric at the worst entrance and 2–3 inches everywhere else. The chips knit together, drain, and give the hens a grippy surface. I top up by wheelbarrow every 3–4 months with whatever I can get; the base layer has been in place 18 months and still drains.
The truth: fresh chips can be chunky. I sifted out a couple wrist-thick branches and tossed them into the firewood pile. Also, never use dyed mulch — it mats and stains.
Make it yours: if chips are scarce, ask a garden center for bulk “natural playground mulch” by the yard; I paid $38/yard one spring and it handled rain as well as chips.
5. Gravel Perimeter Strip: Dry Boots, Dry Foundation
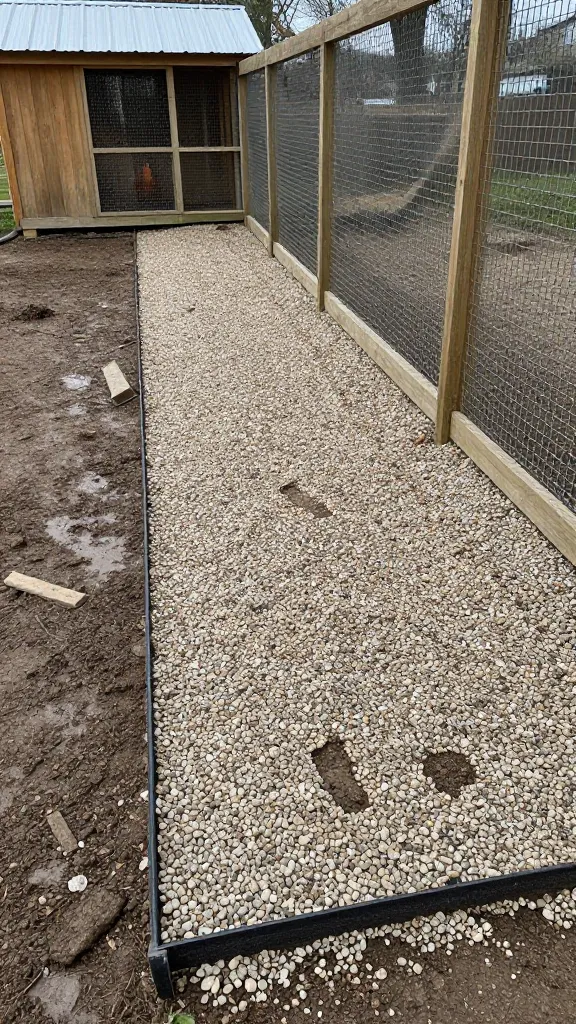
My run fence sat right on clay, so every step along the edge squished. I wanted a path that didn’t grab my boots and a rim that didn’t wick water under the fence. I dug a shallow apron inside and outside the fence line, 12 inches wide on each side.
I laid landscape fabric on both bands and filled with 3/8-inch crushed gravel — about 0.75 yard total, $36 from the bulk pile. I tamped with a scrap 4×4 and called it done. Suddenly I had a clean boot path and less mud kicking under the fence. Two winters in, I’ve only topped it once with a few buckets from the driveway pile.
Downside: you will rake chips and straw off the gravel weekly if your birds fling like mine. It’s still worth the 6-minute tidy to keep the drainage pores open.
Make it yours: for rentals, use paver stones as a reversible edge — a 10-pack at $28–$32 made a neat strip I could lift when I moved.
6. The Cheap Swale and Step-Down Pad: Regrade Without Hiring a Bobcat
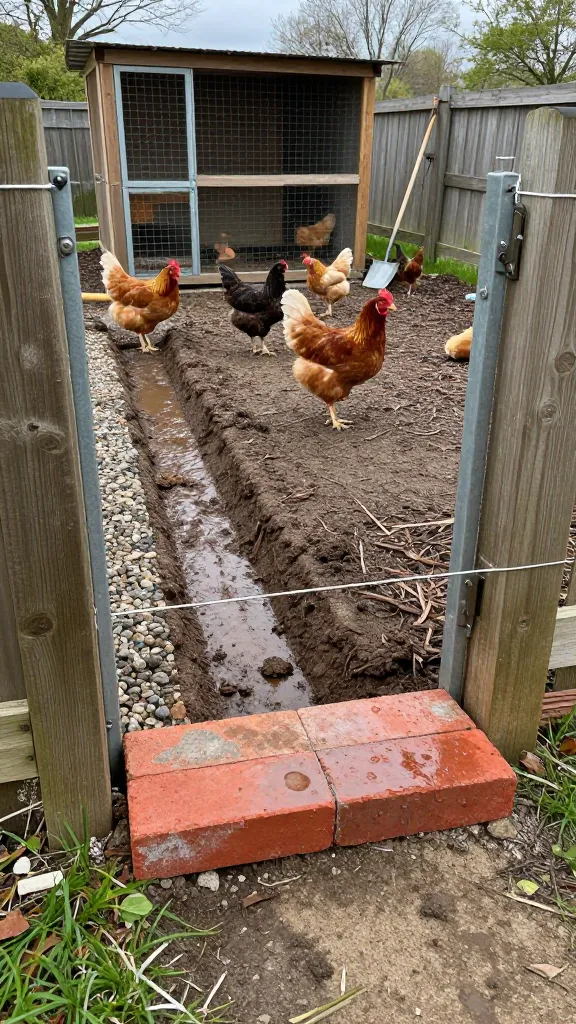
I priced a mini skid steer for a day — $210 plus delivery — and then remembered I own a shovel and a stubborn streak. I set a string level from the high corner to the gate and realized I only needed about 2 inches of drop to steer water where I wanted it.
I carved a shallow swale (think spoon-shaped channel) outside the run, then inside the gate I made a step-down pad using leftover bricks and sand. The swale directs sheet flow around the run; the step-down catches what sneaks in and keeps the gate from grinding into muck. Materials were leftovers; if you buy, 6 bags of sand are $24–$30 and mismatched bricks on clearance can be $0.30–$0.60/each (I used 22, so about $7–$13).
Not magic: you still need an outlet. I sent mine toward a lilac hedge. If your outlet points at a neighbor’s fence, rethink or you’ll trade your mud for a conversation you don’t want.
Make it yours: swap bricks for recycled rubber pavers at the threshold; one pack of 4 ran me $24 and stayed non-slip in ice.
7. Rain Garden Bed at the Downhill Corner: Soak, Don’t Flood

I kept a bucket by the run to see how much water was arriving in a storm — 1 inch of rain off a small coop roof is more than you think. After two storms, I dug a shallow planting bed to catch and use that water rather than chase it.
I cut a 4×8-foot kidney-shaped bed 6 inches deep at the downhill corner, lined the bottom with 2 inches of sand ($10 worth), filled with a compost/topsoil mix (8 bags, $32), and planted tough, non-toxic perennials that don’t mind wet feet. I ringed the inlet with river rock from item 3 so the flow didn’t scour. That bed takes overflow without making a new swamp, and I don’t have to babysit it.
Be honest with yourself on plant picks. Some ornamentals can be toxic if your chickens can access them, and mine absolutely taste-test any leaf that leans through the fence. I stuck to native grasses and daylilies just outside the fence; inside the fence is plant-free on purpose.
Make it yours: no planting budget? Skip to mulch and grasses divided from a friend — I started with hand-me-down clumps and spent $0 the first season.
8. Coop Skirt That Drains, Not a Moat: Hardware Cloth + Rock
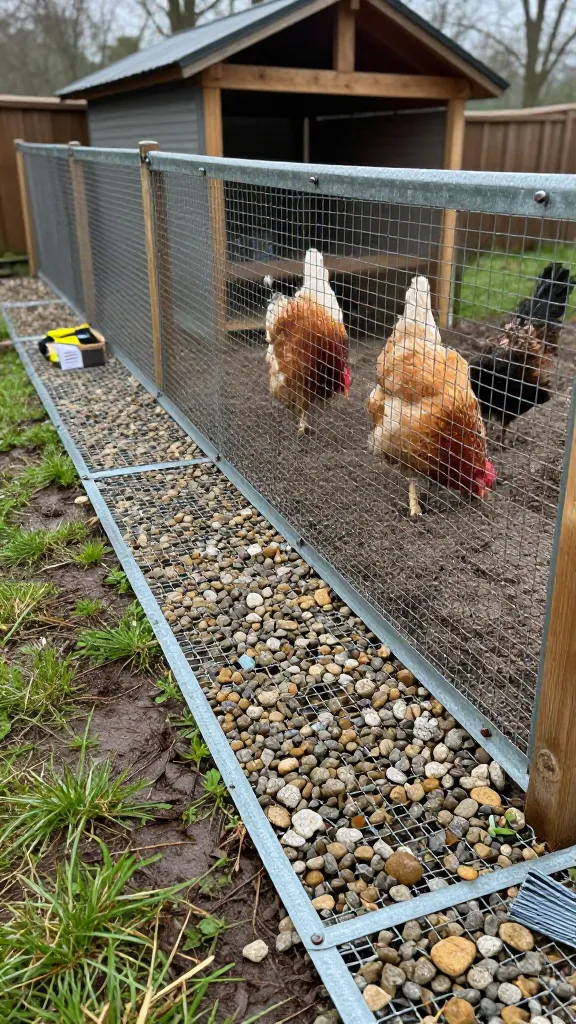
Predator skirts are non-negotiable here, but my first try — just hardware cloth laid and backfilled with soil — turned into a soggy lip that held water against the run. The birds tracked that mess inside every day.
On the rebuild, I laid 18-inch hardware cloth flat out from the fence, pinned it with landscape staples ($8/box), and covered with 2 inches of gravel instead of soil. The skirt still stops diggers, but now water drains through instead of puddling on top. I needed 50 feet of hardware cloth at $45 for my run side and two wheelbarrows of gravel from item 5 — call it $12 worth. It’s been solid 11 months with zero puddles along the fence line.
I did slice one fingertip on the cut wire edge, so wear gloves and fold the outer edge under itself with pliers to keep it tidy and safe.
Make it yours: if gravel offends your mower along the outside edge, use coarse wood chips as the top layer; I tried a 10-foot test strip and it still drained well after 2 months.
9. Seasonal Mats and Moveable Feed Zone: Control the Splash Points
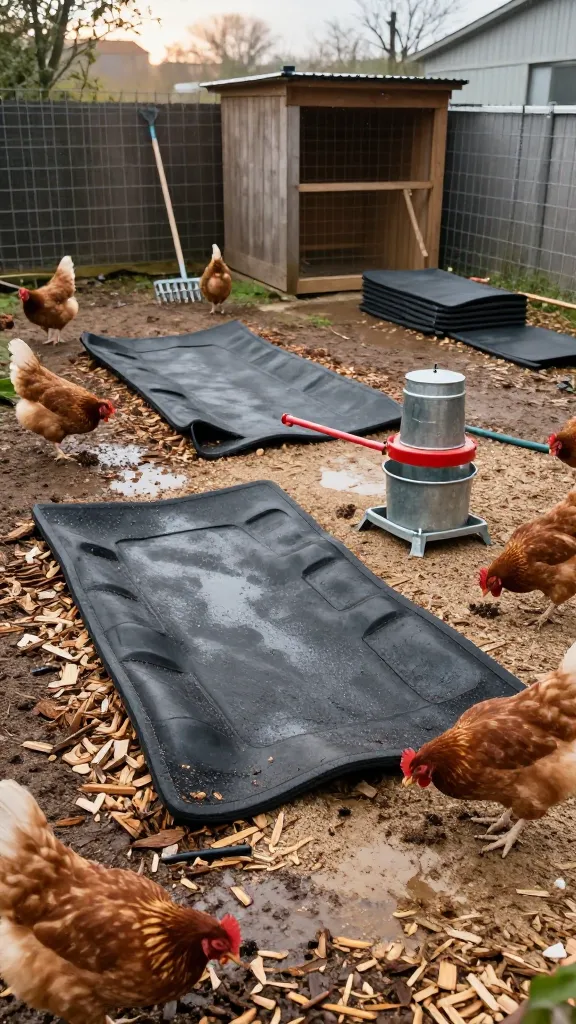
The worst craters in my run were under the waterer and feeder. The first time I tried a concrete paver stack, it just sank unevenly and made a deeper puddle, which the hens thoughtfully turned into a spa. I gave up on fixed spots and made them moveable.
I cut two horse-stall mats in half with a utility knife (one mat was $45 at my farm store) and rotate them under feeders and waterers. They sit on top of wood chips or sand, don’t sink, and hose clean in 30 seconds. I also swapped to a horizontal nipple waterer on a bucket to cut drips — the DIY kit was $8 and it reduced the splash zone to basically my clumsy refills.
What I learned: if you leave the mats in place all season, fines will pack underneath. I pop them up every 2 weeks, fluff the base with a hoe, and set them in a fresh spot. Takes 6 minutes and prevents the “mat island” look.
Make it yours: for winter, set one mat right inside the pop door as a mud scraper and dust with play sand ($6/bag) so boots and feet de-gunk before stepping onto the dry pad.
Frequently Asked Questions
What’s the cheapest way to fix a muddy chicken coop without rebuilding?
Start with bulk arborist chips and a small regrade. One half-load of chips cost me $60 and covered a 10×20-foot run 2–4 inches thick; then I carved a shallow swale with a shovel in under 2 hours to steer water around the gate. Together they changed the footing in a single afternoon.
How do I add drainage to a chicken coop run in clay soil?
Layer, don’t till. Put down landscape fabric, then 2–3 inches of crushed stone for structure, then 2–4 inches of wood chips or screenings on top. A simple 10-foot perforated pipe set 6–8 inches deep along the low side (mine was $12 for the pipe and $25 for fabric) gives excess water a place to go.
Are wood chips or sand better for a wet run?
In constant-rain zones, coarse wood chips over a draining base win because they don’t compact and they knit together. Sand works well as a 4-inch perch pad or under a covered area, but in my clay yard it needed raking every few days. I now use both: chips for the field, sand for the loafing pad.
Do I really need gutters on a small coop?
Yes. Even a 4×8-foot roof can dump 20–30 gallons in a short storm, which turns into a trench at your pop door. My $34 vinyl gutter with a $14 splash line stopped the under-door bog in one afternoon, and the barrel catches about 25 gallons for garden use.
Will a predator skirt make my mud problem worse?
It can if you backfill with soil. My first soil-covered skirt held water like a moat. Switching to an 18-inch hardware cloth skirt topped with 2 inches of gravel kept the security and let water pass through; materials were about $57 for 50 feet plus gravel.
Start With Where the Water Wants to Go
Grab a string level, watch one storm, and sketch the path you want water to take. Your first win can be as small as a 3-foot splash zone and two wheelbarrows of chips — it was for me, and it bought me dry feet while I dug the rest on a cold Saturday.
— ask me how I know.