Cheap DIY Chicken Coop Designs
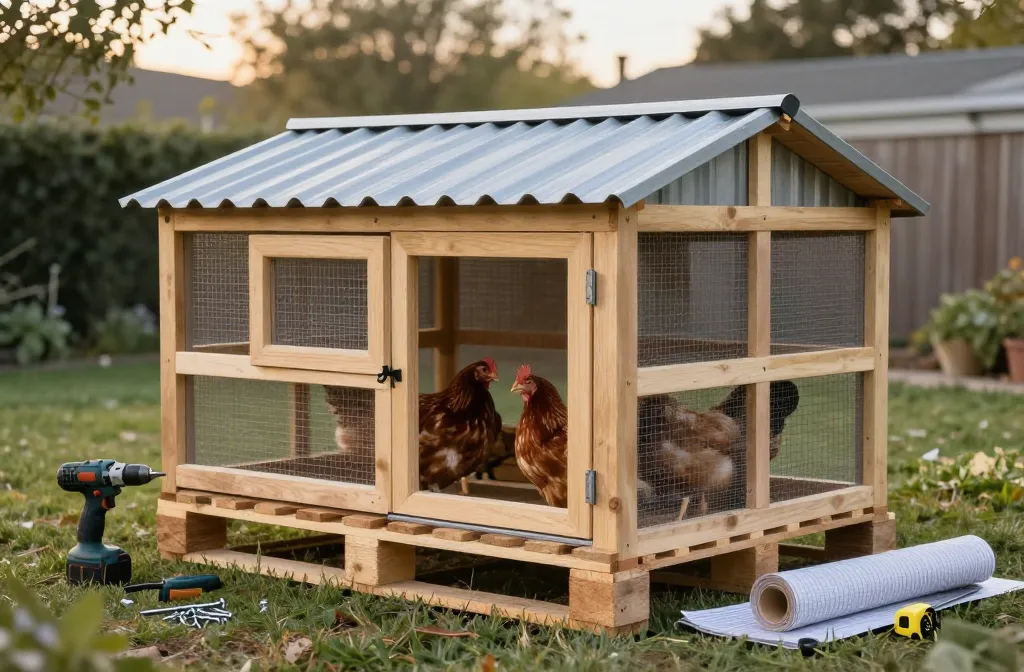
What My Cheap Chicken Coop Actually Cost
My pallet coop came in at $239 with free pallets and scrap plywood. Hardware cloth, roofing, and hinges were the real expenses — buying all-new lumber would have pushed the same footprint to $380–$450, but scavenging saved $140–$210 if you’re willing to ask garden centers and neighbors.
Cheap DIY Chicken Coop Designs got real for me the night I was standing in the lumber aisle, holding a warped 2×4 and doing math on my phone with sawdust on the screen. I had 4 pullets in a stock tank growing faster than my budget, and the prefab coops were either $499 or made of balsa wood. I went home, measured two pallets I’d dragged out of a garden center’s discard pile, and built the first version for what I thought was a win. It wasn’t — but the second build was, and I kept every receipt so you don’t have to learn the expensive parts the same way.
- Reclaimed pallets, 6 — free from a garden center that was thrilled to clear space. Ask first; most say yes.
- Half-inch hardware cloth, 25-foot roll — $42–$65 depending on year and region. I paid $49.
- Corrugated roof panels, 3 — $55–$75 total. Mine were $63.
- Exterior screws (1 lb) + construction screws (1 lb) — $18–$28. I spent $22.
- Hinges and latches (4 hinges, 2 locking latches) — $20–$35. Mine: $27.
- 2x4s, 8-foot, 6 pieces — $22–$36. I paid $30 for studs that weren’t banana-shaped.
- Flooring: scrap plywood, 1 sheet — $0 from a neighbor’s dumpster; new would be $25–$45.
- Roof screws with washers, 1 box — $7–$12. Mine: $9.
- Exterior paint or stain, 1 quart — $12–$22. I used a $15 mistint.
- Sand + pavers for coop legs (optional) — $20–$40. I spent $24 on 6 cheap pavers.
Total out of pocket (my build): $239 with free pallets and scrap plywood. Buying all-new lumber would have pushed this same footprint into the $380–$450 range.
The Coop Footprint and Why Size Eats Your Budget
Build to standard material sizes and you save both cash and Saturday afternoons. A 4×6 coop with a 6×12 run maps to common pallet and roof panel lengths — squeezing the plan to 4×4 to “save money” cost me $32 in odd-length lumber and hinges that didn’t fit right.
I planned for 4–6 standard hens: that meant 16–24 sq ft of enclosed coop and a 60–120 sq ft run if they weren’t out all day. My first sketch was 4×6 for the coop and 6×12 for the run because that mapped to common pallet and roof panel lengths. When I squeezed the plan to 4×4 to “save money,” I ended up spending an extra $18 on lumber to fix the nesting box roof overhang and another $14 on more hinges because the door sizing changed. Small isn’t cheaper if it makes you buy odd lengths. Build to standard material sizes and you save both cash and Saturday afternoons.
The Cheap Version That Failed (and How Fast)
Chicken wire keeps birds in; it does not keep anything out. My first run used chicken wire because it was $12 vs. $49 for hardware cloth — it lasted 11 weeks before a raccoon chewed a baseball-sized gap. The redo with half-inch hardware cloth cost $49 once and hasn’t been touched by anything with thumbs.
My first try used chicken wire for the run because it was $12 for a roll versus $49 for hardware cloth. It lasted 11 weeks. I came out one September morning to a chewed gap the size of a baseball and a scattered feather pile. Chicken wire keeps birds in; it does not keep anything out. I replaced that section, then the next section after a raccoon tested a seam I hadn’t stapled deep enough. By the time I was done “patching,” I’d spent $31 on extra staples, $19 on a second roll of the wrong thing, and a whole evening feeling sick. The redo with hardware cloth cost me $49 once and hasn’t been touched by anything with thumbs. According to Wild Hearth Life and the Backyard Chickens community, university extension predator-proofing guidelines consistently recommend welded hardware cloth over poultry netting — chicken wire is easily breached by raccoons, snakes, and weasels, while 1/2-inch hardware cloth (19-gauge minimum) stops even small predators like weasels and resists tearing by dogs and foxes.
Build Order That Worked (With The Dumb Parts Left In)
Follow a logical build sequence and pre-drill everything — splitting a pallet slat costs time, not cash, but it slows you down. Site and level first, then floor and skid frame, walls from pallets, roof frame with proper pitch, door and hardware, ventilation, run attachment, and finally interior roost and nest boxes.
- Site and level — I set 6 pavers on packed soil and a 1-inch sand bed, checking with a $9 torpedo level. My first try skipped the sand to “save $4”; the coop racked after the first hard rain and doors wouldn’t close square.
- Floor + skid frame — Two 2×4 skids on edge with cross braces every 24 inches, sheathed in 1/2-inch plywood. I pre-painted the underside to slow rot. This took me 1 hour solo and used 24 screws.
- Walls from pallets — I stood 4 intact pallets on edge for 8 linear feet per long side and faced gaps with ripped pallet slats. I lag-screwed corners with 3-inch construction screws. Here’s where I split a slat and had to backfill with scrap — cost was time, not cash, but I learned to pre-drill.
- Roof frame and pitch — 2×4 rafters at 24-inch centers with a 6-inch rise over 4 feet for runoff. Corrugated panels overlapped 1 rib and I used the washered screws in the high ridges. The first panel I put the screws in the low channels; it leaked in the first storm. I reversed them and added butyl tape on the seams: $6.
- Door and hardware — I framed a 20×36-inch people door because smaller doors save wood but cost you shoulders. Two strap hinges held fine; the first latch wasn’t locking and I found it open at dawn twice. I paid $11 for a locking latch and slept better.
- Ventilation — 2 opposite vents under the roofline, each 6×24 inches, covered in hardware cloth and framed so there was no exposed edge to pry. On my first coop I made cute little decorative vents. Moisture bloomed on the inside of the roof in January. Steam is harder on birds than cold; big vents kept it dry.
- Run attachment — I anchored the run with T-posts I already had and wrapped hardware cloth 24 inches out as an apron around the perimeter, pinned with landscape staples every 12 inches. This cost $14 in staples and saved me trenching, which I hate.
- Interior: roost and nest — A 2×3 on its wide face as the roost, 12 inches from the back wall, 18 inches above the floor; 2 nest boxes made from a cut pallet crate at 12 inches high. I tried putting the roost at 30 inches because it looked right. They launched into the soffit nightly and I had to rehang the roost lower the next weekend.
Where I Spent, Where I Saved
Keep the structure cheap with pallets and scrap plywood, but spend real money on hardware cloth, hinges/latches, and a roof that doesn’t leak. I saved by using mistint paint, scrounged pallets, and building to 4-foot increments — but a $6 “assorted screws” tub stripped 3 heads and taught me to buy proper exterior screws first.
I kept the structure cheap with pallets and a neighbor’s plywood, but I spent real money on three things: hardware cloth, hinges/latches, and a roof that doesn’t leak. I saved by using mistint paint ($15), scrounged pallets (free), and building to 4-foot increments so I didn’t have to buy another $7 of saw blades or throw out weird offcuts. I tried to save on fasteners once with a $6 “assorted screws” tub — stripped 3 heads and threw the rest in a jar. The $22 for proper exterior screws was money I should have spent first.
Cheap DIY Chicken Coop Designs That Actually Work
Three budget designs that hold up: pallet box with shed roof ($220–$280), hoop run with raised mini coop ($260–$350), and shipping crate conversion ($170–$230). Each uses salvaged or low-cost materials but spends on predator-proofing and weather-tight roofing — the two things you can’t skimp on.
Pallet Box + Shed Roof (4×6 coop, 6×10 run)
Uses intact pallets as walls, a simple sloped roof, and a skid base. It took me one Saturday plus a weeknight to paint. Budget: $220–$280 with reclaimed wood. Strength: fast, rigid. Weak point: insulating gaps unless you skin the inside with slats or plywood.
Hoop Run + Raised Mini Coop
Two 16-foot livestock panels or garden hoops arched over a 6×10 footprint make an easy run; the coop is a 3×4 raised box at one end. I built this for a friend using a borrowed trailer. Budget: $260–$350 depending on the panels. Strength: spacious run for the price. Weak point: wind load if you skimp on anchor stakes and rope ties.
Shipping Crate Conversion
I scored a 48x40x36-inch crate from a machine shop for free and turned it into a small coop with a 6×8 run. Budget: $170–$230 because the box was the structure. Strength: dead simple. Weak point: crate wood sucks up water; you must seal every edge and add real ventilation.
The Two Places I’d Change My First Build
Start with the run size you actually need and frame a bigger human door from day one. My 6×8 run needed a 6-foot extension 3 weeks later ($70 and 2 hours), and a 16-inch-wide door cost me one bruised shoulder and a tipped waterer before I widened it for $19.
First, I’d start with the run size I actually needed. When I built a 6×8 run to “start,” I added a 6-foot extension 3 weeks later because the birds were pacing. That add-on cost me $58 in more hardware cloth, $12 in screws and stakes, and 2 hours I could have used sitting down. Second, I’d frame a bigger human door from day one. I thought 16 inches wide was “enough” because I am not a linebacker. Cleaning through a slot cost me one bruised shoulder and a tipped waterer. Widening the door cost $19 in a third hinge and a replacement latch and paid back the first time I hauled out a full muck tub.
Weatherproofing on a Budget (That Actually Helps the Birds)
Big high vents, draft baffles below the roost, and deep bedding beat insulation for chicken health. Birds need dry air and no drafts at roost height more than they need a space heater — I tried stuffing foam board in pallet gaps my first winter and created a damp cave.
I live where winter nights hit the low 20s. I tried stuffing foam board in pallet gaps my first winter and created a damp cave. Birds need dry air and no drafts at roost height more than they need a space heater. The combo that worked: big high vents, draft baffles below the roost made from pallet slats, and deep bedding (4–6 inches of chips). Weather spend: $0–$25 if you’re scrounging. I added a heated water base the second year for $40 so I wasn’t knocking ice at 6 a.m., and that’s one of the few plug-in things I don’t regret.
How It’s Held Up and What It Survived
At year 4, my pallet coop has handled two wind events over 45 mph, raccoons, and a spring flood. I re-coated the exterior with leftover stain at year 3 and replaced a latch spring for $4 — the only structural failure was a roost support that split in summer year 2, fixed with a full 2x offcut.
The pallet-and-panel coop you’ve just read about is at year 4. It’s handled two wind events over 45 mph, raccoons doing raccoon things, and one spring flood that put 2 inches of water under it for a day. I re-coated the exterior with leftover stain at year 3 and replaced a latch spring for $4. My only structural failure was a roost support that split in summer year 2; I swapped the 1x scrap for a full 2x offcut and it’s been fine.
Cheap Doesn’t Mean Flimsy
If you can only afford to do two things right this weekend, make them hardware cloth everywhere a predator can touch and a roof that sheds water. You can upgrade doors, trim, and paint later; you can’t undo a night you lost birds because the wire was for tomatoes.
Cheap DIY is fine; flimsy is not. If you can only afford to do two things right this weekend, make them hardware cloth everywhere a predator can touch and a roof that sheds water. You can upgrade doors, trim, and paint later; you can’t undo a night you lost birds because the wire was for tomatoes.
Frequently Asked Questions
Can I build a chicken coop for under 0?
Yes, if you source the structure from pallets or a shipping crate and spend your money on hardware cloth, roofing, and hinges. My pallet build was $239 out of pocket with free pallets and scrap plywood; buying all-new lumber pushed it toward $400.
How big should a cheap DIY chicken coop be for 4–6 hens?
Plan for 4 sq ft per bird inside and 10–20 sq ft per bird in the run if they won’t free-range daily. A 4×6 coop with a 6×12 run works for 4–6 standard hens and maps cleanly to common material sizes, which saves you waste and cash.
What’s the cheapest predator-proofing that actually works?
Half-inch hardware cloth on every opening and the lower 24 inches of the run, plus a 24-inch horizontal apron around the perimeter. Expect $42–$65 for a 25-foot roll; I used one full roll and part of a second on my 6×12 run.
Do I need insulation in a budget coop?
Not usually. Prioritize ventilation high up and wind baffles low; dry air beats added R-value for chicken health. I run 4–6 inches of chips and big soffit vents and my flock handled nights in the low 20s without a heater.
What tools do I actually need for these designs?
A circular saw or handsaw, a drill/driver with exterior bits, a stapler for hardware cloth, a tape measure, and a level. I built my first coop with a $49 saw, a loaner drill, and a $16 stapler; fancy tools save time but aren’t required.
Quick Comparison: 3 Cheap Coop Designs
| Design | Footprint | Approximate Cost | Build Time | Strength | Weak Point |
| Pallet box + shed roof | 4×6 coop, 6×10 run | $220–$280 | 1 Saturday + 1 weeknight | Fast, rigid structure | Insulating gaps unless skinned inside |
| Hoop run + raised mini coop | 6×10 run, 3×4 coop | $260–$350 | 1–2 weekends | Spacious run for the price | Wind load if skimping on anchors |
| Shipping crate conversion | 4×3 crate, 6×8 run | $170–$230 | 1 weekend | Dead simple structure | Crate wood absorbs water; must seal edges |
Start With the Two Purchases That Matter
If you’ve got an afternoon and a normal budget, grab a 25-foot roll of half-inch hardware cloth and enough roof panel to cover a 4×6 box, then scrounge pallets. Cut the door full-width, hang the roost at 18 inches, and get the apron down around the run before you get cute with trim. The birds won’t thank you, but they’ll be there tomorrow morning. For detailed comparisons of coop designs with pictures and honest verdicts, the coop designs comparison walks through pros and cons. If you’re working with salvaged materials, the homemade coop ideas guide shows how to build from what’s already in the garage. And when you’re ready to think about every weak point in your setup, the predator-proofing checklist covers diggers, climbers, and flyers.
— ask me how I know.