Predator-Proof Chicken Coop Checklist
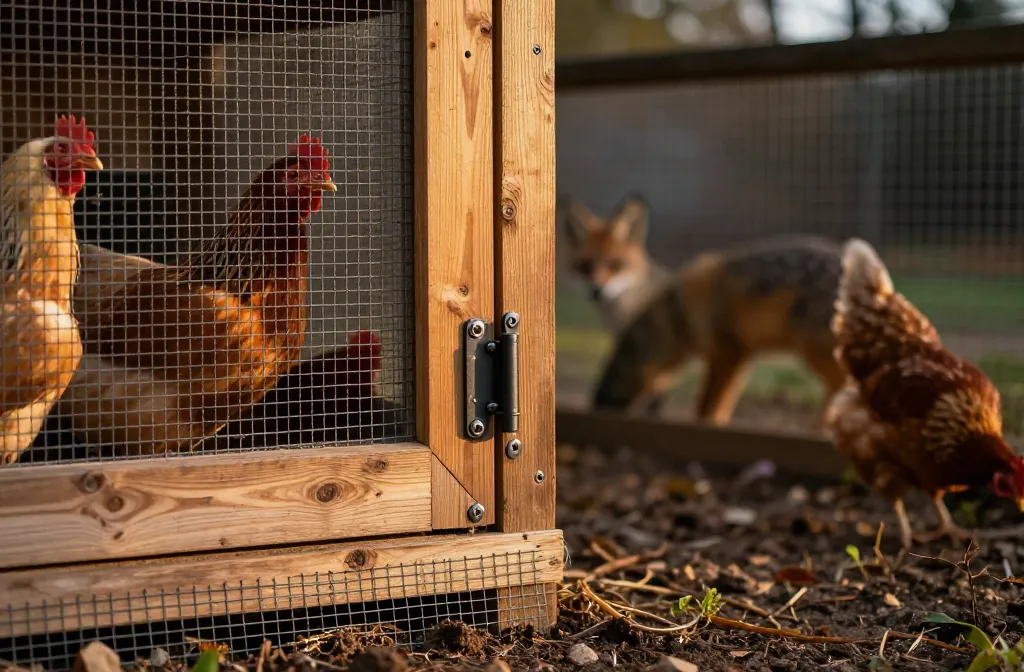
The Standard for a Secure Shell
No opening larger than 1/2 inch, no unprotected edge into soil, and a door system that takes two distinct motions to open. Build to keep out raccoons (hands, intelligence), foxes/dogs (digging, force), rats/weasels (small gaps), and raptors (top attack) — if any part of your system relies on a bungee cord, replace it with steel.
Predator-proof chicken coop work starts where losses actually happen: a raccoon’s hand through a one-inch gap, a fox digging under a soft edge, or a hawk keying on a sagging run roof. Your coop is only as strong as its weakest inch. I have replaced a coop door after a raccoon learned my lazy latch, and I have dug out a fox tunnel that reached the floor joist. By the end, you’ll have the standards, materials, and a walk‑through checklist to harden your setup without guesswork.
The standard is simple: no opening larger than 1/2 inch, no unprotected edge into soil, and a door system that takes two distinct motions to open. Build to keep out raccoons (hands, intelligence), foxes/dogs (digging, force), rats/weasels (small gaps), and raptors (top attack). In practice that means 1/2-inch hardware cloth on every vent and window, a 12–24 inch perimeter dig skirt, a solid roof on the run, and locking latches at all human and chicken doors. If any part of your system relies on a bungee cord, replace it with steel.
Doors, Latches, and Hinges That Don’t Fail
Every exterior door has a two-step latch raccoons cannot manipulate and 3-inch exterior screws or carriage bolts through hinges. A raccoon can open a simple slide bolt; require a lift-and-turn plus a carabiner or a keyed barrel lock; doors should be framed in 2×2 or 2×4, sheathed in 1/2-inch plywood or thicker, with no gap exceeding 1/4 inch.
The standard: every exterior door has a two-step latch raccoons cannot manipulate and 3-inch exterior screws or carriage bolts through hinges. A raccoon can open a simple slide bolt; require a lift-and-turn plus a carabiner or a keyed barrel lock. Doors should be framed in 2×2 or 2×4, sheathed in 1/2-inch plywood or thicker, with no gap exceeding 1/4 inch between door and jamb.
Checklist: Doors & Latches
- Human door: solid core (not hollow), weatherstrip to close gaps bigger than 1/8 inch.
- Pop door: vertical slide or side-hinged panel in 3/4-inch lumber with a guide track; add a spring-loaded bolt plus carabiner.
- Hinges: at least two 4-inch strap or T-hinges per door, installed with through-bolts or 3-inch screws into framing.
- No rope pulls routed outside without a protected channel; cover cable routes with 1/2-inch EMT conduit.
Hardware Cloth Everywhere It Belongs
Cover all vents, windows, and weak panels with 1/2-inch, 19-gauge (or heavier) galvanized hardware cloth, not chicken wire. Fasten with 1-inch exterior screws and fender washers every 4 inches along the perimeter; overlap seams at least 2 inches and stitch with galvanized wire or hog rings every 3 inches.
The standard: cover all vents, windows, and weak panels with 1/2-inch, 19-gauge (or heavier) galvanized hardware cloth, not chicken wire. Chicken wire keeps chickens in; it does not keep predators out. Fasten hardware cloth with 1-inch exterior screws and fender washers every 4 inches along the perimeter; staple guns alone are a failure point. Overlap seams at least 2 inches and stitch with galvanized wire or hog rings every 3 inches.
Where to Apply It
- Ventilation openings: full coverage, mounted inside the wall framing so pry attempts hit wood and washers, not loose mesh.
- Windows: mesh on the inside against framing; if you add a decorative exterior screen, treat it as cosmetic only.
- Run walls: if your run is framed in 2x4s, skin the entire frame in hardware cloth up to the roof with no gaps at corners.
The Dig Line: Skirt, Trench, or Slab
No bare soil edge under the coop or run: install a horizontal dig skirt, a vertical trench, or a solid floor. A horizontal skirt is the best balance — lay hardware cloth 24 inches wide flat on the ground, pin it with 6-inch landscape staples every 12 inches, and bury under 2–3 inches of soil, gravel, or pavers.
The standard: no bare soil edge under the coop or run. Install one of three barriers: a horizontal dig skirt, a vertical trench, or a solid floor. A horizontal skirt is the best balance: lay hardware cloth 24 inches wide flat on the ground, attached to the base of the wall and extending outward. Pin it with 6-inch landscape staples every 12 inches and bury under 2–3 inches of soil, gravel, or pavers. For a vertical trench, bury hardware cloth down 18 inches and bend it outwards at the bottom to form an L. According to Wild Hearth Life and Garden Betty, use 1/2-inch hardware cloth (19-gauge minimum, the 23-gauge version sold at big-box stores is not predator-rated and can be torn open by raccoons and dogs) and install a buried or surface-laid apron extending 18-24 inches outward from the base — 24 inches preferred in areas with foxes, coyotes, or free-roaming dogs.
Floors That Stop Diggers
- Coop floor: solid 3/4-inch plywood on joists at least 8 inches above grade, or pour a 2–3 inch concrete slab.
- Run floor: if you can’t pour slab, lay a 2×2-inch welded wire panel on the ground under bedding and connect it to the wall cloth; cover with 4–6 inches of sand, gravel, or wood chips so birds don’t contact bare wire.
Roof and Walls: Top Attack Is Real
No open tops: a run needs a solid roof or hardware cloth roof that cannot be sagged by snow or a climbing predator. Use corrugated metal or polycarbonate panels on 2×4 purlins spaced 24 inches on center, screwed with gasketed roofing screws; if you use hardware cloth on top, support it every 12–16 inches with cross-members.
The standard: no open tops. A run needs a solid roof or hardware cloth roof that cannot be sagged by snow or a climbing predator. Use corrugated metal or polycarbonate panels on 2×4 purlins spaced 24 inches on center, screwed with gasketed roofing screws. If you use hardware cloth on top, support it every 12–16 inches with cross-members and avoid spans wider than 3 feet.
Wall Integrity
- Siding: 1/2-inch plywood or better; no OSB exposed to weather without cladding.
- Seams: back every vertical seam with a stud and cover with trim; caulk gaps over 1/8 inch before screening.
- Under-eave gaps: block with 1x lumber and hardware cloth; leave ventilation open but screened.
Ventilation That’s Safe and Sufficient
Provide 1 square foot of screened ventilation per 10 square feet of floor year-round, with openings above roost height and covered in 1/2-inch hardware cloth. In cold climates, add adjustable baffles but never remove the mesh; aim for roosts 12–18 inches below the lowest vent edge.
The standard: provide 1 square foot of screened ventilation per 10 square feet of floor year-round, with the openings above roost height and covered in 1/2-inch hardware cloth. In cold climates, add adjustable baffles but never remove the mesh. Drafts at bird level cause frostbite; high venting removes moisture without chilling. Aim for roosts 12–18 inches below the lowest vent edge.
Feed, Water, and What Attracts Trouble
No overnight food scent outside the coop, and water that doesn’t create a mud magnet: bring feeders indoors at dusk or use a treadle feeder with a 2-step pedal. Hang feeders and waterers 6–8 inches off the coop floor or run grade, and secure all stored feed in a metal bin with a tight lid; plastic is chewable.
The standard: no overnight food scent outside the coop, and water that doesn’t create a mud magnet. Bring feeders indoors at dusk or use a treadle feeder with a 2-step pedal. Hang feeders and waterers 6–8 inches off the coop floor or run grade, and keep the run dry with 3–4 inches of coarse wood chips and roof overhangs of 8–12 inches. Secure all stored feed in a metal bin with a tight lid; plastic is chewable.
Day vs. Night: Different Rules, Same Discipline
Night losses come from gaps and latches; day losses are usually aerial or through an open gate: lock the coop and run by 30 minutes after sunset and do a physical door tug test. For free-range time, stay outside with the flock or string poultry net fencing 48 inches tall and hang mylar tape every 6–8 feet as a raptor visual.
Night losses come from gaps and latches; day losses are usually aerial or through an open gate. Lock the coop and run by 30 minutes after sunset; do a physical door tug test. For free-range time, stay outside with the flock or string poultry net fencing 48 inches tall and hang mylar tape every 6–8 feet as a raptor visual. Provide two covered shelters in the yard—plywood A-frames or shrubs—so hens are never more than 10–12 feet from cover.
Rodents and Small Predators: Tighten the Small Stuff
Deny entry holes and food, then trap outside the coop footprint: seal any gap larger than 1/4 inch with hardware cloth or steel wool and exterior caulk. Use rat-size snap traps in covered boxes along exterior walls, never inside the coop where birds can reach them; if you have a persistent weasel problem, double up with an interior liner of hardware cloth on the lower 24 inches.
The standard: deny entry holes and food; then trap outside the coop footprint. Seal any gap larger than 1/4 inch with hardware cloth or steel wool and exterior caulk. Use rat-size snap traps in covered boxes along exterior walls, never inside the coop where birds can reach them. If you have a persistent weasel problem, double up: add an interior liner of hardware cloth on the lower 24 inches of coop walls and floor edges.
Electric Assistance on Fences and Runs
For high-predator areas, add a low-voltage perimeter zap: run a single electrified wire at 6 inches and another at 12 inches outside the run, offset from the wall with 4-inch insulators. Keep vegetation trimmed to under 2 inches so you’re not grounding out, and test weekly with a fence tester aiming for at least 3,000 volts.
For high-predator areas, add a low-voltage perimeter zap. Run a single electrified wire at 6 inches and another at 12 inches outside the run, offset from the wall with 4-inch insulators. Keep vegetation trimmed to under 2 inches so you’re not grounding out. Test weekly with a fence tester and aim for at least 3,000 volts on the line.
Seasonal Weak Points: Heat, Freeze, and Storms
Summer heat loosens materials and sags netting; winter freeze heaves posts and opens gaps: re-tension roof panels and cloth every June and inspect the dig skirt edge in late fall. After any wind event over 30 mph, walk the perimeter and push on every panel; if it flexes more than 1/2 inch, add a fastener.
Summer heat loosens materials and sags netting; winter freeze heaves posts and opens gaps. Re-tension roof panels and cloth every June, checking screw bite and adding supports where spans exceed 36 inches. In late fall, inspect the dig skirt edge and re-bury any sections exposed by erosion; add gravel bands 6–8 inches wide to shed water away. After any wind event over 30 mph, walk the perimeter and push on every panel; if it flexes more than 1/2 inch, add a fastener.
What Fails in the Real World
The common failures are predictable: staples only holding hardware cloth, chicken wire on runs, no dig barrier, one-step latches, and open tops. Fix sequence if you’re overwhelmed: 1) add latches that lock, 2) hardware-cloth the vents and windows, 3) roof the run, 4) install a 24-inch skirt, 5) replace any chicken wire below 6 feet with hardware cloth.
The common failures are predictable: staples only holding hardware cloth, chicken wire on runs, no dig barrier, one-step latches, and open tops. Fix sequence if you’re overwhelmed: 1) add latches that lock, 2) hardware-cloth the vents and windows, 3) roof the run, 4) install a 24-inch skirt, 5) replace any chicken wire below 6 feet with hardware cloth.
Predator-Proof Chicken Coop Audit — Walk It Tonight
A systematic walkthrough covers gaps, latches, mesh, skirt, roof, floor, hinges, feed, night routine, and perimeter: no opening over 1/2 inch, each door needs two-step action, all vents/windows skinned in hardware cloth. Start with the door tug test and a flashlight search for light gaps, then work outward to the dig skirt and vegetation clearance.
- Gaps: no opening over 1/2 inch anywhere; door clearances under 1/4 inch.
- Latches: each exterior door needs a two-step action; add carabiners or keyed locks.
- Mesh: all vents/windows/run skinned in 1/2-inch hardware cloth, washered every 4 inches.
- Skirt: 24-inch horizontal hardware cloth skirt, pinned every 12 inches, buried 2–3 inches.
- Roof: solid panels or well-supported cloth; no span over 3 feet without support; no netting as the only barrier.
- Floor: solid plywood or slab in coop; run has buried wire or skirt tied to walls.
- Hinges/fasteners: 3-inch exterior screws or bolts; no rusted hardware; pull-test panels.
- Feed: stored in metal; no overnight feed outside; water hung 6–8 inches up; mud managed with chips/gravel.
- Night routine: doors closed by +30 minutes after sunset; visual check that every latch is set.
- Perimeter: trim vegetation to 6 inches along walls; remove ladders/woodpiles within 3 feet of run walls.
Frequently Asked Questions
What gauge hardware cloth is best for a predator-proof chicken coop?
Use 19-gauge or heavier galvanized hardware cloth with a 1/2-inch mesh. Lighter 23-gauge tears under a dog’s paw or raccoon prying. Fasten with screws and washers every 4 inches.
How deep should I bury wire to predator-proof a chicken coop run?
Bury hardware cloth to 18 inches in a vertical trench with an outward L at the bottom, or install a 24-inch horizontal skirt just under the surface. The skirt blocks digs more efficiently for the labor.
Is chicken wire ever OK on a predator-proof chicken coop?
Use chicken wire only as a secondary barrier inside a secured envelope, never as an exterior defense. For any wall, window, or run surface, the primary layer must be 1/2-inch hardware cloth fastened with washers.
Do I need a roof over the run to be predator-proof?
Yes—an open top invites hawks, owls, and climbing raccoons. Install a solid roof or a hardware cloth lid supported at least every 12–16 inches; netting alone is not predator protection.
What’s the best latch to stop raccoons on a coop?
Any latch that requires two motions, like a spring-loaded bolt plus a locking carabiner or a keyed barrel lock. Mount it at least 36 inches off the ground and shield with a wood cleat so there’s no leverage edge.
How much ventilation can I have without risking predators?
Provide 1 square foot of screened vent per 10 square feet of floor, with all openings covered in 1/2-inch hardware cloth and placed above roost height. Keep lower edges at least 12–18 inches above the highest perch.
Quick Comparison: Predator Defense by Threat
| Predator | Attack Method | Time of Day | Defense Needed |
| Raccoon | Reaches through wire, opens latches, pulls birds through gaps | Night | Small-gauge mesh, two-step latches |
| Fox | Digs under fences, squeezes through small openings | Dawn/dusk, night | Buried apron 24 inches, solid walls |
| Hawk/Owl | Swoops from above | Day (hawk) / Night (owl) | Overhead cover, solid roof |
| Weasel/Mink | Squeezes through gaps as small as 1 inch | Any time | 1/2-inch hardware cloth with no gaps |
| Dog/Coyote | Digs, chews, crashes through weak points | Any time | 19-gauge hardware cloth, sturdy framing |
| Rat/Snake | Enters through small gaps, raids eggs | Night | 1/4-inch cloth in nest areas, egg collection |
Do It Right Once
The standard is unforgiving but simple: 1/2-inch hardware cloth, a 24-inch dig skirt, solid doors with two-step latches, and a closed top. Start tonight by choosing one weak point and fixing it—swap every simple slide bolt for a spring bolt plus carabiner, then walk the perimeter with a flashlight to find gaps bigger than a dime. Firm opinion: You can repaint trim later; you cannot postpone the hardware cloth. For detailed guidance on specific predator threats, the raccoon-proofing guide explains locks and latches in detail. If you’re dealing with digging predators, the predator apron guide covers skirt installation step-by-step. And when you need to understand the difference between wire types, the hardware cloth vs. chicken wire guide breaks down the critical differences.