8 Rustic Chicken Coop Ideas — Built From Salvage and Weathered Wood
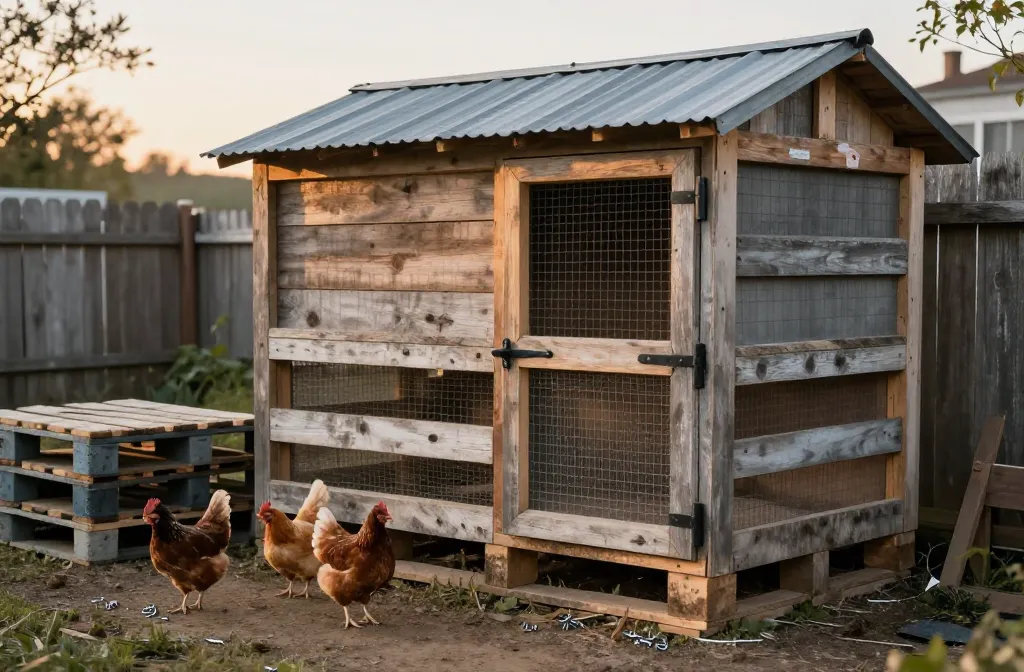
Rustic chicken coop ideas saved my budget the spring I stood in the feed aisle doing math on my phone and realized the “starter” shed kits were going to eat my entire run fund. I went home, stared at the stack of gray pallets behind the hardware store, and built my first coop from salvage and weathered wood for under what I’d just spent on feed and grit that month. This is exactly what I built (and rebuilt), what it cost me in real numbers, and how it held up through real weather and raccoons. By the end, you’ll have eight salvage-forward builds and swaps you can do with a circular saw and a Saturday, plus the parts I wouldn’t cheap out on again.
1. Pallet-Frame Chicken Coop: Free Bones, Paid-for Predators
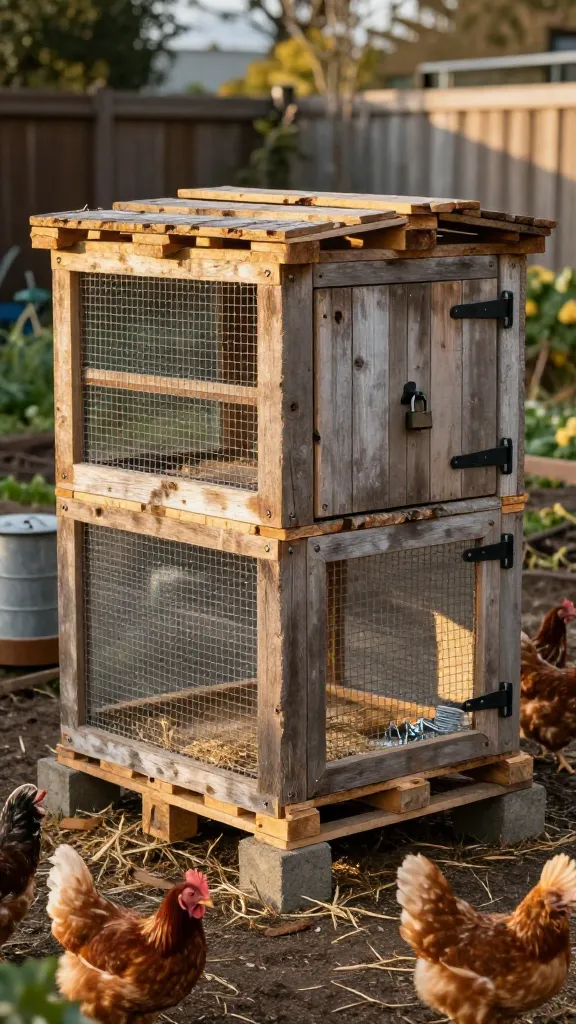
I started with what I could actually lift: 6 busted pallets the garden center was happy to let me haul off. The first time I tried this, I lag-screwed the pallet corners, skinned the outside in weathered fence boards I found on the curb, and felt like a genius for getting a standing box in a day.
The frame was free; the real spend was non-negotiable: a 25-foot roll of 1/2-inch hardware cloth for about $45–$70 in my area, exterior screws around $12, and two heavy hinges plus a hasp at $18–$25. Roofing ate another $50–$90 depending on whether I used corrugated panels or salvaged tin. Call it a $130–$200 coop that has now seen 3 winters with one midlife tune-up. The catch: pallets vary. On my first go, a split stringer meant the door never hung square; I ended up sistering a 2×4 inside that corner for $5 in scrap and an hour of muttering.
Make it yours: if you’re short on pallets, use two full pallets as the short walls and frame the long walls with 2x4s; it cuts your hardware cloth waste and gives you straighter door edges without losing the salvage look.
2. Reclaimed Barn Tin Roof: Cool Shade and Real Drainage
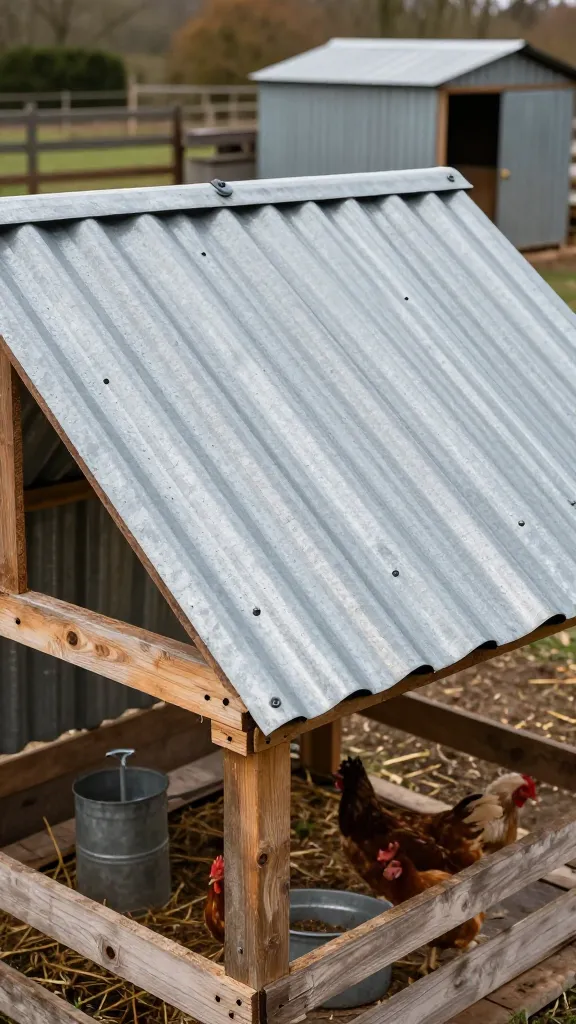
I bought a stack of dented barn tin from a neighbor who was re-roofing his goat shed. I wiped each panel down, pre-drilled the ribs, and learned the hard way that tin will skate across a roof pitch if you sneeze before you set the screws.
The tin cost me $5–$8 per 8-foot panel for 5 panels, so $25–$40, and a box of roofing screws with washers ran $9–$14. I framed a 1:12 to 2:12 pitch with salvaged 2x4s (free from a deck demo), overhung the front by 6 inches, and added a 2-inch ridge gap under the tin for ventilation. It has handled two hailstorms and a week of 100°F without warping. The gotcha: tin sings in wind. I added a purlin mid-span and 6 more screws—call it another $3—to stop the rattle.
Make it yours: paint the underside of the tin flat white; a $12 quart cut the coop’s midday heat by a few degrees and made red mites easier to spot.
3. Salvaged Window on a Hinge: Light Without the Drafts
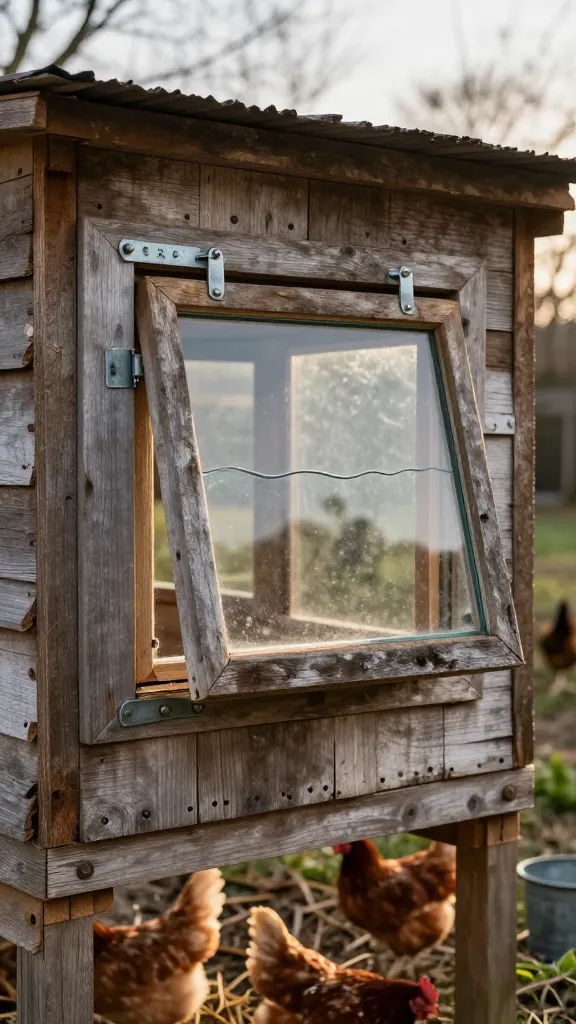
The first window I installed was a roadside find with a wavy single pane that looked dreamy and leaked air like a flute. My birds were fine in summer, but winter made the roost side drafty, and I saw frost on comb tips after one real cold snap.
I rebuilt it as a top-hinged clerestory: a 24×18-inch salvaged sash on two exterior hinges ($8–$12) with a 1/4-inch polycarbonate sheet set behind the old glass for $18–$25, and weatherstrip ($6). Opened to 45° in summer, it chimney-vents out ammonia; closed and latched tight in winter, it doesn’t draft across the roosts. The first version cost me about $10 and lasted 1 season; the reinforced version ran $35–$45 and is in year 3. Don’t skip the hardware cloth behind the window; glass is not predator-proof.
Make it yours: if you can’t find an old sash, frame a window opening and screw in a cut piece of polycarbonate with a 1-inch batten—still looks rustic, still cleans easily.
4. Board-and-Batten Coop Siding From Fence Planks: Weathered Look, Straight Walls
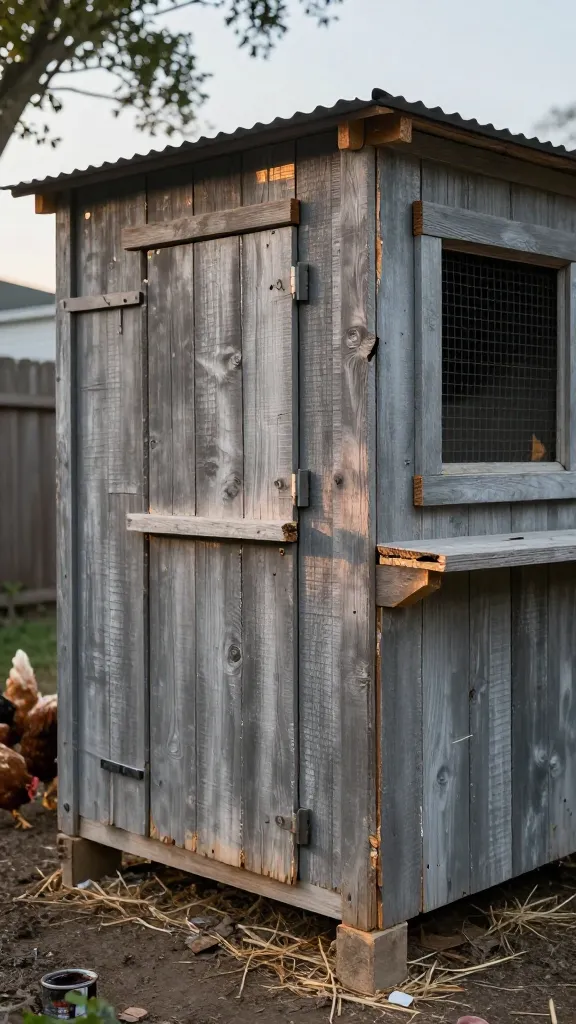
I pulled 22 gray fence planks off a curb on bulk trash night and learned why they were there: cupped, split ends, uneven widths. The first time I nailed them edge-to-edge, they shrank and let daylight through by July.
The fix was true board-and-batten. I ran full-width boards vertically, then overlapped every seam with a 3-inch rip from the same stock. Costs: fasteners ($10–$15) and a quart of exterior stain I already had, otherwise $14–$22. It took me a full Saturday solo. The siding is still tight at 2 years. The visible downside: you’ll burn through blades on old wood—plan on one $7–$10 circular saw blade per 40–50 cuts if there are hidden staples.
Make it yours: set a 3/4-inch air gap with furring strips behind the siding on the south wall; it cost me $6 in scrap and keeps the coop cooler by letting hot air rise behind the boards.
5. Log-Style Roosts From Stormfall Branches: Free Perches the Birds Actually Like
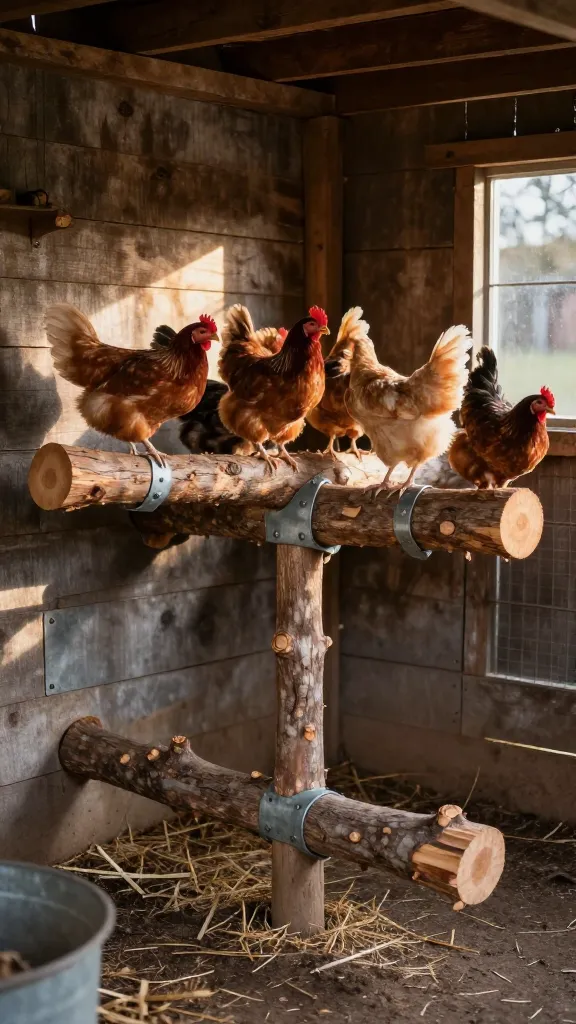
After a windstorm, I dragged home two ash branches thinking “free roosts.” I chiseled off the nubs, sanded the top curve, and wedged them between supports. The first install sagged because I underestimated live weight: 6 hens all chose the same bar and I watched it bow like a diving board.
Second try, I set the main roost at 12 inches from the back wall, 18 inches off the floor, with a 2.5–3-inch diameter branch on L-brackets and a center post. Zero cost for wood, $6–$9 for brackets and screws. It’s been steady for 18 months. I allow 10–12 inches of perch length per standard hen; for 8 birds, that’s at least 80–96 inches total spread across 2 bars. Sand the top; splinters aren’t rustic, they’re mean.
Make it yours: switch to a 2×3 with the 2-inch side up if you don’t have branches; it still gives a flat top to cover toes in winter and costs $4–$6 per 8-footer.
6. Scrap-Lid Nest Boxes: Buckets, Crates, and the One Angle That Worked
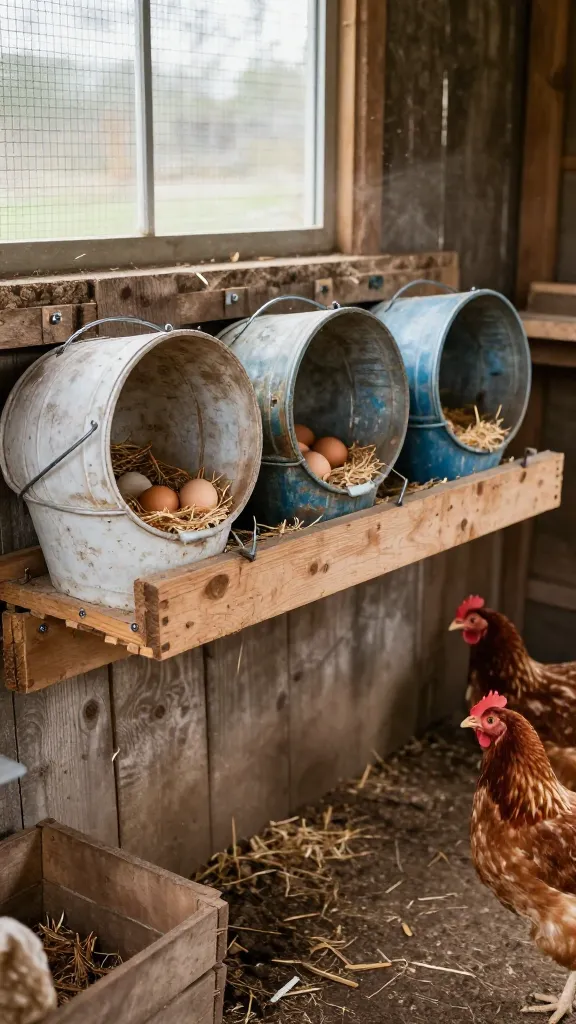
I tried the cute crate nests because Pinterest said the hens would love them. Mine kicked shavings out the front like toddlers, and one hen started laying on the coop floor instead. That was my sign I’d built the wrong angle and lip.
What has worked for 2 years: three 5-gallon buckets cut open, rim tilted up 1 inch, with a 5-inch front lip screwed on to hold bedding. Cost was $0–$5 per bucket used, $4 for a scrap 1×6 lip, and $6 for screws. I mount nests at 16–18 inches off the floor but below the roost height so they don’t sleep in them. The rustic look is there; the inside is actually comfortable. The mistake I won’t repeat: I once used an old milk crate with 1-inch holes and a thin liner—eggs cracked against the plastic. A 1-inch stall mat scrap fixed it for $3.
Make it yours: if you hate buckets, a wood box at 12x12x12 inches with a 2-inch front lip works; line it with a removable rubber mat so you can spray it out once a month.
7. Hardware-Cloth Coop Skirt and Stone Apron: Rustic Look, Real Predator Stop
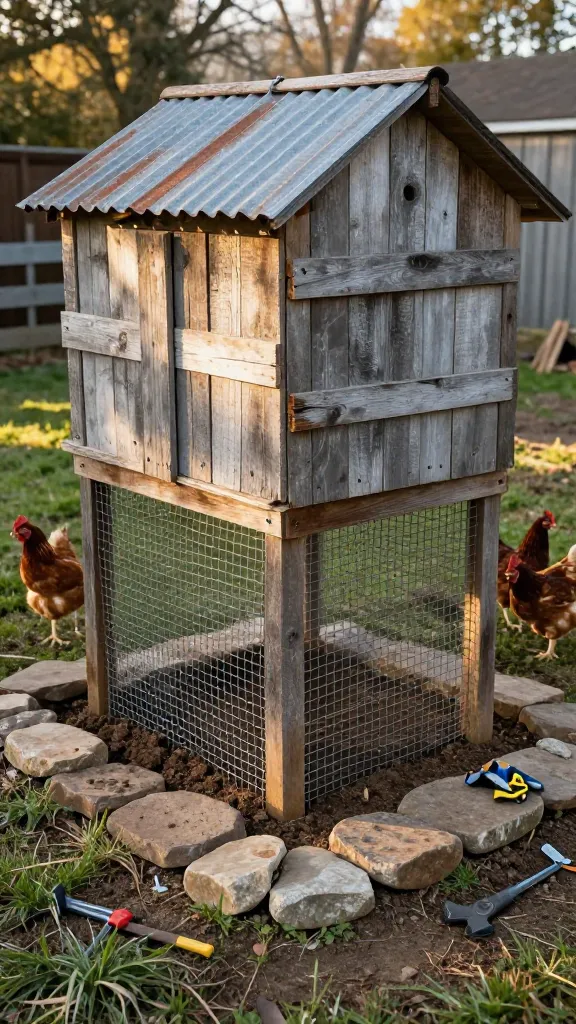
The first summer I “saved” $30 by skipping an apron and just set heavy rocks around the perimeter. A raccoon family proved I’d basically made them decorative handles. I woke up to feathers and learned fast.
My rebuild: a 24-inch wide hardware cloth skirt stapled to the bottom frame and laid flat under the soil and stones. I overlapped corners by 6 inches, staked it with landscape staples ($6–$10), and covered it in 2 inches of soil and then salvaged fieldstone. Costs: $25–$45 for another 25 feet of 1/2-inch cloth, plus my time moving rocks. It has stopped diggers for 2 seasons. The rustic payoff is you still see stone, but the real work is the buried metal. I won’t run a coop without a metal apron again.
Make it yours: in super rocky soil, bend a L-shaped kickout: 12 inches vertical down, 12 inches out. It uses the same roll length and makes trenching easier when you hit cobble.
8. Scrap Wood Pop Door on a Counterweight: One-Finger Open With Twine and Bricks
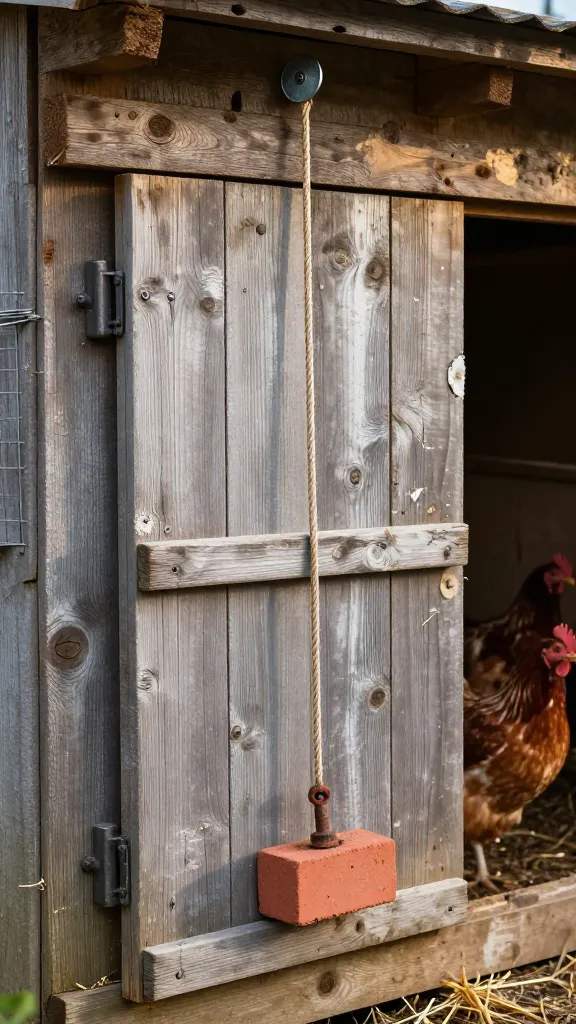
I built a solid pop door the first month and then realized how often I open and close that thing with an armload of feed. The original door stuck in the track the first rain and I had to shoulder it open like a barn in a Western.
The keeper: a vertical sliding door from a weathered fence plank, riding in 1×2 guides, with a paracord loop over a pulley to a brick counterweight in a scrap pipe. Materials: wood was free, $6–$9 for a pulley and eye screws, $2 for cord, and one brick from the side yard. It weighs out so you can lift with a finger but stays put when latched. I added a positive slide bolt for $6 after I watched a raccoon try to lift the bottom. Two years in, still smooth even after freezing rain. The only con: you have to keep the track clean; I run a paint stick down it once a week.
Make it yours: if you want hands-off mornings, this same track accepts a simple battery timer opener later—build square now and you won’t rebuild when you upgrade.
Frequently Asked Questions
How do I find salvage wood that’s safe for a chicken coop?
Look for unpainted, untreated lumber or fencing, and avoid anything with flaking paint unless you can confirm it’s modern and lead-free. I source from curbside fence tear-outs, garden centers’ pallet piles, and neighbor demo scrap, then cut back 2–3 inches from any soft ends and pull every staple I see. If a piece smells like chemicals or oil, I don’t use it inside the coop.
Are rustic chicken coop builds sturdy enough for predators?
Yes if you spend your real money on 1/2-inch hardware cloth, solid latches, and a buried apron. On my pallet-frame build, the lumber was free but I still spent $130–$200 total because the wire and roofing matter most. Decorative barn wood won’t stop a raccoon; hardware cloth and a skirt will.
What’s the cheapest way to roof a small build with a weathered look?
Salvaged tin or corrugated plastic over simple 2×4 rafters is the best cost-to-durability play I’ve used. I paid $25–$40 for enough tin to roof a 4×6 footprint and $9–$14 for screws, and it’s lasted through hail. Keep at least a 1:12 pitch so rain actually leaves.
How much ventilation does a small rustic build actually need?
As a rule, aim for 1 square foot of vent area per 10 square feet of floor, high on the walls so it doesn’t draft across roosts. My 4×6 coop has around 3 square feet total via a clerestory window and eave gaps under the tin. I cover all openings with 1/2-inch hardware cloth year-round.
Can I build a chicken coop from pallets without it looking junky?
Use pallets for the internal frame and skin the outside with weathered fence boards in board-and-batten; that keeps the lines straight and hides odd pallet spacing. I spent about $22–$37 on fasteners and stain to pull it together, and most people assume I bought a kit until they see the pallet cores from inside.
Start With the Salvage, Spend on the Wire
If you’ve got a stack of weathered boards and one Saturday, you can frame something real and safe. Start by pricing a roll of hardware cloth and hinges, then build your rustic shell around that number. The first step I’d take this weekend: grab two pallets, a box of exterior screws, and mark out a 4×6 footprint—stand two walls, square them, and you’re already past the hardest part.
— ask me how I know.