8 Chicken Coop Designs Compared — With Pictures and Honest Verdicts
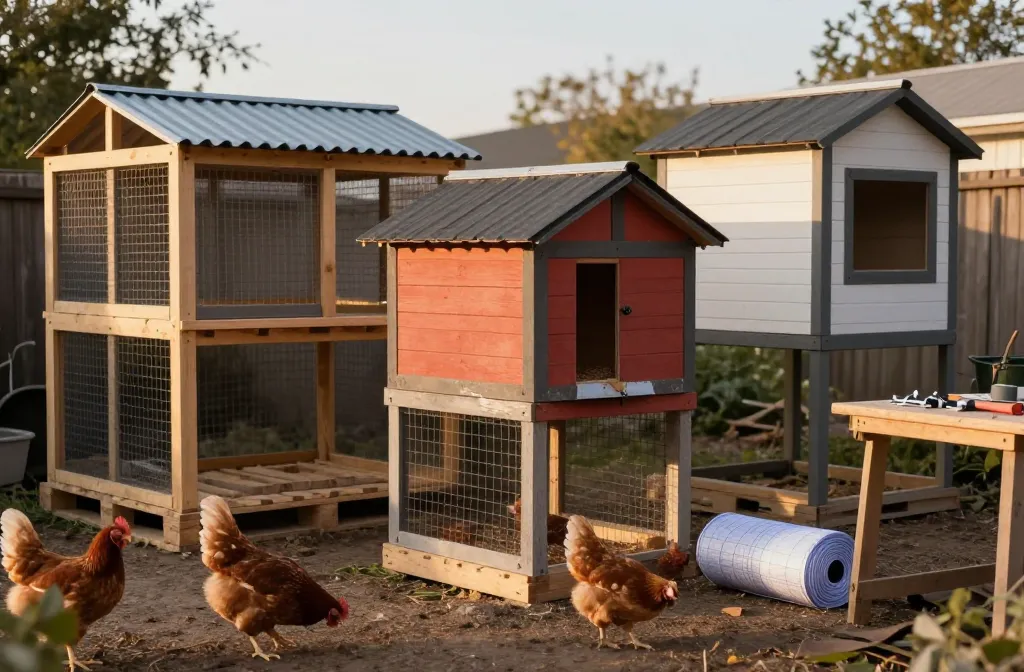
Chicken coop designs are easy to pin and hard to live with; I learned that standing in the feed aisle with a 25-foot roll of hardware cloth in my cart and a number in my head that kept being wrong. I started with a painted playhouse “coop” that cost me $240 to adapt and lasted 11 months before the roof warped and a raccoon peeled a hasp off like a soda tab. By the end of this, you’ll have 8 builds and buys I actually used, what each one cost me or would cost you in 2023–2025 pricing, and the honest verdict on who they suit. I’ll show you where my first attempts failed, what fixed it, and what I’d do again on a normal Saturday without a table saw. Photos are included where I remembered to take them before the mud won.
1. The Pallet-Frame Chicken Coop: Free Lumber, 0 That Actually Matters
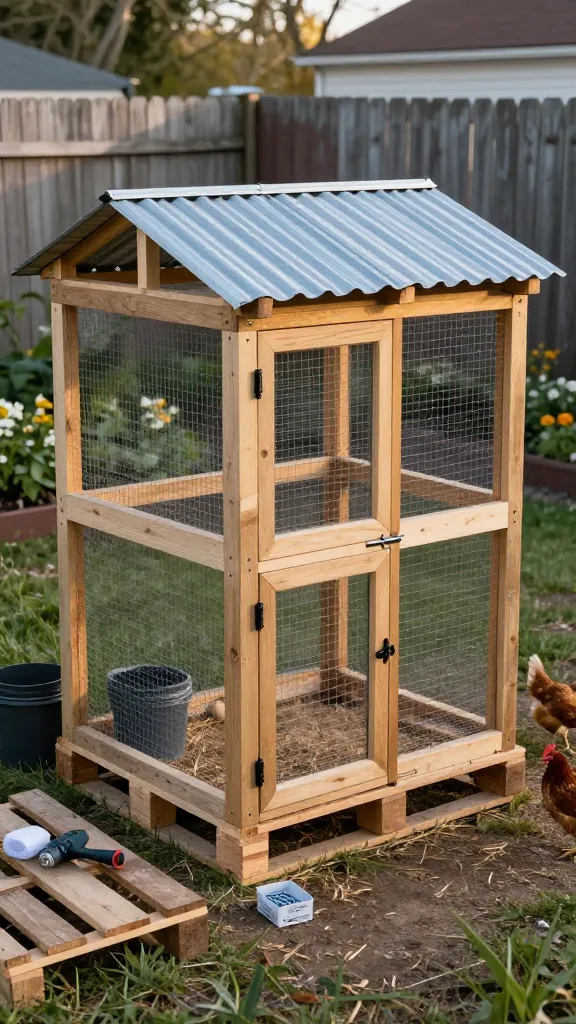
A pallet-frame coop uses free or cheap pallets for the structure, with real costs going toward a 25-foot roll of 1/2-inch hardware cloth, corrugated roof panels, and exterior hardware, totaling $160–$225 if pallets are free and you own a circular saw. The key is treating pallets as a frame, not finished walls, and adding a sill plate to prevent water wicking.
I wanted a walk-in coop without the $1,200 kit price, so I begged pallets from a garden center and a neighbor’s delivery pile. The first weekend I stacked them like Lego and learned pallets aren’t square or kind. Version 2 worked: 6 pallets, lag screws, and a simple shed roof.
The free part is the frame. The real costs were a 25-foot roll of 1/2-inch hardware cloth for $48–$75 depending on gauge and year, two 8-foot corrugated roof panels for $48–$70, plus exterior screws, hinges, and a hasp around $25–$40. Call it $160–$225 all-in if the pallets are free and you already own a circular saw. Mine’s gone through 3 winters; I repaint the roof screws every fall. The miss on my first try was skipping a sill plate; the soft pallet stringers wicked water and the door sagged in 6 weeks.
University extension research on coop design emphasizes that proper ventilation and dry footing matter more than insulation. I learned this when condensation dripped from my sealed pallet coop one January — now I keep high vents open and check for moisture on cold mornings.
Make it yours: if you’re renting, build the pallet walls as two L-shaped panels and bolt them together so the whole coop breaks down into 4 pieces for a move. It adds about $12 for carriage bolts and saves your deposit.
2. A-Frame Tractor Build: 0 Mobile Shelter You Can Move Solo
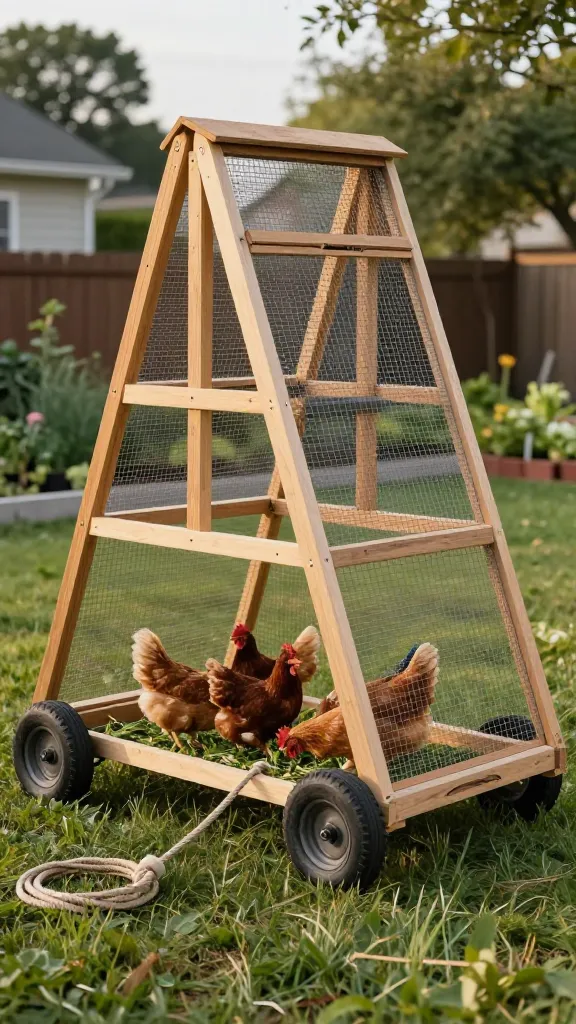
An A-frame tractor is a mobile shelter that moves across your yard, giving birds fresh ground while spreading their impact, with costs around $280 for a 10-foot version using 2×3 studs, poultry netting, hardware cloth, and wheels. The honest catch is wind — an A-frame can kite if you don’t stake it, so tent stakes are essential.
I built an A-frame because my lawn looked like a moonscape and I wanted the birds to mow, not excavate. The first tractor I tried was too heavy; I could move it 6 feet and then I had to go lie down.
The keeper version was a 10-foot A-frame with 2×3 studs instead of 2x4s, poultry netting plus hardware cloth in the lower 24 inches, two 10-inch solid wheels, and a rope pull. Materials ran $220–$320 depending on lumber prices; wheels were $35–$60 for the pair. It held 4 hens comfortably, and I moved it 8–10 feet daily. The honest catch is wind: an A-frame can kite if you don’t stake it. My scare was a spring storm that shifted it 2 feet; since then I pound in two tent stakes per side, $10, done.
Make it yours: add a 12-inch-wide hardware cloth skirt on the outside perimeter instead of burying wire; it cost me $18 extra and stopped every digger we have.
3. Hoop Run Shelter: 12×8 for 0 That Laughs at Snow
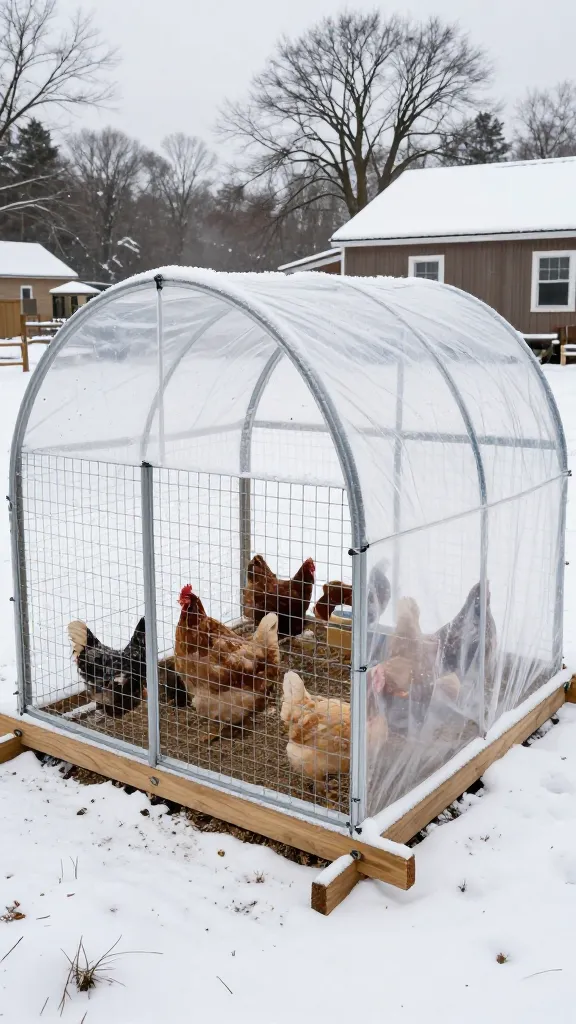
A hoop run uses cattle panels arched over skids to create a covered run space that sheds snow and handles weather better than tarps, with costs around $190–$350 depending on the cover material. The arch design distributes weight evenly, making it ideal for snow country, though headspace at the edges is limited.
When our flock hit 10, I needed covered run space fast. I tried the blue-tarp-over-posts thing. It flapped itself to death in 3 weeks and ended up in the neighbor’s maple.
The fix was a 12×8 hoop run: 4 cattle panels arched over 8-foot 2×6 skids, screwed to each panel with heavy-duty fence staples, then skinned in hardware cloth up to 3 feet and 2×4 fencing above. A UV-stable greenhouse cover or clear poly sheeting handled snow better than tarps. My costs: panels $120–$160 for four, skids and screws $35–$55, hardware cloth $48–$75, cover $35–$60. Total $190–$350 depending on what you cover with. Ours took a 9-inch wet snow without collapsing because the arch sheds load. The downside is headspace at the edges — I cracked my head twice before I learned to walk the center line.
Make it yours: swap the skids for 16-inch ground anchors if you’re on a slope; four of them were $24 and it stopped the slow downhill creep.
4. Shed-Conversion Chicken Coop: 0 Retrofit That Doesn’t Look DIY
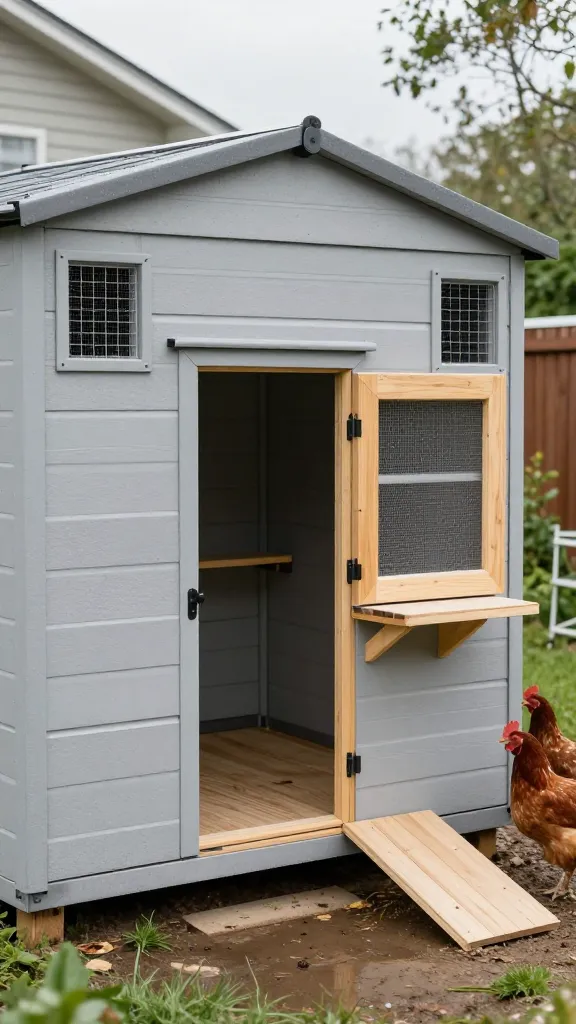
A shed-conversion coop repurposes an existing structure into a clean, draft-free space by adding a pop door 6 inches above floor height, foundation vents for ventilation, hardware cloth over all openings, and a vinyl floor for easy cleaning, with total costs around $480–$560 including a used shed. The result is the least-DIY-looking coop you can build without starting from scratch.
I bought a dented 6×8 resin shed off a neighbor for $150 because I was tired of building in the rain. First go I cut a pop door too low; rain ran in and the litter turned into a lasagna pan.
Here’s what worked: cut a pop door 6 inches above floor height, frame with 1×3 pine, and hang a simple out-swinging door with two hinges. Add two 8×16 foundation vents high on opposite walls for $12–$20 each, cover every opening with 1/2-inch hardware cloth, and lay a vinyl peel-and-stick floor for $24–$40 so shoveling is easy. My total including the used shed was $480–$560. It was the cleanest, least-drafty coop I’ve had. Resin does heat up in direct sun; I hung a shade sail for $30 and the interior dropped 8–10°F on July afternoons.
Make it yours: if you’re in serious winter, add a plug-in thermostat switch ($18–$28) and a rated heated base under the metal waterer to keep it above freezing without heating the whole coop.
5. The 4×8 Starter Box: 0, Built in a Day With One Saw
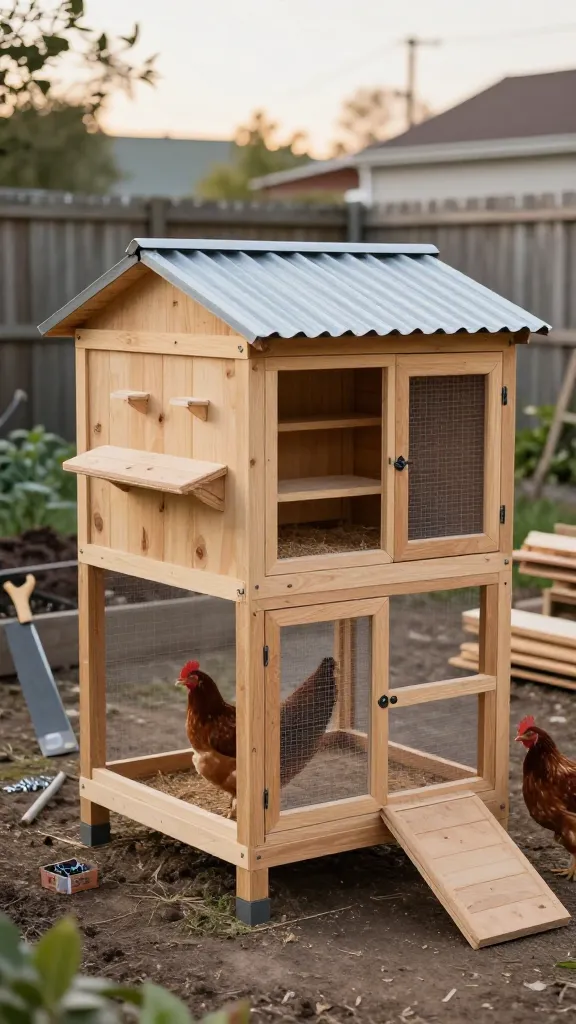
A 4×8 starter box is a compact, efficient coop built from plywood on runners with a hinged shed roof for top access, external or internal nest boxes, and two roosts, costing $310–$415 and buildable in a day with one circular saw. The catch is weight at 200–300 pounds, so a chain stop on the roof prevents hinge damage.
I built this when a neighbor texted “I impulse-bought chicks,” which is how half of us start. The first version had a fixed roof; egg collection required yoga and a headlamp.
The keeper version was a 4×8 plywood box on 4×4 runners, with a hinged shed roof for top access, two 4-foot roosts at 18 inches high, and external nest boxes. Materials: two sheets exterior plywood $70–$110, framing lumber $60–$90, hardware cloth $48–$75, roofing (corrugated or shingles) $60–$100, hardware $25–$40. Call it $310–$415. I built the shell in 6 hours solo with a circular saw and speed square. The catch is weight: it’s 200–300 lb. I added a chain on the roof to stop it hyperextending and smashing the hinge — because it did, once, and that was a $12 lesson.
Make it yours: skip external boxes in snow country and do internal boxes with a top lid; it saved me $22 in flashing and zero snow melt drips.
6. Deep-Litter Coop Setup: /Month Saved, Cleaner Winter Air
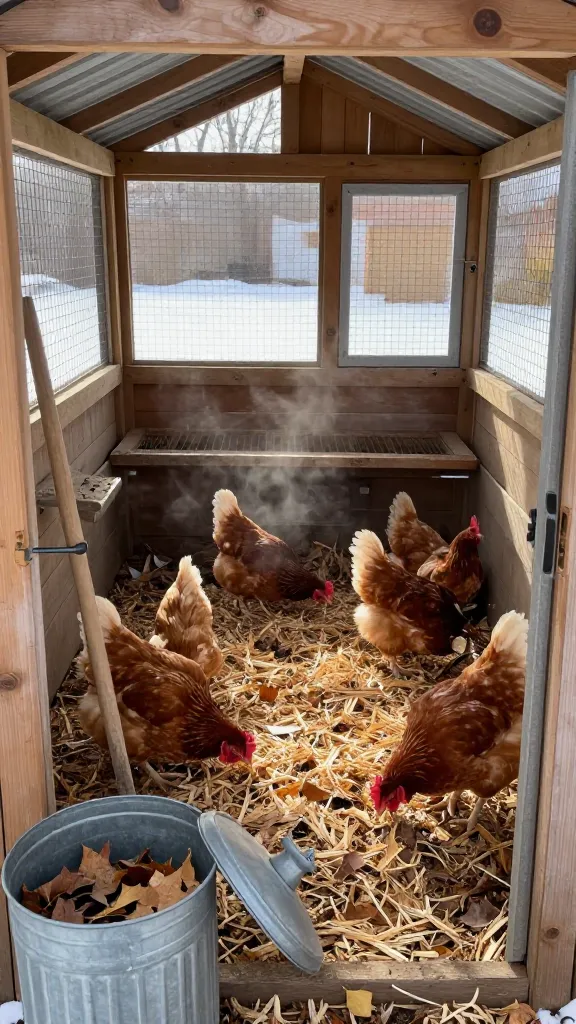
Deep litter starts with 3–4 inches of kiln-dried pine shavings, builds to 8–10 inches with shredded leaves and wood chips, and requires weekly stirring with a rake, reducing bedding costs by about $35 per month while creating compost-ready material after 4–6 months. The critical line is moisture — water in the coop spikes ammonia in days.
The first winter I bagged out pine shavings every week and paid for it — $7–$9 a bale times 4–5 bales a month. My trash can smelled like a hamster cage.
Switching to deep litter in the coop changed the math: start with 3–4 inches of kiln-dried pine shavings, add shredded leaves and coarse wood chips as they compact, and stir weekly with a rake. I now buy 1–2 bales a month in winter ($14–$18) and use saved leaves for free browns. After 4–6 months you pull out compost-starting material. The honest part: moisture is the line you can’t cross. I learned to hang the waterer in the run; water in the coop made ammonia spike in 3 days, and my eyes told me before a tester did.
Penn State Extension research on deep litter confirms that proper management reduces ammonia and creates beneficial composting organisms. The key is keeping litter dry and aerated — if it smells, it’s too wet.
Make it yours: if you’re in a humid area, add two more high vents and a 2-inch lip at the door so litter doesn’t spill; it cost me $14 and kept bedding inside where it belongs.
7. Predator-Grade Doors and Latches: That Stops the 2 a.m. Panic
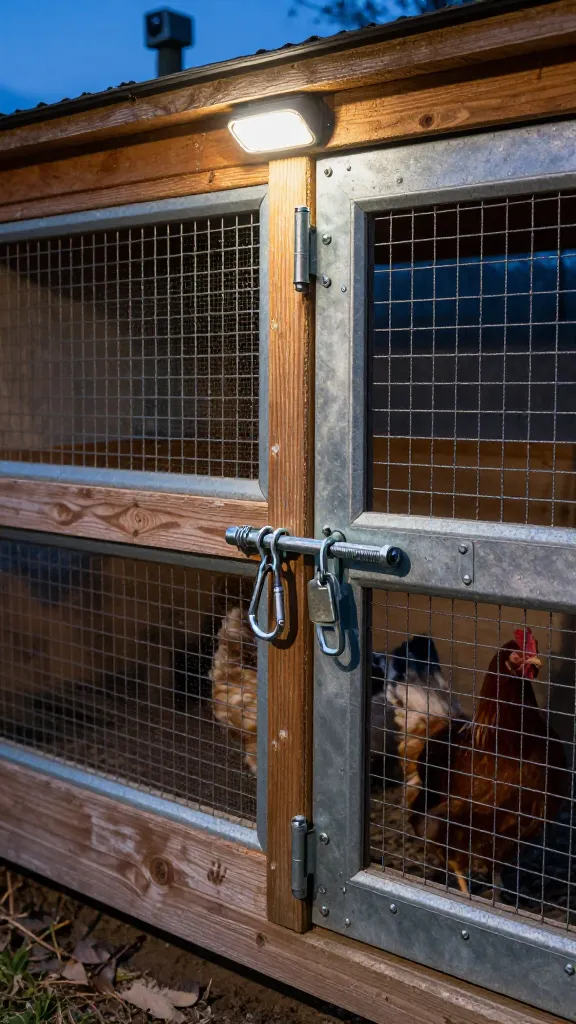
Predator-grade latches use a hasp with a carabiner, spring-loaded barrel bolt, and hinges with non-removable pins to stop raccoons and other clever predators, with total costs under $22–$37 that change your sleep quality immediately. The honest part is that cute hook-and-eye latches don’t work — raccoons undo them in under a week.
My first latch was a cute hook-and-eye. A raccoon undid it in under a week — I know because my trail cam caught the little locksmith at work. I replaced hardware at 9 p.m. with a flashlight in my mouth.
What hasn’t failed: a hasp with a carabiner through it on the pop door, a spring-loaded barrel bolt on the human door, and hinges with non-removable pins. Costs: hasp $6–$10, carabiner $3–$5, barrel bolt $8–$12, hinge upgrade $6–$10. Under $22–$37 changed my sleep. If you have bears, this won’t cut it — you need electric netting. We have coyotes and raccoons; this setup is two years in without a breach. The human factor is real: I added a bright rubber doorstop at the pop door track so I can see at a glance if it’s open or shut; $5 to save a morning heart attack.
Predator-proofing research emphasizes that hardware cloth, not chicken wire, is essential for keeping out raccoons, weasels, and snakes. The 1/2-inch openings stop paws and noses while remaining strong enough to resist determined predators.
Make it yours: if kids help with lockup, paint a red/green stripe on the door edge so “closed” is obvious in twilight; a sample pot was $4.
8. Ventilation That Doesn’t Draft Birds: in Vents, Zero Frostbite
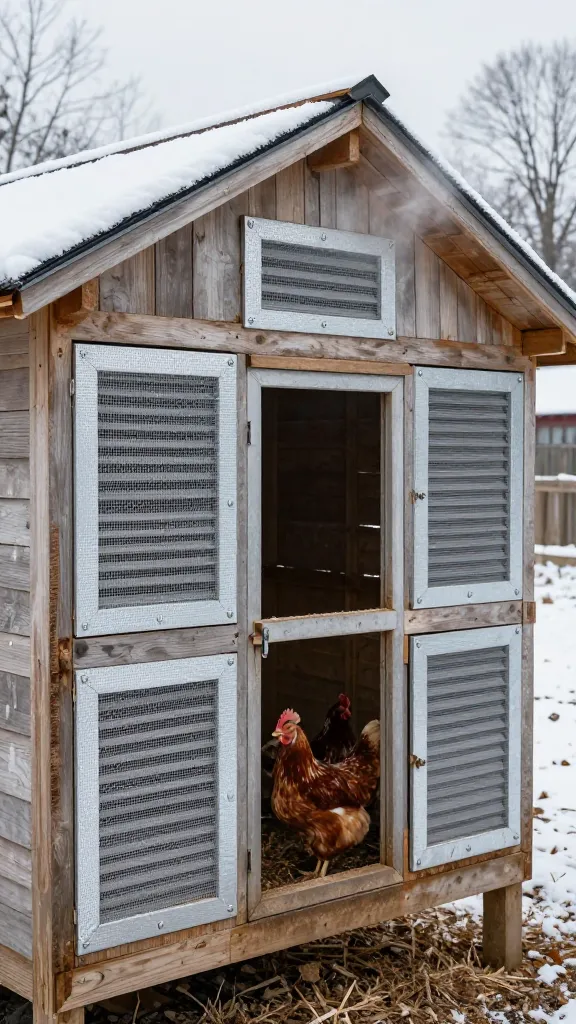
Proper ventilation uses high vents near the roofline and a continuous gap under the eaves to let moist air escape while keeping still air at roost height, with costs around $60 for vents, fasteners, and hardware cloth. The key is more air high and still air low — never aim a vent at the roost, or you’ll see tail feathers ruffle on still nights.
My first winter, I sealed the coop like a soup thermos and woke to frost on the inside of the roof and damp combs. That’s how you earn a January you won’t repeat.
The fix was more air high and still air low. I cut four 8×16 vents near the roofline on two walls and covered them with hardware cloth, and I left a continuous 1-inch gap under the eaves. Costs: vents $24–$40, fasteners and flashing $12–$18, plus the hardware cloth you already bought. In -5°F windchill, the thermometer inside read 10–12°F warmer than outside but dry, which matters more than raw heat. The catch: don’t aim a vent at the roost. I moved one after I watched tail feathers ruffle on a still night; 30 minutes with a jigsaw fixed it.
University of Minnesota Extension confirms that ventilation, not heat, prevents frostbite — moisture is the enemy, and proper airflow keeps combs dry even in extreme cold.
Make it yours: in summer, swap one solid gable for a removable screen panel so hot air has an escape route; lumber and mesh ran me $18 and my birds stopped panting at 4 p.m.
Chicken Coop Designs Compared
| Design | Cost Range | Build Time | Best For | Key Challenge |
|---|---|---|---|---|
| Pallet-frame | $160–$225 | 1–2 weekends | Walk-in coop on budget | Pallets aren’t square; need sill plate |
| A-frame tractor | $280–$320 | 1 weekend | Mobile shelter for lawn mowing | Wind kite risk; needs staking |
| Hoop run | $190–$350 | 1 day | Covered run for snow/rain | Low headspace at edges |
| Shed conversion | $480–$560 | 1–2 days | Clean, draft-free retrofit | Resin heats in sun; needs shade |
| 4×8 starter box | $310–$415 | 1 day | Compact coop for 4–6 hens | Heavy (200–300 lb); roof chain needed |
| Deep litter setup | $14–$18/month | Ongoing | Reduced bedding costs, compost | Moisture management critical |
| Predator latches | $22–$37 | 1 hour | Stopping raccoons, coyotes | Hook-and-eye latches fail |
| High ventilation | $60 | 2–3 hours | Preventing frostbite, moisture | Don’t aim vents at roost |
Frequently Asked Questions
Which chicken coop design is best for 4–6 hens on a small lot?
A 4×8 starter box or a small A-frame works well. You want at least 4 square feet per bird inside and 8–10 square feet per bird in the run. If you’re moving it solo, keep the frame in 2x3s and aim for under 250 lb total.
How much does it cost to build a chicken coop that actually lasts?
In my yard and prices, the durable builds landed between $160 and $560. The pallet-frame was $160–$225, the shed conversion $480–$560, and the 4×8 box $310–$415. Spend your real money on 1/2-inch hardware cloth, roofing, and latches; that’s where my first $240 “bargain” failed.
Do I need a hoop coop or just a covered run?
If you get snow or hard rain, a covered run pays for itself in bird health and your sanity. The hoop run I built cost $190–$350 and handled a 9-inch wet snowfall that shredded two tarps in the same storm. If predators are heavy, skin the lower 3 feet in hardware cloth.
What size should the setup be for 10 hens?
Plan for at least 40 square feet inside and 80–100 square feet of run. My 12×8 hoop run paired with a 6×8 coop kept 10 hens busy without feather picking. Roosts should provide 8–10 inches per bird.
Is deep litter safe in this build, or is it a smell trap?
It’s safe if you keep it dry and aerated. Start at 3–4 inches and build to 8–10 inches, rake weekly, and keep water out of the coop. I cut my bedding spend by about $35/month in winter and the coop smelled like forest floor, not a barn.
Conclusion
If you only do one thing this weekend, price a 25-foot roll of 1/2-inch hardware cloth and buy the latches; build the rest of your plan around those two realities. I’ve wasted more money replacing flimsy doors and soft wire than I ever spent on lumber. Start with the door, end with the wire, and your flock will thank you for it. — ask me how I know.
If you want to extend this predator-proofing philosophy to other parts of your setup, my guides on predator-proof coop checklists, hardware cloth vs chicken wire, and raccoon-proofing locks and latches show how to keep your birds safe from every angle.