9 Brooder Setup Ideas — What I Used for My First Chicks
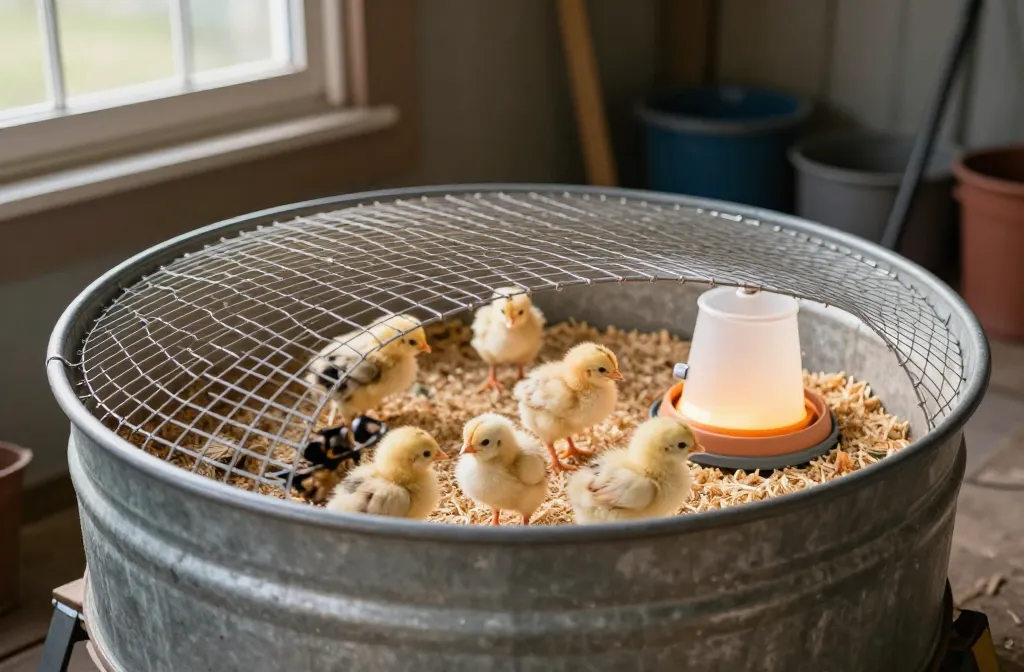
Brooder setup ideas were all I was searching when I stood in the feed aisle with a cart full of pine shavings and the dawning panic of “where do these fluff-balls actually live.” My first chicks started in a stock tank on an old desk because the dining table was taken, and I learned fast what worked and what cost me twice. By the end of this, you’ll have 9 solid ways to build, heat, and manage a brooder without wasting money or losing sleep. Nothing here needs a workshop — just a Saturday and a willingness to measure before you click buy.
1. The Stock Tank Brooder: Zero Gaps, Easy Clean, ~0 All-In
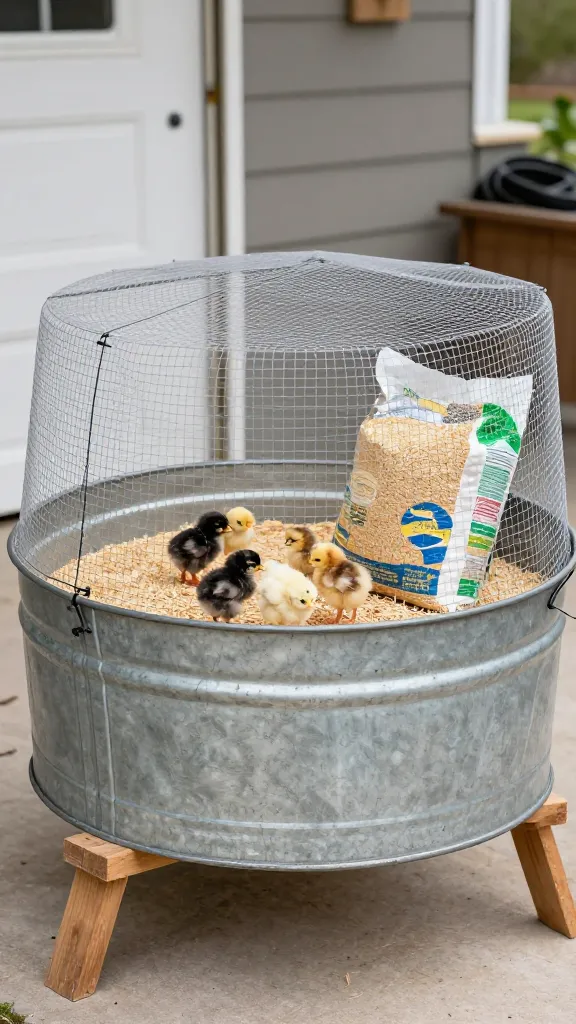
I brought home 4 chicks thinking a cardboard box would last a month. It lasted a night — they found the corner seam and headed for the baseboard heater. I swapped to a 100–150 gallon galvanized stock tank I found secondhand for $60, set it on two sawhorses, and added a wire top made from a 2×4 sheet of 1/2-inch hardware cloth and zip ties ($28 for the cloth, $3 for zip ties). Bedding was a 2.0 cu ft bag of pine shavings at $7–$9 and I used two bags the first three weeks.
The catch is weight and storage — that tank is a bear to move and eats garage space off-season. But it held heat evenly and there were no chewable corners. Mine’s now in year 4 and still my favorite start for up to 8 chicks.
Make it yours: if a full tank won’t fit your space, a 50–70 gallon plastic tote works for the first 2 weeks for $15–$25; just reinforce the lid with hardware cloth so it can’t sag onto the heat source.
2. Seed-Starting Heat Mat Under Half the Floor: Gentle, Even Warmth
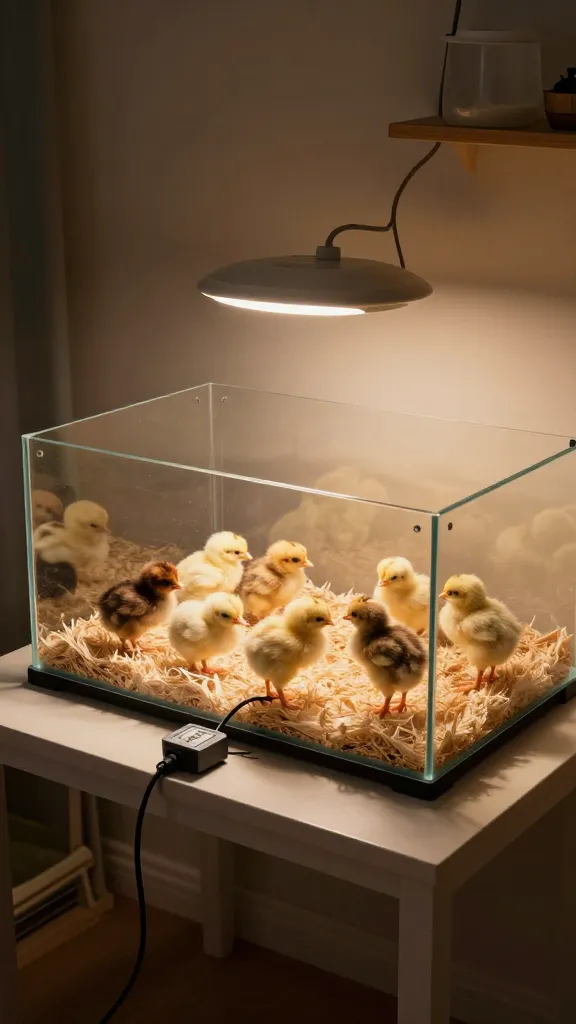
I scorched a cardboard flap with a clamp lamp at 2 a.m. and moved to floor heat the next morning. I slid a 10×20 seed-starting heat mat ($18–$30) under a third of the tank with a plug-in thermostat ($20–$30) and set the probe level with the chick backs. The mat took the chill off the floor so I could keep the main heat source lower, and it stopped the nighttime pile-ups in the corners.
It won’t replace your primary heat for week 1, and you need a thermostat so you’re not guessing. But as a supplement it paid for itself in the first month in lower wattage and calmer chicks.
Make it yours: in a cold room, run two mats overlapped under 1/2 the floor (still with a thermostat) and raise your brooder 4–6 inches off concrete to prevent wicking cold.
3. The Brooder Plate You’ll Actually Sleep With
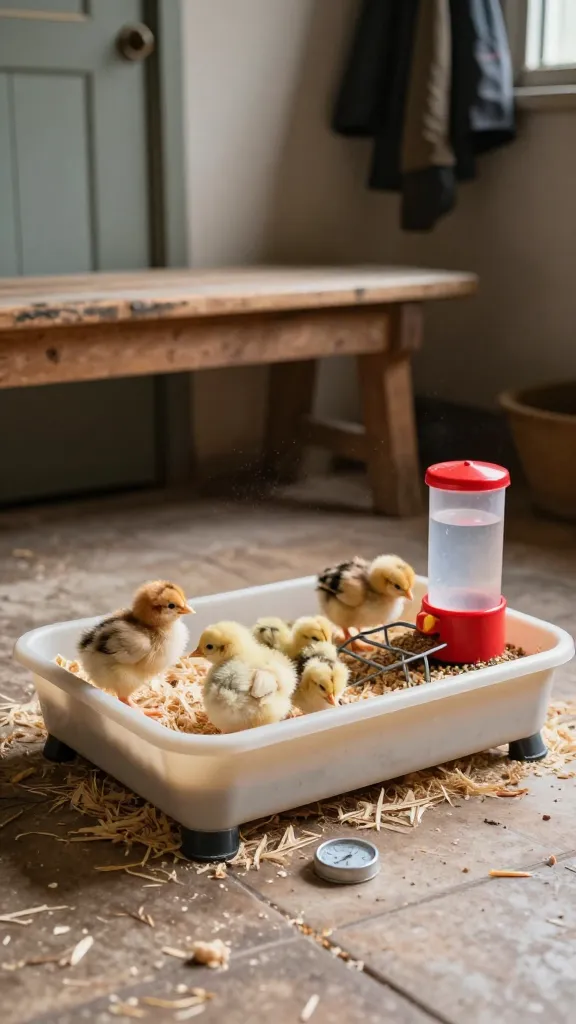
The first week I kept waking up to check the clamp lamp, because I like my house and would prefer it not on fire. A low-wattage brooder heating plate (the type with adjustable legs, $45–$85 depending on size) changed that. I set it so the front edge just brushed their backs and kept a cheap room thermometer ($8) at chick height under the edge — they tucked under, ran out to drink, and stopped yelling at me.
Plates don’t heat the air, so your room needs to be at least 60°F. In my drafty mudroom at 55°F, I added the heat mat under one side and taped cardboard around the outside to cut drafts. The upside: power use dropped from 150W on a bulb to about 40–60W on the plate.
Make it yours: size up. The small plate “for 10 chicks” was cramped for my 6 by week 2; the next size up only cost $10–$15 more and bought me two extra weeks before moving out.
4. Hardware Cloth Lid That Actually Stays Put
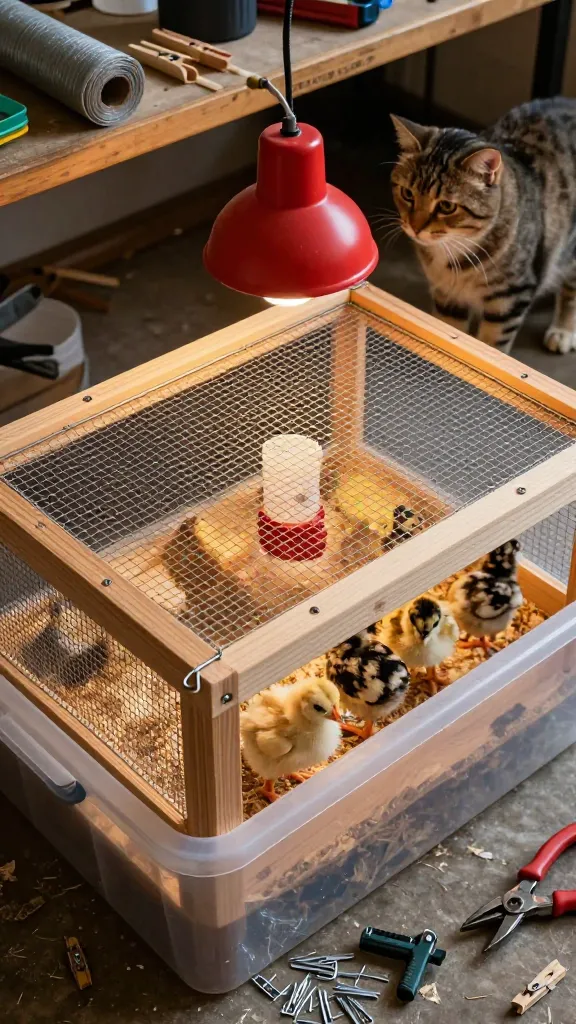
The first time I tried a screen top, I used leftover chicken wire and clothespins. It sagged, the lamp slipped, and a chick launched herself onto the rim like she was trying for a better ZIP code. I remade the lid with a 1×2 pine frame ($6 in cuts) and 1/2-inch hardware cloth ($28 for a 25-foot roll; I used 1.5 feet). I stapled it every 2 inches and added two small hook-and-eye latches ($4).
It took an hour to build and has survived two broods and one cat trying to parkour. Hardware cloth, not chicken wire, is what keeps paws and beaks where they belong.
Make it yours: if tools are sparse, skip the frame and zip-tie hardware cloth to the stock tank rim in three panels you can flip; add a binder clip every 8 inches so it can’t bow.
5. Dust, Smell, and Sane Cleaning: My 10-Min Routine
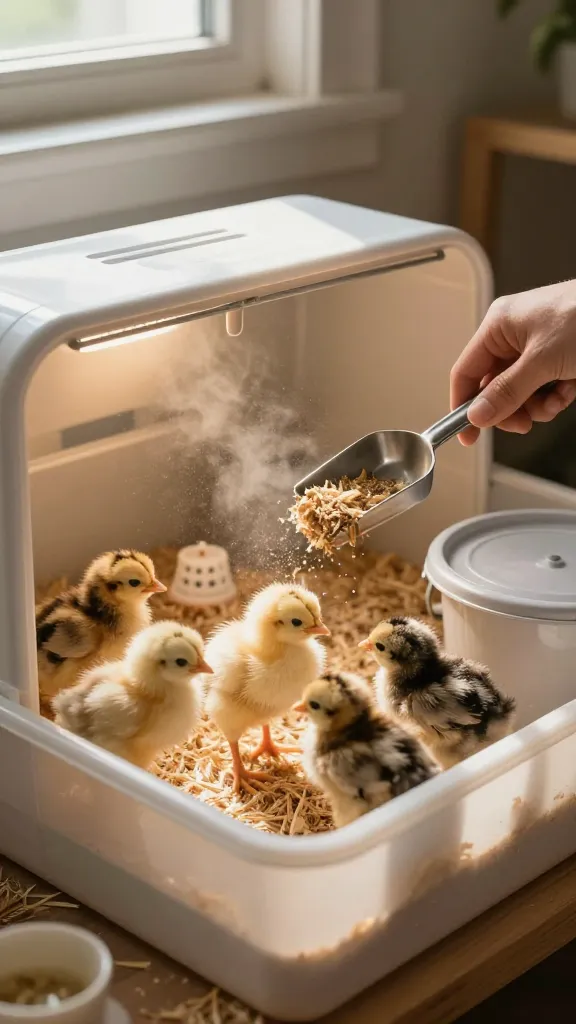
Week 2, I realized the “sweet pine smell” had become “ammonia sting” and my eyes confirmed it. I switched to a routine: puppy pad liner under 1–1.5 inches of pine shavings for the first 5–7 days (pads are $0.40–$0.60 each in bulk), then full shavings only. I spot-scooped with a cat litter scoop ($3) every evening and tossed the worst clumps into a covered bucket. Full change was every 3–4 days early, every 2 days after week 2.
Ventilation matters. A small 8-inch desk fan set on low, pointed at the wall, not the chicks ($12), cut dust in the room by half. If you can smell ammonia, it’s already too high for them — I learned that the damp way.
Make it yours: in humid climates, add a layer of kiln-dried pine pellets under shavings (about $6–$8 a bag; I used 1/3 bag) to keep the base layer dry longer.
6. The Horizontal Nipple Waterer That Didn’t Flood the Bedding

My first waterer sat on the floor and made a swamp by noon. I drilled three horizontal poultry nipples ($6–$10 for a pack) into a 1-gallon food-grade bucket ($5–$8), hung it so the nipples sat at chick-eye level, and wrapped the bucket with heat tape in winter to temper the chill ($6). Zero spilled bedding, zero poo in the tray.
The only snag is training: I tapped each nipple until they saw the drip and pecked; it took 5 minutes. If your room is cold, keep the water around 50–60°F so they drink enough, and check twice daily the first week.
Make it yours: no drill? A quart jar waterer on a 2-inch riser with a hardware cloth ring around it works for week 1; budget $6–$10 and change it 2–3 times/day.
7. The Feeder That Slowed the Seed-Throwing Olympics

I started with an open trough feeder. The chicks treated it like a suggestion and flung $0.50 of feed onto the floor every morning. I swapped to a mason-jar style gravity feeder with port holes ($12–$16) and set it on a 2×4 offcut to bring the rim to back height. Waste dropped by more than half, and the pecking order brawls at breakfast chilled out.
As they grow, switch to a hanging tube feeder ($18–$25) at week 3 so they can’t stand in it. I refill once a day and it stays clean enough to make me feel competent.
Make it yours: on a tight budget, make a 2-inch PVC elbow feeder for $6–$8; it tucks into a corner and still controls scatter.
8. Brooder Placement: Heat Stays In, Dust Stays Out
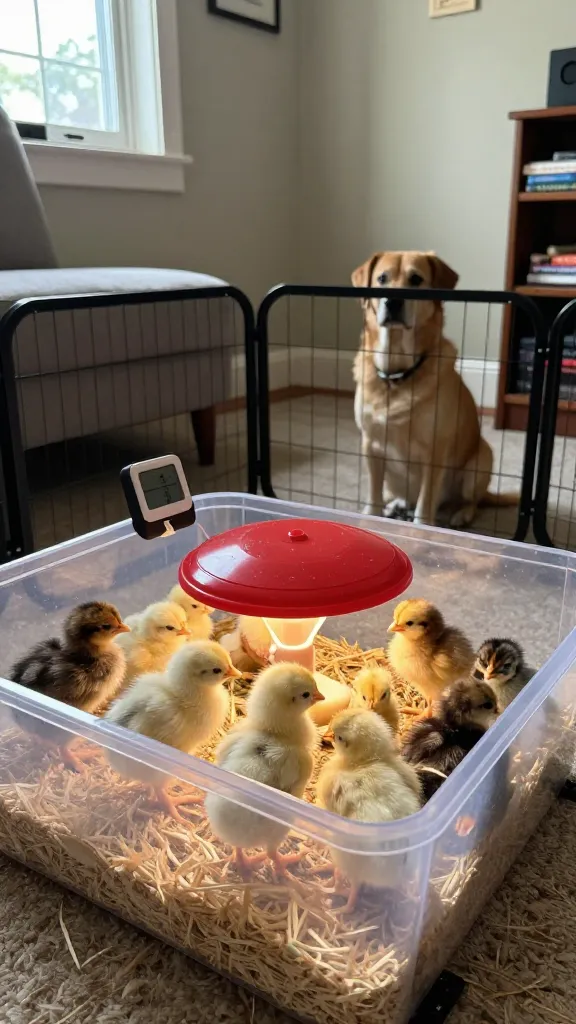
I learned the hard way that the laundry room is where humidity goes to party. My hygrometer read 70% and the brooder never dried. I moved the whole setup to a spare corner of the living room against an interior wall at a steady 65–68°F, 10 feet from the nearest vent, and everything got easier — steadier heat, less draft, and I actually saw what the chicks were doing.
Noise and pets matter. I added a folding exercise pen around the brooder ($30–$45 secondhand) to keep the dog curious-but-outside. If your air is very dry (under 30%), add a bowl of water near the brooder (not in it) to keep dust down without soaking bedding.
Make it yours: in small spaces, put casters ($12 for four) on a plywood board and set the brooder on it — you can roll it out to clean under and push it back when company comes.
9. The Move-Out Plan on Day 1 (So You Don’t Panic at Week 4)

My first batch hit the “roadrunner” phase at day 21 and suddenly the stock tank felt like a studio apartment with six roommates. I had nothing ready. Now I plan from day 1: I set a calendar reminder for week 3 to assemble a grow-out pen in the garage with 2×4 welded wire panels ($30–$40 total), a heat plate at the highest setting, and a rubber stall mat ($45) under shavings.
Weather rules the final move. I don’t put them in the coop until they’re fully feathered and nights are reliably above 50°F unless I can provide safe supplemental heat. The time I pushed it in a cold snap, I spent two nights running outside with warm water like a butler with stage fright.
Make it yours: if your coop isn’t predator-secure yet, a loaner dog crate wrapped in hardware cloth inside the garage buys you an extra week for $0–$10 in materials and a good neighbor.
Frequently Asked Questions
What’s the cheapest brooder setup that still keeps chicks safe?
A 70–100 gallon plastic tote ($15–$25), a hardware cloth lid ($10–$15 worth of a larger roll), a brooder plate ($45–$65), pine shavings ($7–$9), and a basic feeder/waterer ($12–$20) will land you around $90–$130 depending on what you can borrow. I’d cut everything before I’d cut a safe heat source or the hardware cloth lid.
How warm should a brooder be and for how long?
Start with a warm zone around 95°F at chick height in week 1, then lower by about 5°F each week until they’re fully feathered (usually 5–6 weeks). Watch behavior: quiet under the heat is good; panting or all in the corners means too hot; constant peeping and piling means too cold.
Where Can You Research Brooder Temperature Schedules?
| Source | What It Says |
|---|---|
| UNH Extension | University extension guidance on brooding chicks, covering starting temperature and the weekly step-down as chicks feather out. |
| Mother Earth News | Lays out the standard 95°F-in-week-1, minus-5°F-per-week schedule and how to read chick behavior for warmth. |
| Nutrena (Poultry Nutrition) | Feed-industry guidance on brooder temperature targets and adjusting heat source height week to week. |
Do I need a stock tank brooder, or will a cardboard box work?
A cardboard box works for the first 48–72 hours if you must, but it soaks, sags, and chicks will find the corner gap. A stock tank brooder or a large tote with a hardware cloth lid is safer and lasts the whole brooding period. My tank cost $60 used and has outlived four sets of chicks.
How often should I change bedding in this setup?
Plan a full change every 3–4 days in week 1, then every 2 days after week 2 as output increases. Spot-scoop once daily and keep bedding at 1–2 inches deep; if you smell ammonia or see damp clumps, change it the same day.
What size setup for 6 chicks and how long until they outgrow it?
Give at least 0.5–1.0 sq ft per chick early on; a 100–150 gallon tank is comfortable for 6 chicks through week 3–4. By week 4–5, you’ll want a grow-out space or the actual coop with safe heat if nights are under 50°F.
Start Simple, Spend Where It Matters
If you’re staring at bins and bulbs wondering what actually matters, buy safe heat and a way to keep it off flammable things, then spend on the lid. You can build the rest from totes and scrap in an afternoon. Start with one container, a plate, a bag of shavings, and a thermometer — set it up dry tonight so you’re not testing at midnight with a chirping audience.
— ask me how I know.