7 Trampoline Frame Chicken Coop Ideas — What Worked and What Sagged
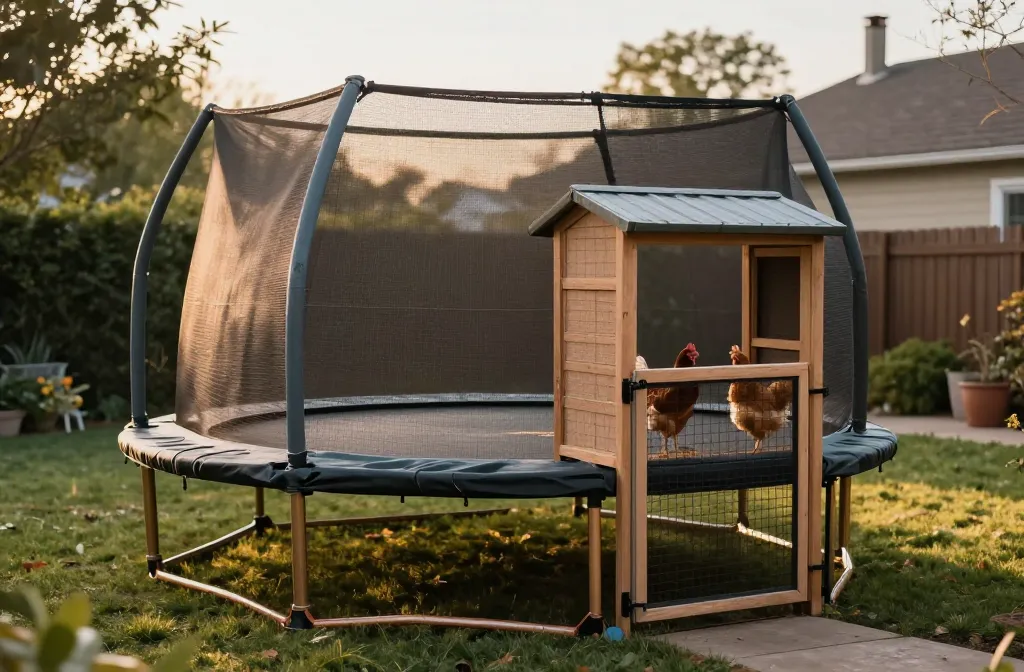
Trampoline frame chicken coop ideas sound like a clever shortcut, and I chased them because my lumber quote made me choke in the feed aisle. I dragged a 12-foot round frame out of a neighbor’s trash night and told myself I’d have a predator-proof coop by Saturday. By the end of this, you’ll have seven builds and swaps that I actually tried on a trampoline skeleton, exact costs I paid, and which versions folded, rusted, or kept birds safe. The first frame I set up looked Pinterest-cute for one week, then sagged like a wet hammock after the first storm.
1. The Hoop-Run Trampoline Coop: 1 Weekend, Under 0, Predator-Safe
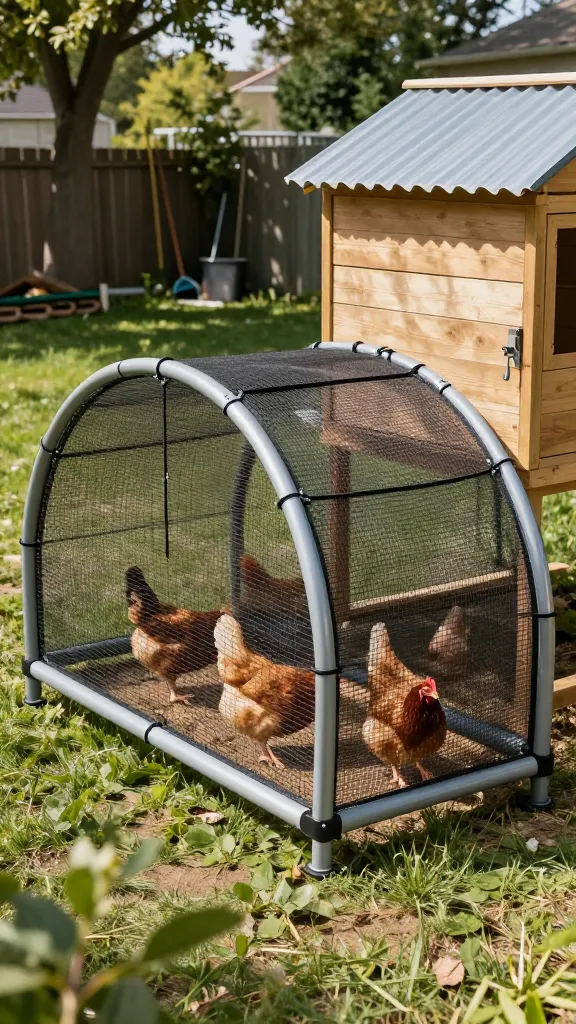
I started with the easy win: set the round trampoline frame on edge, bolted the legs back as ribs, and used it as an arched run attached to my existing coop. My goal was a daytime fortress I could move myself without crying. I bought a 50-foot roll of 1/2-inch hardware cloth for $95, a 25-foot roll of 1-inch poultry netting for roof shade at $26, UV zip ties and exterior screws around $18, and a sheet of poly roofing for $32 over the feed corner. Add $20 in hinges and a latch, and I was at $191 plus a free frame.
I wrapped hardware cloth up 24 inches along the sides for chew-proofing and used poultry netting only above shoulder height. It’s been up 19 months with zero breaches; a raccoon tested it the second week and got nose prints on the wire. The catch: stretching hardware cloth over a circle is like gift-wrapping a beach ball — I used galvanized wire at $9 to stitch seams every 4 inches so it wouldn’t pucker. If you skip the stitching, you’ll have gaps big enough for a weasel.
Make it yours: If you get snow, swap the poly sheet for two 2×4 purlins across the top ribs ($14) and screw corrugated metal to them so weight sheds instead of bowing the netting.
2. Flip-and-Slab Coop: Hanging Floor That Doesn’t Rot Out
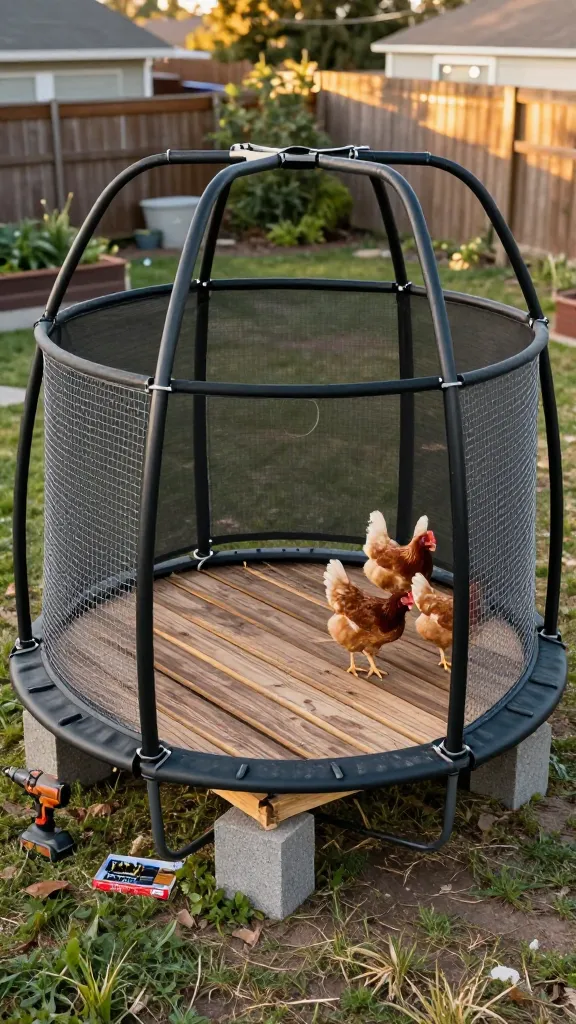
My first full trampoline coop I flipped the frame upside down and tried to tension a plywood floor inside the circle. That floor lasted 11 weeks before sagging, and at $48 in plywood plus $12 in carriage bolts, it taught me about leverage the expensive way. On the redo, I laid four 2×4 runners on cinder blocks (8 blocks at $2 each) as a ground-supported platform under the frame, then screwed deck boards across. Total on wood and blocks was $92 in my area last spring.
By letting the ground carry the load, the circle walls became just that — walls. I skinned the lower 24 inches in hardware cloth ($38 of the roll) and the upper in poultry netting ($18 of the roll) to save money without inviting teeth at ground level. The door was a 2×2 rectangle with a $6 spring latch; I doubled it with a $7 carabiner after a raccoon opened it like a toddler gate. This one’s held two full seasons and hoses out in 10 minutes.
Make it yours: On wet ground, put paver stones under the blocks (8 at $1.50 each) so the platform doesn’t sink and skew the door square — I added them mid-winter after the latch started scraping.
3. Snow-Safe Trampoline Coop Roof: From Soggy Tarp to 2×4 Ribs
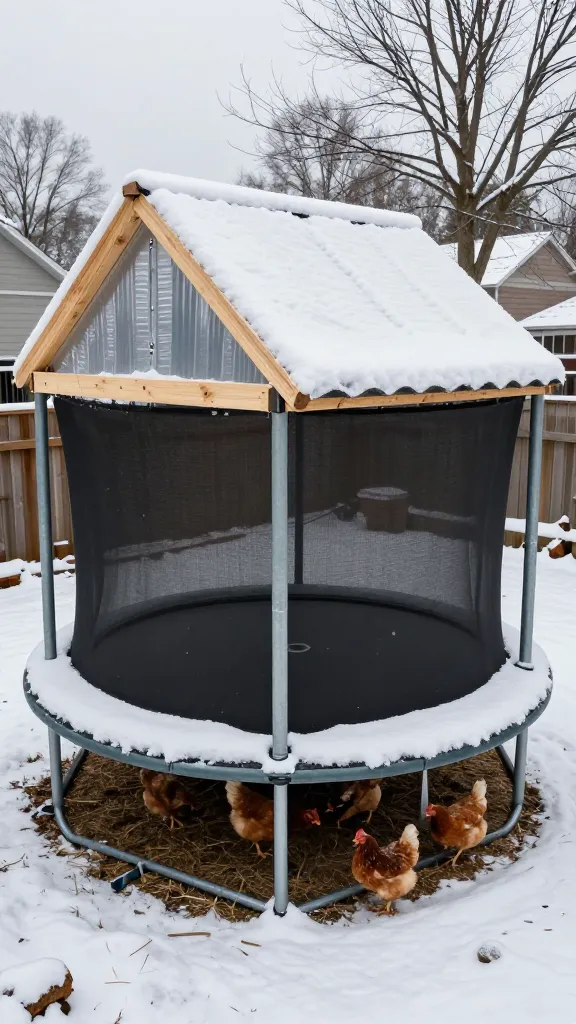
The first roof I tried was a $20 tarp bungeed to the top ring. One 6-inch, 24-hour snow gave me a sagging blue pond that dumped on me when I poked it — tarp went to the trash in 3 days. The fix was two pressure-treated 2x4s, cut to span the diameter, screwed into the frame at right angles, and a third 2×4 diagonaled across to crown it. I skinned that with corrugated plastic panels at $32 each (used 3, so $96) with roofing screws ($8).
The triangle crown sheds rain and snow, and with a 6-inch vent gap all around topped in 1/2-inch hardware cloth, I finally had airflow without drafts on the roosts. It took me 4 hours working alone and has now seen two winters without a buckle. Wind does try to lift it; I added two screw-in ground anchors and ratchet straps ($28 total) after a 35-mph gust season. Without anchors, you own a kite.
Make it yours: Hot climate? Skip plastic panels and use metal roofing (2 sheets at $30 each locally) to reflect heat and leave a 1-inch ridge vent every 12 inches, backed with hardware cloth.
4. The Mobile Day Tractor: 2 Wheels, 1 Person, No Backache
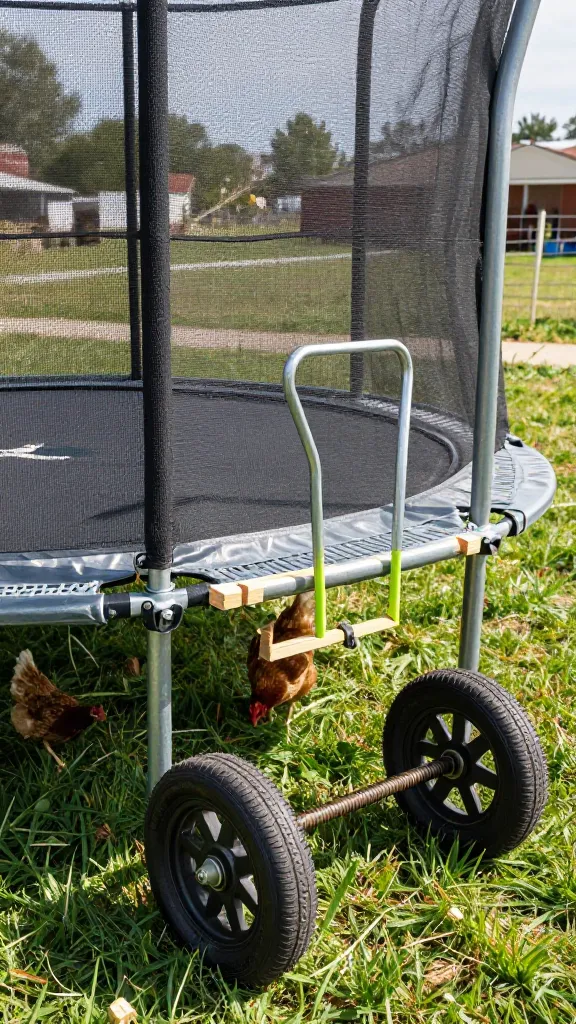
I wanted grass time without hawks making the rules. My first “tractor” attempt was to drag the circular frame by a rope. I moved it 6 feet, broke the rope, and learned I am not a draft animal. The working version used a scrap 2×6 tongue bolted across two legs, a pair of 10-inch pneumatic wheels on a 5/8-inch threaded rod axle ($42 all-in), and a gate handle screwed to a short 2×4 for pulling.
I skinned the bottom 24 inches with hardware cloth from the same $95 roll and used poultry netting up the rest. Total add was $74 including $12 of U-bolts and washers. I can move it solo across lumpy yard in under a minute. The catch: open bottoms aren’t night-safe. I only use this 8am–dusk and park it next to the main coop. A mink will slip under any gap you leave; I pinch the skirt with landscape staples ($9) every 2 feet to seal it.
Make it yours: If your yard is soft, swap pneumatic tires for flat-free wheels (usually $25–$35 each) so you’re not patching tubes on chore day.
5. Hardware Cloth vs. Poultry Netting on a Circle: Where to Spend
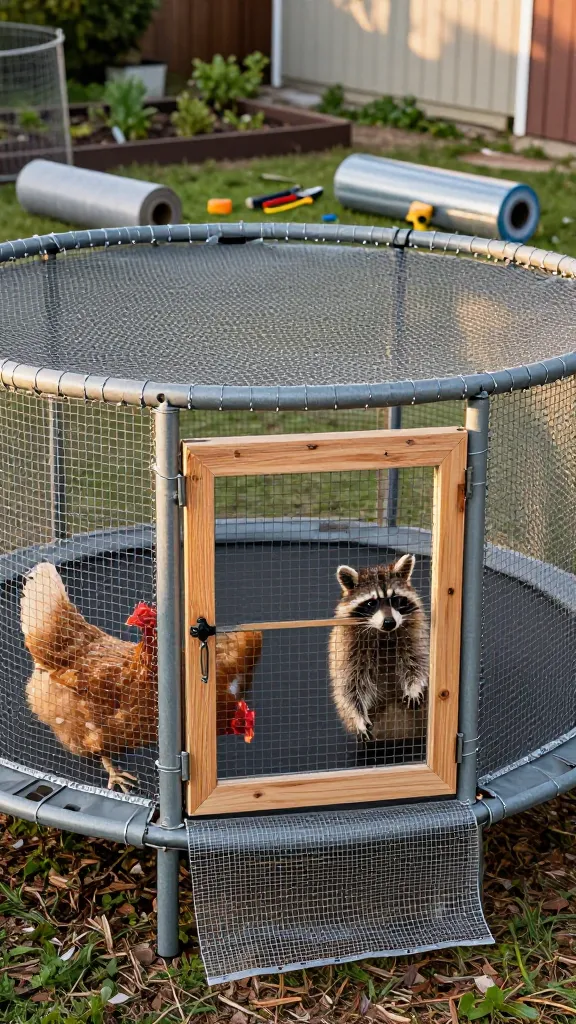
I tried to save money once by doing the whole cylinder in poultry netting. It cost $34 and lasted 1 night before a raccoon chewed through like it was angel hair. My working rule became hardware cloth where teeth and paws reach, netting only where they can’t. On a 12-foot diameter frame, that means a 37-foot circumference. Two feet high of hardware cloth is roughly 74 square feet, which is most of one 50-foot x 3-foot roll at $95. The upper section takes one 25-foot x 4-foot roll of netting at $26.
Attach hardware cloth with galvanized poultry staples ($7) every 3 inches on wood blocking or with stainless zip ties ($10 for 100) directly to the steel ring; zip ties must be UV-rated or they’ll fail in 1 summer. The tidy-looking shortcut is to overlap netting on netting — I did that and had a 4-inch seam open in wind by week 2. Stitch dissimilar edges with wire and double-wrap corners, or budget for losses.
Make it yours: In fox country, add a 12-inch hardware cloth apron outward on the ground around the base (another $26–$35), pinned with landscape staples so diggers hit wire and give up.
6. Venting and Roosts Inside a Round: Birds Breathe Better, You Clean Faster
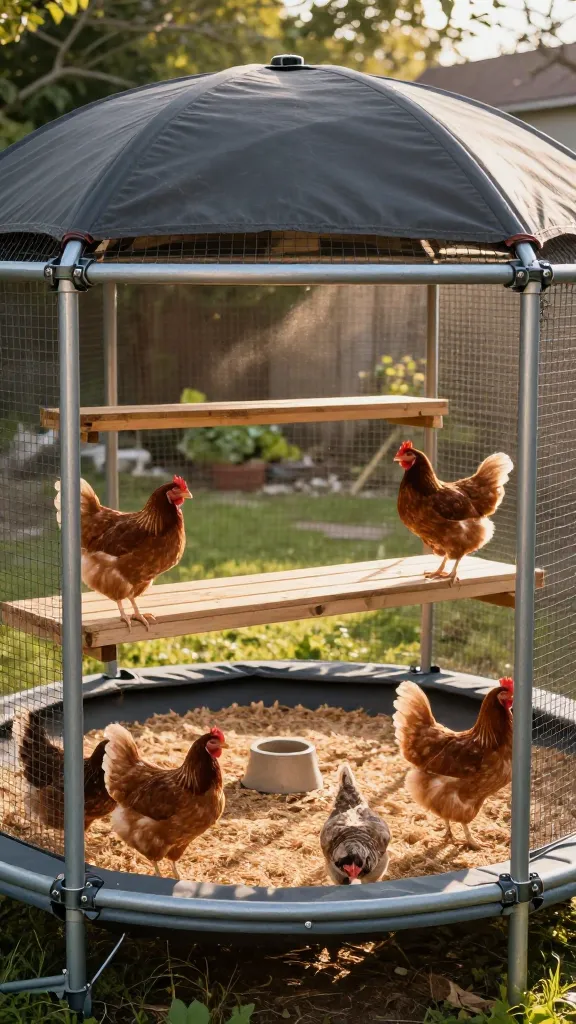
The first time I crammed roosts across the circle, I made a pick-up-sticks mess that no one used. They slept on the feeder for 3 nights and I deserved it. The working setup is two 2×4 roosts wide-side-up, 18 inches apart, both mounted at 36 inches off the floor on short 2×2 cleats screwed into the frame with 1/2-inch conduit clamps ($9 for a 10-pack). I keep the highest roost at least 12 inches lower than the lowest ceiling point to prevent head-bump drafts.
For venting, the circle helps: I left a continuous 4–6 inch gap under the roofline all the way around, backed with hardware cloth. Moisture left my winter headlamp beam after night 2. Cost to tweak was $0 because I reused offcuts. The catch is rain blow-in; I hung a 4-foot plastic panel on the windward side with $6 worth of clips for storms. Poop boards under roosts made of vinyl-coated wire shelving ($15 per 4-foot piece, used 2) hose clean in minutes.
Make it yours: If your flock includes heavies, drop roosts to 24 inches and add a ladder from scrap 2x2s so nobody bails and sprains a leg.
7. The Cold-Season Skin: Clear Plastic That Doesn’t Turn into a Sail
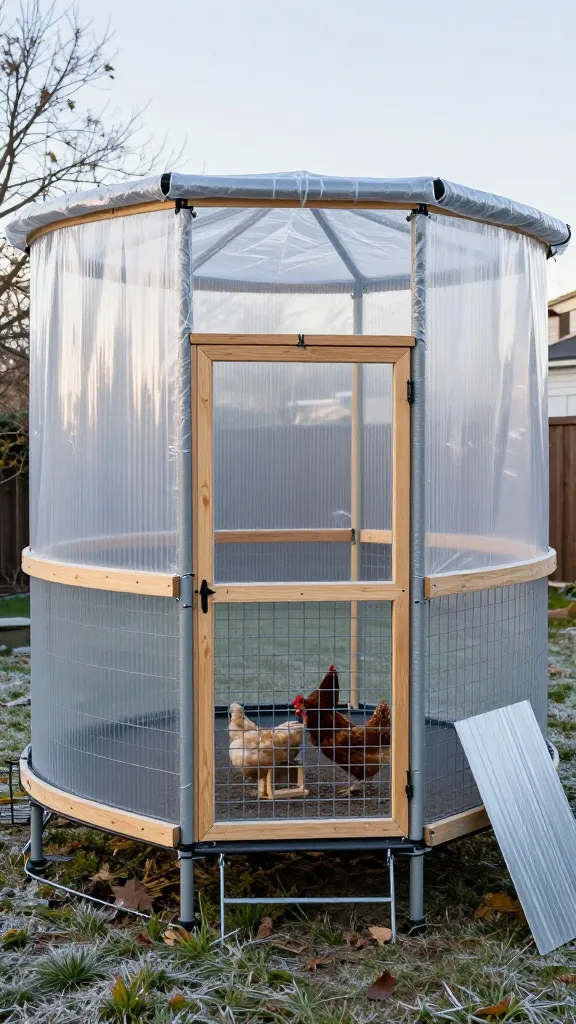
I tried wrapping the whole frame in thin greenhouse film one November because it was on sale for $22. It turned into a 12-foot parachute and snapped half my zip ties in the first wind event. The working version uses clear corrugated panels for the bottom 18 inches on the north and west sides (3 panels at $32 each, cut in half), and contractor-grade clear plastic on the upper half only on those two sides ($18 for a 10×25-foot roll), clipped to a run of 1×2 strapping ($11) so I can roll it up on mild days.
It blocks wind without killing airflow, and I leave the south and east wide open. Condensation was a problem until I added a 1-inch gap at the top of every panel run. The cost came to $125 and took me 3 hours solo with a step stool. Do not shrink-wrap the coop: ammonia builds fast and frostbite follows. If you can smell it, the birds’ lungs already did.
Make it yours: In very cold zones, hang a thick canvas drop cloth ($20–$30) behind the roosts as a wind baffle and skip plastic on the leeward sides so moisture has somewhere to go.
Frequently Asked Questions
Are trampoline frame chicken coops safe from predators?
Yes, if you use 1/2-inch hardware cloth at ground level, anchor the frame, and latch the door twice. On my 12-foot build, the lower 24 inches took most of a 50-foot x 3-foot roll and has held 19 months without a breach. Poultry netting alone failed here in 1 night, so I only use it above reach height.
How many chickens fit in a 12-foot round build?
The circle gives about 113 square feet (πr²), but usable floor after roosts and feeder is closer to 90–100 square feet. At a conservative 4 square feet per bird for indoor space, that’s 22–25 standard hens for the run portion; for a true sleeping coop I cap it at 8–10 with an attached run. I’ve actually kept 9 through winter in mine with no crowding issues.
What does a trampoline coop cost to build?
With a free frame, my predator-safe run version landed at $191. The full sleeping coop with roof and platform came to $92 (platform) + $96 (roof panels) + shared hardware cloth/netting and hardware for a realistic total of $260–$340 depending on sales. Regions vary, but the hardware cloth line item (~$95) is the part I never cut.
How do you roof a round coop without it sagging?
Cross-span the circle with at least two 2x4s, add a diagonal to crown, and skin with corrugated panels screwed every rib. My tarp roof failed in 3 days; the 2×4 crown has handled two winters. Ground anchors and ratchet straps ($28) keep gusts from turning it into a Frisbee.
Can you make a mobile version of this build?
Yes — bolt a 2×6 tongue across two legs, run a 5/8-inch axle with 10-inch wheels, and keep the bottom skirted in hardware cloth. Mine cost $74 on top of the frame and moves solo across lawn in under a minute. It’s for daytime only; I pin the skirt with landscape staples so nothing noses under.
Start With the Circle, Spend on the Wire
If you’ve got a frame on the curb and a Saturday, you can have a safe, workable setup by dark — just price the hardware cloth first and build the rest around it. Start with one ring section, 10 feet of wire, and a real latch, and see how it feels to work on the circle before you commit the whole roll.
— ask me how I know.