Raccoon-Proofing the Coop (locks & latches)
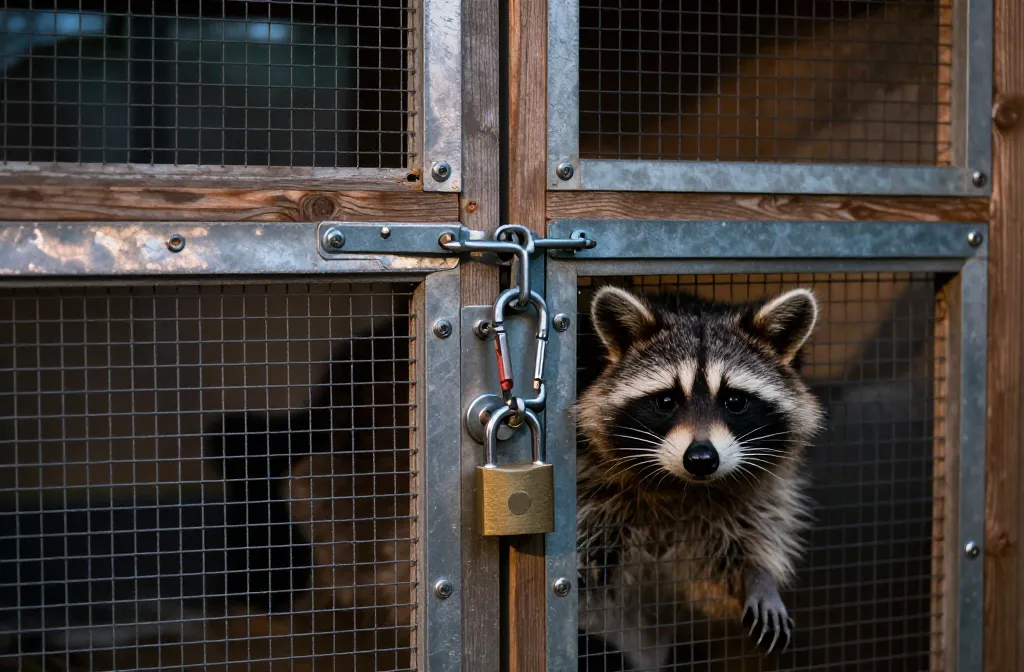
The Raccoon Problem, Stated Plain
Assume a raccoon can pull, pry, and manipulate anything human fingers can — they climb wire, reach through gaps as small as 1 inch, and work latches up to 5 feet off the ground. They return to the same weak spot night after night. Your job is to remove finger access, eliminate pry points, and force two-handed, tools-required actions to open any door. Every exterior opening—pop door, main door, egg access, clean-out, run gate—gets a two-step latch at a minimum, backed by 1/2-inch hardware cloth on all windows and vents, secured with screws and fender washers at 4–6 inch spacing. Exposed edges get covered with 1-inch wood or metal trim. If an opening is wider than 24 inches, it gets two latches, top and bottom, to stop prying.
Raccoon-proofing the coop starts with the hardware in your hand: locks and latches that a raccoon cannot open with nimble fingers in the dark. I’ve watched a trail-cam raccoon slide a simple barrel bolt and lift a hasp like it owned the place. By the end of this guide you’ll know which latches hold, where to put them, the numbers that matter, and how to back them up so a raccoon doesn’t get a second chance. You’ll leave with a clear standard and the parts list to meet it.
Locks & Latches That Beat Raccoons
Use latches that require two distinct motions or a key/combination — a raccoon can slide a bolt and flip a simple hasp, but struggles with inward pressure, spring tension, and anything needing two hands. My kind opinion, stated once: Buy stainless or zinc-plated, two-step latches and skip the cute barn hardware—function wins lives.
Standard: use latches that require two distinct motions or a key/combination. A raccoon can slide a bolt and flip a simple hasp. It struggles with inward pressure, spring tension, and anything needing two hands. My kind opinion, stated once: Buy stainless or zinc-plated, two-step latches and skip the cute barn hardware—function wins lives.
Method:
- Safety hasp with hidden screws + carabiner: Mount a fixed hasp where the staple’s screws are inaccessible when closed. Add a 3-inch, spring-gate carabiner through the staple. Place the hasp at 48 inches high on pop doors; add a second at 8–12 inches from the bottom if the door is taller than 20 inches.
- Spring-loaded barrel bolt (locking bolt) + carabiner: Choose a bolt with a spring detent. Install so it slides horizontally into a receiver, not vertically into soft wood. Add a carabiner through the bolt hole. Use on egg doors and small service hatches; one at top and one at bottom if taller than 18 inches.
- Gate latch with keyhole or gravity + pin: If you use a gravity latch on a run gate, drill a 3/16-inch hole through both latch parts and drop a 2–3 inch clevis pin or carabiner to lock it. Mount at 54–60 inches to push reach out of easy paw range.
- Padlockable hasp + weatherproof padlock: For the main human door, install a hasp that accepts a lock shackle. Use a lock with a covered keyway. If you prefer no keys at night, use a combination lock. Height: 48–52 inches.
- Sliding pop door tracks + interior latch: A vertical guillotine door must have a positive stop inside: a 3/8-inch steel pin through paired holes in the tracks, or an interior barrel bolt. Tracks should be 3/4–1 inch deep to deny finger access to the door edge.
According to Wild Hearth Life, if a toddler could open it, a raccoon definitely can — which is why two-step latches with spring-loaded carabiners on every gate have proven effective night after night. And Garden Betty recommends further securing all gate latches and slide bolts with carabiners, especially on upper locks which are more out of reach of critters.
Where Raccoon-Proofing the Coop Fails: Weak Points by Door
Every door needs a latch count that matches its size and leverage — the longer the edge, the more pry force. Use two latches on doors wider than 10 inches, one in the upper third and one in the lower third. Mount hinges with through-bolts and install a continuous hinge or three hinges to reduce flex. Add a 1-inch door stop trim on the inside frame to eliminate an exterior pry lip.
Standard: every door needs a latch count that matches its size and leverage. The longer the edge, the more pry force.
Pop Door (Chicken Door)
Use two latches on doors wider than 10 inches—one in the upper third, one in the lower third. If hinged, mount the hinges with through-bolts and install a continuous hinge or three hinges to reduce flex. Add a 1-inch door stop trim on the inside frame to eliminate an exterior pry lip.
Main Human Door
Use a padlockable hasp at 48 inches and a secondary barrel bolt on the bottom interior edge at 6–10 inches from the floor to defeat bottom prying. Weatherstrip the strike side with 1/2-inch stop molding to close gaps.
Nest/Egg Access Door
Add two spring bolts, one each corner of the opening edge, plus a carabiner on each. If the door spans more than 24 inches, reinforce the middle with a third latch. Close any gap larger than 1/4 inch with trim.
Run Gate
Install a gravity or keyhole gate latch that accepts a pin/carabiner, mounted at 54–60 inches. Add a lower slide bolt at 10 inches from ground to prevent bottom flex. Frame the latch side with 2×4 lumber so the gate meets square—raccoons exploit racking.
Backing Up Latches: Cloth, Screws, and No Pry Points
Locks slow fingers; structure resists force — hardware cloth and framing prevent reach-ins and prying that defeat even good latches. Cover all openings with 1/2-inch, 19-gauge galvanized hardware cloth attached with exterior screws and fender washers every 4–6 inches around the perimeter. Cap cloth edges with 1-inch wood battens or metal trim so raccoons can’t start a peel. Use 3 hinges on doors over 24 inches tall, through-bolted where possible, and close all cracks to 1/4 inch or less with stop molding or aluminum angle.
Standard: locks slow fingers; structure resists force. Hardware cloth and framing prevent reach-ins and prying that defeat even good latches.
- Hardware cloth: Cover all openings with 1/2-inch, 19-gauge galvanized hardware cloth. Attach with exterior screws and fender washers every 4–6 inches around the perimeter. Staples alone are not enough.
- Trim every edge: Cap cloth edges with 1-inch wood battens or metal trim so raccoons can’t start a peel. Corners get a continuous L-flashing.
- Hinges: Use 3 hinges on doors over 24 inches tall. Through-bolt with machine screws, washers, and lock nuts where you can; otherwise use #10–#12 exterior screws at each hole.
- Gap control: Raccoons reach through 1 inch and pull latches inside. Close all cracks to 1/4 inch or less with stop molding or aluminum angle.
- Wood thickness: Mount latches into solid framing at least 1.5 inches thick (2x lumber) to prevent screw tear-out.
Two-Step Security for Raccoon-Proofing the Coop
Every exterior latch gets a secondary action — pin, carabiner, or lock — turning a one-motion open into two different motions. Add a 3–4 inch spring-gate carabiner through the bolt or hasp staple. Drill a 3/16-inch cross-hole through paired latch parts and drop a clevis pin on gravity latches. Use a padlock for the main door and any door you won’t need to open at speed in the dark.
Standard: every exterior latch gets a secondary action—pin, carabiner, or lock. This turns a one-motion open into two different motions.
Method:
- Add a carabiner through the bolt or hasp staple. Size 3–4 inches, spring gate.
- Drill a 3/16-inch cross-hole through paired latch parts and drop a clevis pin on gravity latches.
- Use a padlock for the main door and any door you won’t need to open at speed in the dark. Choose a lock with a shrouded shackle if you store feed inside.
Installation Heights and Spacing That Matter
Put latches where you can reach easily, but avoid the raccoon’s shoulder-high sweet spot near the ground — use at least two points on doors tall or wide enough to flex. Pop doors get a top latch center at 42–48 inches from ground if the coop sits on legs, plus a bottom latch 8–12 inches from the door bottom. Main doors need a primary latch at 48–52 inches and a secondary interior bottom at 6–10 inches. For any edge over 20–24 inches, use two latches; over 36 inches, use three.
Standard: put latches where you can reach easily, but avoid the raccoon’s shoulder-high sweet spot near the ground. Use at least two points on doors tall or wide enough to flex.
- Pop doors: top latch center at 42–48 inches from ground if the coop sits on legs; add a bottom latch 8–12 inches from the door bottom.
- Main door: primary at 48–52 inches, secondary interior bottom at 6–10 inches.
- Run gates: 54–60 inches for the main latch, plus a lower bolt at 10 inches.
- Latch spacing: for any edge over 20–24 inches, use two latches; over 36 inches, use three.
Material Choices: What Holds Up Outdoors
Exterior-rated, rust-resistant hardware only — stainless steel or hot-dip galvanized for latches, hinges, screws, and washers; thin zinc rusts out within a season in wet or coastal weather. Use exterior deck screws, #8–#12, length 1.5–2.5 inches for latches. On thin doors (3/4 inch), add a 2x scrap or metal plate behind latch screws to prevent tear-out. Add a bead of exterior sealant under hasp plates to keep water out of screw holes.
Standard: exterior-rated, rust-resistant hardware only. Thin zinc rusts out within a season if you’re in wet or coastal weather.
- Finish: stainless steel or hot-dip galvanized for latches, hinges, screws, and washers.
- Screws: exterior deck screws, #8–#12, length 1.5–2.5 inches for latches; machine screws with lock nuts where possible.
- Backing plates: on thin doors (3/4 inch), add a 2x scrap or metal plate behind latch screws to prevent tear-out.
- Weather: add a bead of exterior sealant under hasp plates to keep water out of screw holes.
Common Mistakes That Get Birds Killed
No single-action latches, no staples-only cloth, and no gaps larger than a quarter inch — single barrel bolts on wide doors, plain hasps without pins, and chicken wire on openings are the three mistakes that cost birds their lives. If you have a single barrel bolt on a wide door, add a second latch and interior stop trim. If you have a plain hasp, add a carabiner or lock. If you have chicken wire on openings, replace with 1/2-inch hardware cloth, screwed and washed.
Standard: no single-action latches, no staples-only cloth, and no gaps larger than a quarter inch.
- Single barrel bolt on a wide door—raccoons pry the opposite corner. Fix: add a second latch and interior stop trim.
- Plain hasp without a pin—they flip it. Fix: add carabiner or lock.
- Chicken wire on openings—it’s for keeping chickens in, not predators out. Fix: replace with 1/2-inch hardware cloth, screwed and washed.
- Reach-through latch—mesh too large near the latch. Fix: add an interior latch shield or double-layer cloth to 1/4-inch effective openings around latches.
- Weak wood—latch screws in thin siding. Fix: mount into framing or add a 1.5-inch backing block.
Night Routine and Redundancy
Check once, same order every night — close pop door, slide bolt, clip carabiner, confirm both top and bottom points; check main door hasp closed, lock engaged, bottom interior bolt slid; check run gate gravity latch seated, pin in, lower bolt slid; walk the edges with a flashlight. Redundancy is a system, not a pile of locks. Look for fresh pry marks or lifted trim — any new gap over 1/4 inch gets fixed before dark the next day.
Standard: check once, same order every night. Redundancy is a system, not a pile of locks.
- Close pop door; slide bolt; clip carabiner. Confirm both top and bottom points.
- Check main door: hasp closed, lock engaged, bottom interior bolt slid.
- Run gate: gravity latch seated, pin in, lower bolt slid.
- Walk the edges with a flashlight; look for fresh pry marks or lifted trim. Any new gap over 1/4 inch gets fixed before dark the next day.
If You Use an Automatic Door
An auto door must be a barrier, not a convenience feature that leaves a gap — use guillotine style with 3/4–1 inch deep tracks and a positive stop pin through aligned holes at full-close. Wi-Fi or light-sensor timing can lag at dusk; set a hard close time at civil twilight plus 10 minutes. Add a manual secondary bolt you can slide at night during predator pressure weeks.
Standard: an auto door must be a barrier, not a convenience feature that leaves a gap.
- Guillotine style with 3/4–1 inch deep tracks and a positive stop pin through aligned holes at full-close.
- Wi-Fi or light-sensor timing can lag at dusk; set a hard close time at civil twilight plus 10 minutes.
- Add a manual secondary bolt you can slide at night during predator pressure weeks.
Audit Your Coop: Raccoon-Proofing the Coop Checklist
A systematic walkthrough covers: every exterior opening has two-step latching (latch + pin/carabiner/lock); doors over 24 inches have two or more latches spaced along the edge; all vents/windows covered in 1/2-inch, 19-gauge hardware cloth screwed with washers every 4–6 inches; no gaps larger than 1/4 inch; hinges through-bolted or mounted with #10–#12 exterior screws; pop door has interior stop trim and bottom latch; run gate has locking latch at 54–60 inches plus lower bolt at 10 inches; night routine exists and takes 2–3 minutes.
- Every exterior opening has two-step latching (latch + pin/carabiner/lock).
- Doors over 24 inches have two or more latches spaced along the edge.
- All vents/windows are covered in 1/2-inch, 19-gauge hardware cloth, screwed with washers every 4–6 inches, edges trimmed.
- No gaps larger than 1/4 inch around doors, especially at the latch side.
- Hinges are through-bolted or mounted with #10–#12 exterior screws; three hinges on tall doors.
- Pop door has interior stop trim and a bottom latch or pin.
- Run gate has a locking latch at 54–60 inches plus a lower bolt at 10 inches.
- Night routine exists and takes 2–3 minutes, same order daily.
Frequently Asked Questions
What’s the best latch for raccoon-proofing the coop pop door?
A safety hasp with hidden screws plus a 3–4 inch spring-gate carabiner is reliable, and I add a second latch if the door is wider than 10 inches. If it’s a vertical slider, drill for a 3/8-inch stop pin inside so the door can’t be lifted.
Can raccoons open carabiners on coop latches?
Standard spring-gate carabiners sized 3 inches or larger are a solid secondary lock; use one per latch. Avoid twist-lock or tiny keychain clips—go with a simple spring gate that fully closes through the hasp or bolt hole.
Is chicken wire enough for raccoon-proofing the coop windows?
No. Use 1/2-inch, 19-gauge hardware cloth secured with screws and fender washers every 4–6 inches, and cap the edges with 1-inch trim. Chicken wire deforms and tears under pulling; raccoons exploit that quickly.
How high should I mount latches so raccoons can’t reach them?
Place main latches at 48–60 inches and add secondary bolts low at 6–10 inches to defeat bottom prying. Height alone won’t stop a raccoon, so always include a two-step mechanism (pin or carabiner).
Do I need two latches on an egg collection door for raccoon-proofing the coop?
If the door edge is longer than 20–24 inches, yes—use two latches spaced near the corners. Add a carabiner to each and reduce any latch-side gap to under 1/4 inch with stop molding.
Will an automatic coop door keep raccoons out on its own?
Only if it closes into deep tracks and locks at the bottom. Add a 3/8-inch interior stop pin or a manual slide bolt and set a hard close time at dusk plus 10 minutes to prevent late entry.
Quick Comparison: Latch Types and Raccoon Resistance
| Latch Type | Raccoon Resistance | Installation | Best Use |
| Single barrel bolt | Low — raccoons can slide and pry | Easy, one screw location | Interior use only, never exterior |
| Simple hasp | Low — flip-open in seconds | Easy, hidden screws help | Add carabiner or padlock |
| Safety hasp + carabiner | High — two-step action required | Moderate, align staple | Pop doors, egg doors, run gates |
| Spring-loaded bolt + carabiner | High — spring tension + pin | Moderate, horizontal slide | Small hatches, egg doors |
| Padlockable hasp + padlock | Very high — keyed protection | Moderate, shackle clearance | Main human door, high-value areas |
| Gravity latch + pin | High — pin blocks release | Easy, drill cross-hole | Run gates, tall doors |
Do It Right Once
The standard is two-step latches on every opening, backed by 1/2-inch hardware cloth, solid framing, and no gaps over 1/4 inch. Start tonight by adding a carabiner to every existing latch; this five-dollar step buys you safety until you can upgrade the hardware this weekend. For the full predator-proofing checklist that covers all threat types, the predator-proof checklist walks through every weak point. For the hardware cloth specs and installation details, the hardware cloth guide explains the differences. And for stopping diggers who bypass latches entirely, the predator apron guide shows how to install a perimeter defense.