Fox-Proofing Strategies
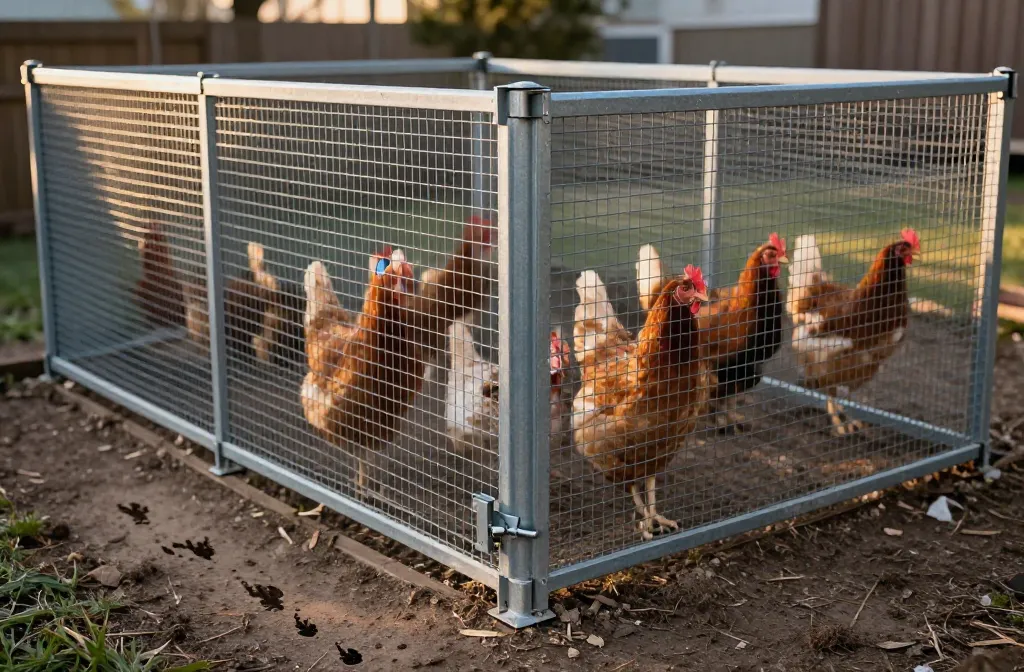
How Fox Losses Actually Happen
The standard is simple: no gap larger than 1/2 inch, no climbable edges, and a dig barrier at least 12 inches deep or 24 inches out. Foxes kill by two patterns: a night raid through a weak latch or gap, or a dawn/dusk snatch-and-run when hens free-range or a run is soft. They test latches with their paws, squeeze through weak fencing, and dig fast in damp soil — a 6–8 inch hole in under 10 minutes. Plan for a fox that returns at the same hour for three nights; they pattern your routine as carefully as you do.
You hear a clean, sudden cry after dusk, then silence — that’s how a fox works. Fox-proofing strategies start with closing the openings a slender, strong predator exploits, then extending your defenses into the ground because foxes dig. I have found fox tracks circling a coop at first snow and once lost a pullet to a hole dug in under an hour after rain. By the end of this guide, you’ll have a clear plan for a run and coop that withstands red and gray fox pressure at night and the quick daytime raid that takes a hen in under thirty seconds.
Perimeter First: The Dig Line That Stops a Fox
The perimeter must deny digging — the standard is 1/2-inch galvanized hardware cloth at 19 gauge or heavier as your ground defense, not chicken wire; you have two durable options: a vertical trench or a horizontal apron. In sand or loam, a vertical trench to 12–18 inches works; in rocky or root-heavy ground, a horizontal apron of 24 inches out from the run base is more reliable.
The perimeter must deny digging. The standard is 1/2-inch galvanized hardware cloth at 19 gauge or heavier as your ground defense, not chicken wire. You have two durable options: a vertical trench or a horizontal apron. In sand or loam, a vertical trench to 12–18 inches works; in rocky or root-heavy ground, a horizontal apron of 24 inches out from the run base is more reliable.
According to Wild Hearth Life, a surface-laid apron of hardware cloth extending 18-24 inches outward from the base (24 inches preferred in areas with foxes, coyotes, or free-roaming dogs) prevents digging predators from tunneling under. The ChickenGuard predator-proofing guide confirms that burying hardware cloth at least 12 inches underground in an L-shape stops sly diggers like foxes and raccoons from tunneling underneath, and that predator aprons are simple but incredibly effective at preventing animals from digging in.
Vertical Trench Method
Excavate a 3–4 inch wide slot to 12–18 inches deep around the run. Drop a continuous strip of hardware cloth so 4–6 inches rise above grade to tie into the wall; fasten with 1-inch exterior screws and fender washers every 6 inches. Backfill and tamp hard — wet it once to settle.
Horizontal Apron Method
Lay hardware cloth flat around the outside of the run, 24 inches wide, snug to the base. Pin with 8-inch landscape staples every 12 inches and every seam. Overlap seams by 6 inches and wire them. Cover with 2–3 inches of soil, stone, or compacted gravel. A fox begins at the fence line and meets metal, not dirt — they quit after a few tries.
Run Walls: Material, Height, and Fastening That Don’t Fail
The standard for fox-proof walls is 1/2-inch hardware cloth, 19 gauge or heavier, from ground to roof; chicken wire is for keeping hens in, not predators out; a fox climbs a textured wall up to about 5 feet, and they also leap cleanly, so build run walls to 6 feet and either roof them or add an overhang.
The standard for fox-proof walls is 1/2-inch hardware cloth, 19 gauge or heavier, from ground to roof. Chicken wire is for keeping hens in, not predators out. A fox climbs a textured wall up to about 5 feet; they also leap cleanly. Build run walls to 6 feet and either roof them or add an overhang.
Solid Roof or Secure Overhang
A rigid roof — corrugated metal or polycarbonate — blocks climb-ins and keeps the run dry, which helps footing and hygiene. If you don’t roof, add a 12–18 inch inward overhang of hardware cloth at the top. Fasten roof panels to purlins every 12–16 inches with gasketed screws; tie hardware cloth to framing every 6 inches with screws and washers.
Doors, Latches, and Openings Foxes Exploit
Assume a fox will test every moving part — the standard is two-step latching on all exterior doors and 1/2-inch gap tolerance or tighter along all edges; main run and coop doors use a hasp + carabiner or padlock or a spring-loaded barrel bolt + carabiner; pop doors are vertical guillotine-style in 3/4-inch plywood or metal tracks with no side gaps beyond 1/4 inch; windows and vents are screened with hardware cloth, not insect screen, backed every 4–6 inches.
Assume a fox will test every moving part. The standard is two-step latching on all exterior doors and 1/2-inch gap tolerance or tighter along all edges.
- Main run and coop doors: use a hasp + carabiner or padlock or a spring-loaded barrel bolt + carabiner. Mount hasps with through-bolts or exterior screws at least 1.5 inches long.
- Pop door: a vertical guillotine-style door in 3/4-inch plywood or metal tracks, no side gaps beyond 1/4 inch. If automatic, choose a unit that closes on a light level below 10 lux or a timed close by 30 minutes after sunset.
- Windows and vents: screen with hardware cloth, not insect screen. Back every vent with hardware cloth fastened every 4–6 inches.
Fox-Proofing Strategies for the Coop Envelope
The coop itself must be a box the fox can’t pry into — the standard is solid sheathing (plywood or boards without knots through) plus exterior cladding, with hardware cloth over every opening; keep gaps at framing joints under 1/4 inch or cover them with 1-inch galvanized angle flashing screwed every 8 inches. Flooring: if your coop is on skids or posts, block the underside with hardware cloth stapled and then screwed/washers to the joists. If you’re on a dirt floor, add a buried layer of hardware cloth over the footprint, overlapping seams by 6 inches and tying with wire.
The coop itself must be a box the fox can’t pry into. The standard is solid sheathing (plywood or boards without knots through) plus exterior cladding, with hardware cloth over every opening. Keep gaps at framing joints under 1/4 inch or cover them with 1-inch galvanized angle flashing screwed every 8 inches.
Flooring: if your coop is on skids or posts, block the underside with hardware cloth stapled and then screwed/washers to the joists. If you’re on a dirt floor, add a buried layer of hardware cloth over the footprint, overlapping seams by 6 inches and tying with wire.
Daytime Versus Night: Adjust Your Routine
Foxes take hens 9–11 a.m. and again near dusk, especially when feeding kits in spring — the standard is supervised free-range and a secure run for unsupervised time; if you free-range, do it when you are outside, keep sessions under 60 minutes, and rotate areas so cover stays short; close the pop door by 30 minutes after sunset year-round and adjust monthly.
Foxes take hens 9–11 a.m. and again near dusk, especially when feeding kits in spring. The standard is supervised free-range and a secure run for unsupervised time. If you free-range, do it when you are outside, keep sessions under 60 minutes, and rotate areas so cover stays short — grass under 6 inches removes ambush points.
Close the pop door by 30 minutes after sunset year-round; adjust monthly. In winter, push close earlier; in summer, be precise because foxes work the long twilight. Set a weekly phone reminder to shift your auto-door timing by 10 minutes as daylight changes.
Landscape and Sightlines: Deny Cover, Add Deterrence
The land around your coop is part of your fox-proofing strategy — keep a 4–6 foot vegetation-free buffer around the run trimmed to 3 inches or covered with gravel; remove stacked lumber, brush piles, and low decking within 50 feet; motion lights set to 30–60 second bursts help you notice activity but won’t stop a hungry adult; if you run electric, a perimeter of two hot wires at 6 inches and 12 inches off the ground on insulated posts is effective.
The land around your coop is part of your fox-proofing strategy. Keep a 4–6 foot vegetation-free buffer around the run — trimmed to 3 inches or covered with gravel. Remove stacked lumber, brush piles, and low decking within 50 feet — common fox daytime rests. Motion lights set to 30–60 second bursts help you, not the fox; they don’t scare a hungry adult, but they alert you to check cameras or step outside.
Deterrents are layers, not solutions. If you run electric, a perimeter of two hot wires at 6 inches and 12 inches off the ground on insulated posts is effective. Keep vegetation off the wires weekly; grass touching the wire bleeds voltage to zero quickly after rain.
Hardware That Lasts Outside
Use materials that survive a year outdoors without babying — the standard is galvanized or stainless fasteners and exterior-rated wood finished with paint or penetrating sealant; for hardware cloth, choose G90 galvanized or better; fasten with 1-inch galvanized staples only as a hold, then secure perimeter with screws and 1-inch fender washers every 6 inches; replace any rusting piece by the first sign of orange.
Use materials that survive a year outdoors without babying. The standard is galvanized or stainless fasteners and exterior-rated wood finished with paint or penetrating sealant. For hardware cloth, choose G90 galvanized or better. Fasten with 1-inch galvanized staples only as a hold, then secure perimeter with screws and 1-inch fender washers every 6 inches. Replace any rusting piece by the first sign of orange — corrosion is a future hole.
Seasonal Pressures: Spring Kits and Soft Ground
Pressure is highest from late April through June when foxes feed kits — double-check latches and dig lines weekly then; after heavy rain or a thaw, walk the perimeter and stomp to check for subsidence over the apron and any fresh digging; re-pin with landscape staples and add fill the same day.
Pressure is highest from late April through June when foxes feed kits. Double-check latches and dig lines weekly then. After heavy rain or a thaw, walk the perimeter and stomp to check for subsidence over the apron and any fresh digging. Re-pin with landscape staples and add fill the same day; a fox returns to yesterday’s half-finished hole.
Common Weak Points and the Fix
Chicken wire walls need replacement to at least 24 inches up with hardware cloth within a weekend; gaps at door edges greater than 1/2 inch need aluminum angle or a secondary stop aiming for 1/4 inch; pop doors without a lower stop need a 3/4 inch thick sill; unprotected soffit vents need backing with hardware cloth every 4 inches; soft soil corners need a 24-inch apron triangle; open compost or feed needs storage in metal cans with tight lids.
- Chicken wire walls: Replace to at least 24 inches up with hardware cloth within a weekend; leave chicken wire above only if you add a rigid roof.
- Gaps at door edges >1/2 inch: Add aluminum angle or a secondary stop; aim for 1/4 inch.
- Pop door without a lower stop: Add a sill so the door seats against wood, not air; 3/4 inch thick stop is enough.
- Unprotected soffit vents: Back with hardware cloth, screws/washers every 4 inches.
- Soft soil corners: Add a 24-inch apron triangle out from each corner; corners are where foxes start.
- Open compost or feed: Store feed in metal cans with tight lids; compost in a bin with 1/2-inch mesh sides. Smell trains behavior.
My Firm Take
You can improvise a roof for shade; you cannot substitute anything for 1/2-inch hardware cloth on the lower three feet of your run.
You can improvise a roof for shade; you cannot substitute anything for 1/2-inch hardware cloth on the lower three feet of your run.
Emergency Hardening This Weekend
If you had a near-miss or a loss, triage in this order: close the pop door 30 minutes before sunset today, add a 24-inch hardware cloth apron tomorrow, then convert the lower 36 inches of your run walls to hardware cloth by next weekend; swap every single latch to a two-step type in the same pass.
If you had a near-miss or a loss, triage in this order: close the pop door 30 minutes before sunset today, add a 24-inch hardware cloth apron tomorrow, then convert the lower 36 inches of your run walls to hardware cloth by next weekend. Swap every single latch to a two-step type in the same pass.
Night Routine That Catches Mistakes
Do the same 3-minute check every evening: count hens, latch the pop door, verify every two-step latch, and flashlight the ground for fresh soil within 18 inches of the fence; put your flashlight beam along the base where raised dirt casts a shadow you see fast; set an alarm for sunset minus 20 minutes so this becomes muscle memory.
Do the same 3-minute check every evening: count hens, latch the pop door, verify every two-step latch, and flashlight the ground for fresh soil within 18 inches of the fence. Put your flashlight beam along the base — raised dirt casts a shadow you see fast. Set an alarm for sunset minus 20 minutes so this becomes muscle memory.
Frequently Asked Questions
What fencing is best for fox-proofing strategies around a chicken run?
Use 1/2-inch hardware cloth, 19 gauge or heavier, from ground to roof or at least the lower 36 inches. Add a 24-inch hardware cloth apron or a 12–18 inch deep trench to stop digging. Chicken wire alone is not predator-proof.
How deep should I bury mesh to fox-proof my coop and run?
Bury hardware cloth to 12–18 inches in a vertical trench, or lay a 24-inch horizontal apron out from the base. Overlap seams by 6 inches and secure every 12 inches with wire and staples plus screws/washers at the frame.
Do motion lights or alarms stop foxes?
They help you notice activity but won’t stop a determined adult, especially in spring. Pair lights with real barriers: two hot wires at 6 and 12 inches and a hardware cloth apron of 24 inches. Check lights monthly and keep brush cut back 4–6 feet.
Can foxes climb into an open-top run?
Yes. Build walls to 6 feet and add a rigid roof or a 12–18 inch inward hardware cloth overhang. Fasten all edges every 6 inches so there’s nothing to pry.
When are foxes most active around backyard flocks?
Dawn and dusk year-round, with heavier pressure in April–June while feeding kits. Close the pop door by 30 minutes after sunset and supervise any free-range, ideally in windows under 60 minutes.
Is electrified netting enough for fox-proofing strategies if I rotate pasture?
It helps if it’s at full voltage and the bottom strand sits within 2 inches of the ground, but foxes can jump low nets or push under when grass drains voltage. For stationary coops, prefer a fixed run with hardware cloth walls and a 24-inch apron; use netting as a monitored daytime perimeter only.
Quick Comparison: Fox-Proofing Defense Layers
| Defense Layer | Specification | Installation | Effectiveness |
| Dig barrier (apron) | 24 inches wide, 1/2-inch 19-gauge hardware cloth | Lay flat, pin every 12 inches, cover with 2–3 inches soil | Very high — stops all digging predators |
| Dig barrier (trench) | 12–18 inches deep, hardware cloth vertical with outward L | Excavate, insert cloth, backfill and tamp | High — effective in sand/loam, labor-intensive |
| Run walls | 1/2-inch hardware cloth, 19-gauge, ground to roof | Fasten every 6 inches with screws and washers | Very high — blocks climbing and reaching |
| Roof or overhang | Solid panels or 12–18 inch inward hardware cloth | Attach to purlins every 12–16 inches | Very high — prevents climb-ins and aerial attacks |
| Two-step latches | Hasp + carabiner or spring bolt + carabiner | Mount with through-bolts, 1.5-inch screws minimum | Very high — raccoons and foxes cannot work two-step actions |
| Vegetation buffer | 4–6 feet clear, trimmed to 3 inches or gravel | Mow weekly, remove brush piles within 50 feet | Moderate — removes ambush points and resting areas |
Do It Right Once
The standard is a sealed coop, hardware cloth walls and a dig barrier of 12–18 inches down or 24 inches out, and two-step latches on every door. Start tonight by walking your perimeter with a flashlight and marking every gap over 1/2 inch with painter’s tape — that’s your Saturday list. For the full predator-proofing checklist that covers all threat types, the predator-proof checklist walks through every weak point. For the hardware cloth specs and installation details, the hardware cloth guide explains the differences. And for the detailed apron installation that stops diggers, the predator apron guide shows exactly how to build it.